Concept & Motivation
This was a self-directed project made specifically for practice/content for my youtube channel . There was a lightweight brief and no market goal, I just wanted to design and build something from scratch. As I said in the video I filmed about this project , “I could buy a $15 GoPro case on Amazon, but instead I’m going to spend three weeks designing, prototyping, and making one just for me.”
This was a self-directed project made specifically for practice/content for my youtube channel . There was a lightweight brief and no market goal, I just wanted to design and build something from scratch. As I said in the video I filmed about this project , “I could buy a $15 GoPro case on Amazon, but instead I’m going to spend three weeks designing, prototyping, and making one just for me.”
The goal was to push myself through every step of the soft goods development process, sketching, patternmaking, prototyping, and creating a production ready tech pack. Working fast taught me how much value there is in being intentional about decisions, problem solving and slowing down early to understand the why behind form and construction.


Moodboard+Sketching
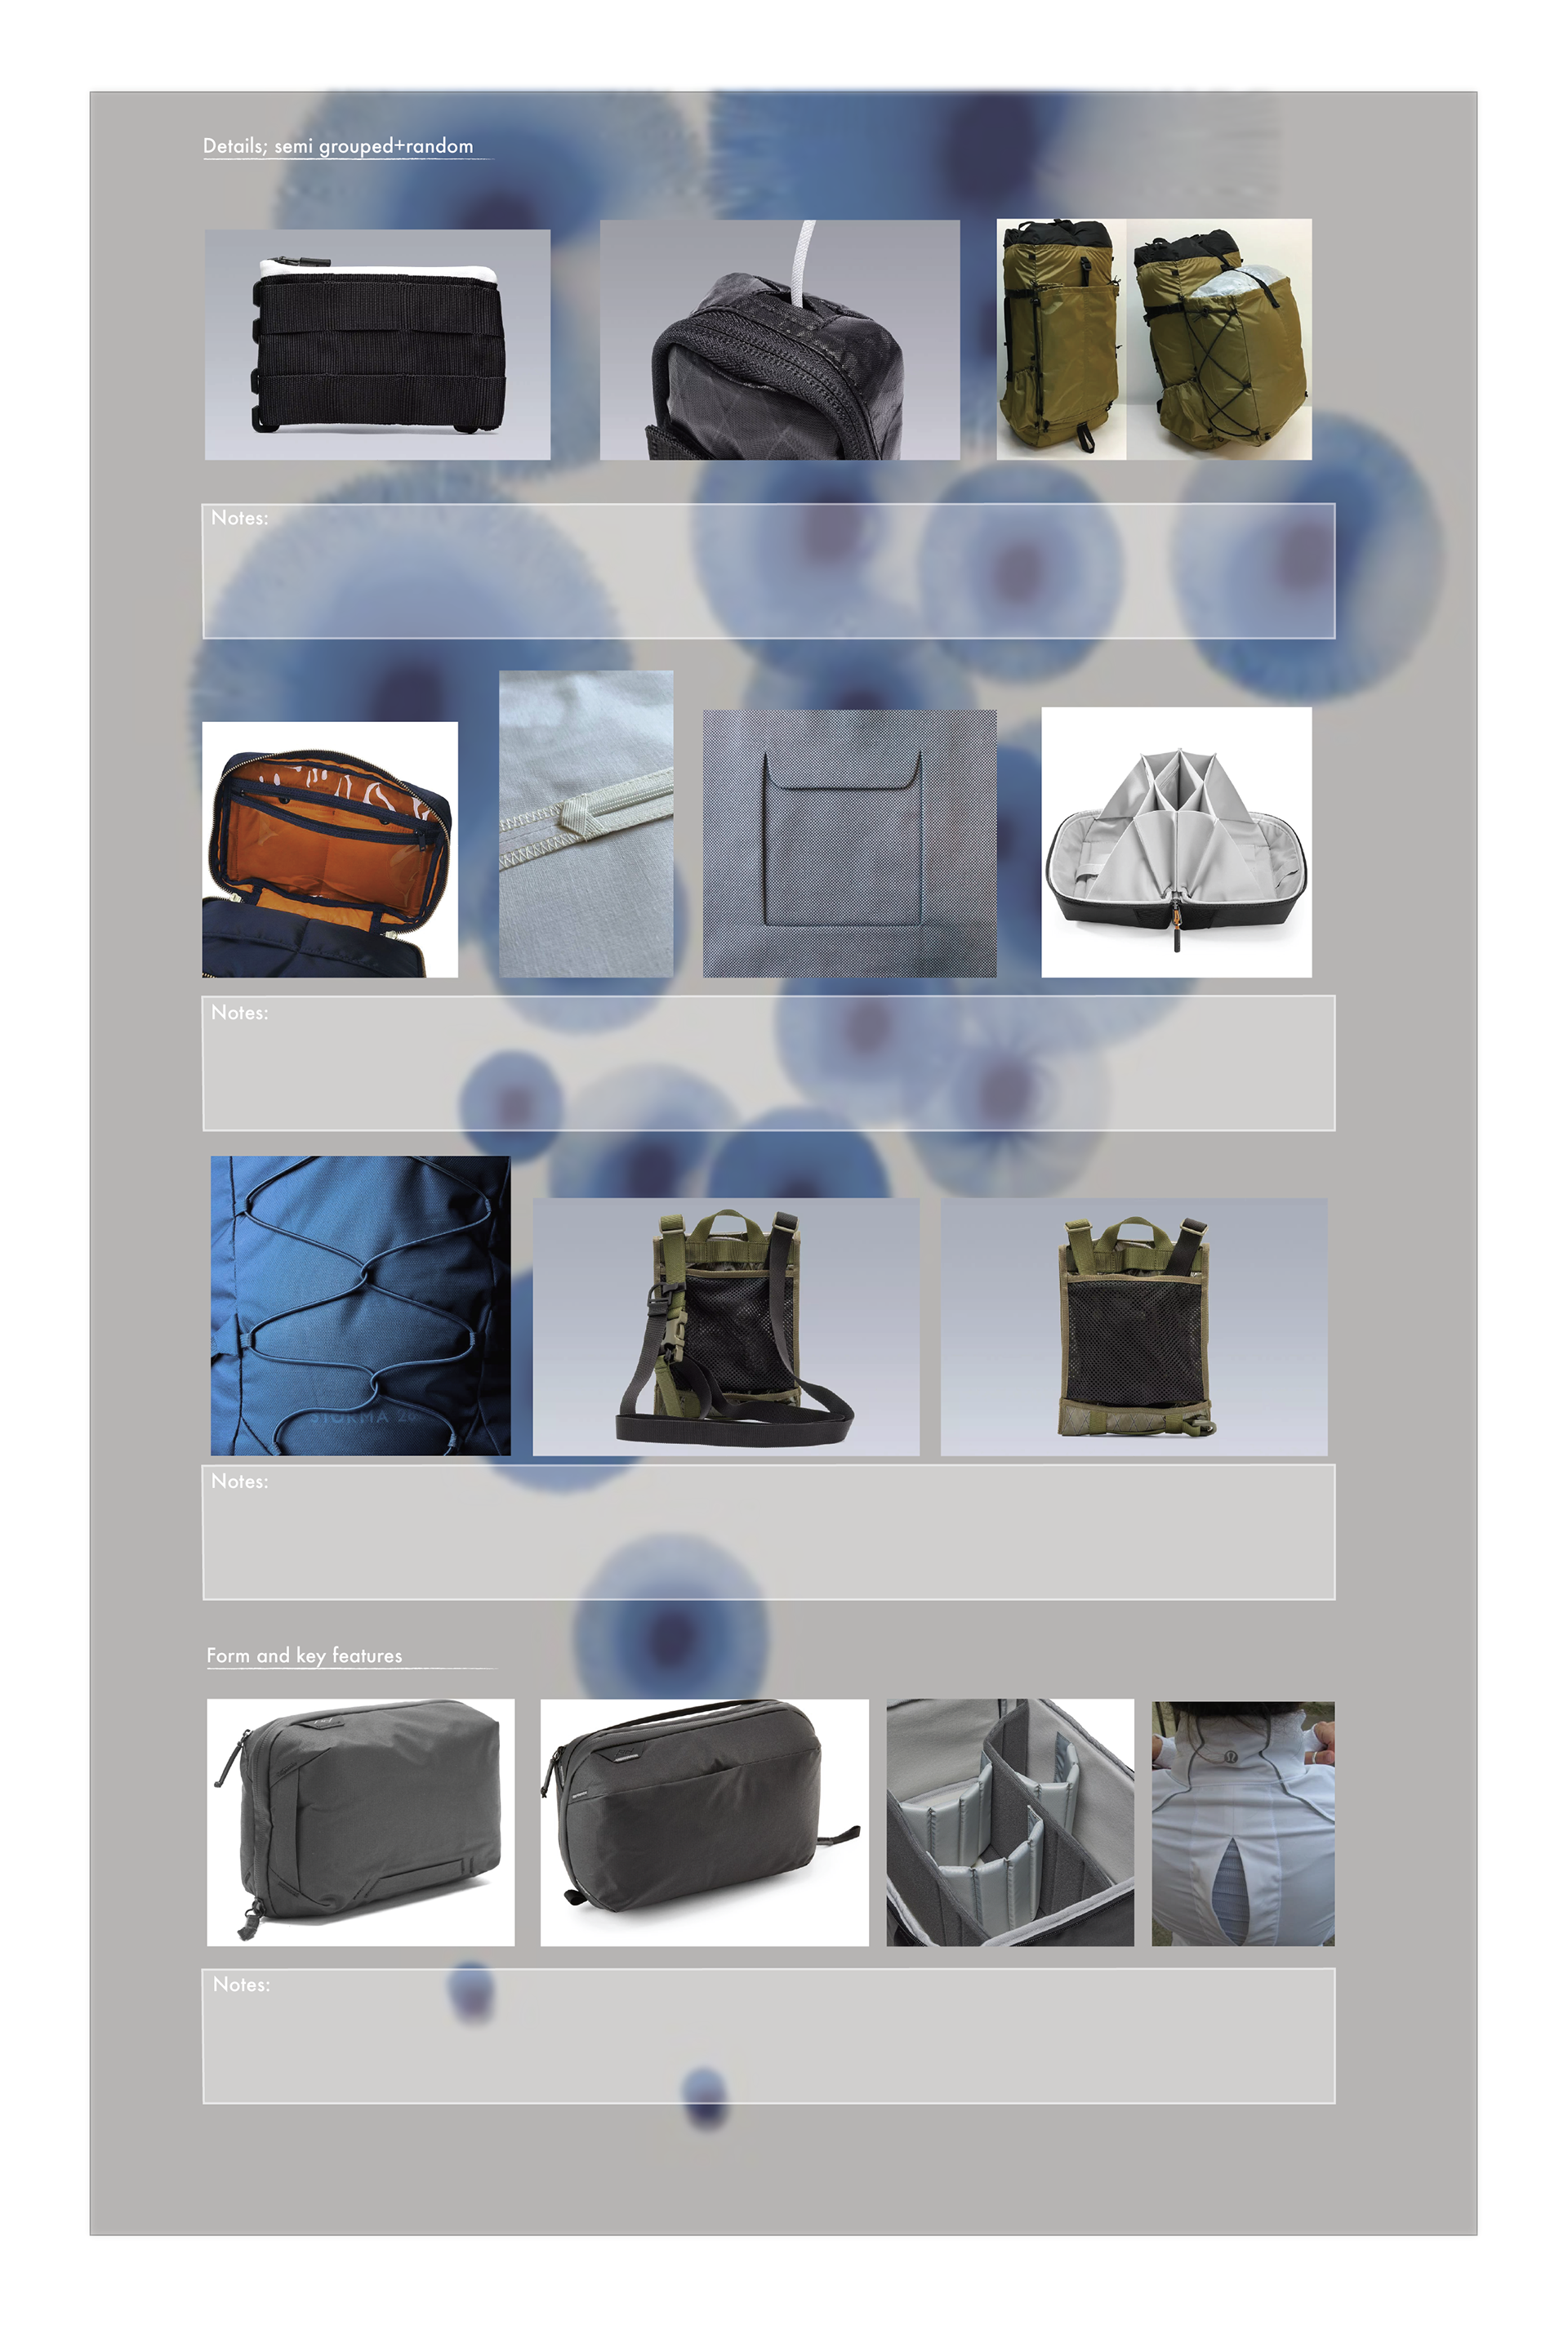
I gathered images of forms, details, features, colors, and materials to guide direction and tone. A quote from Errolson Hugh of ACRONYM stuck with me during this phase: “Don’t look at Tumblr, look through it. The image you’ve got, what was the person thinking about when they made the garment that’s in it?”
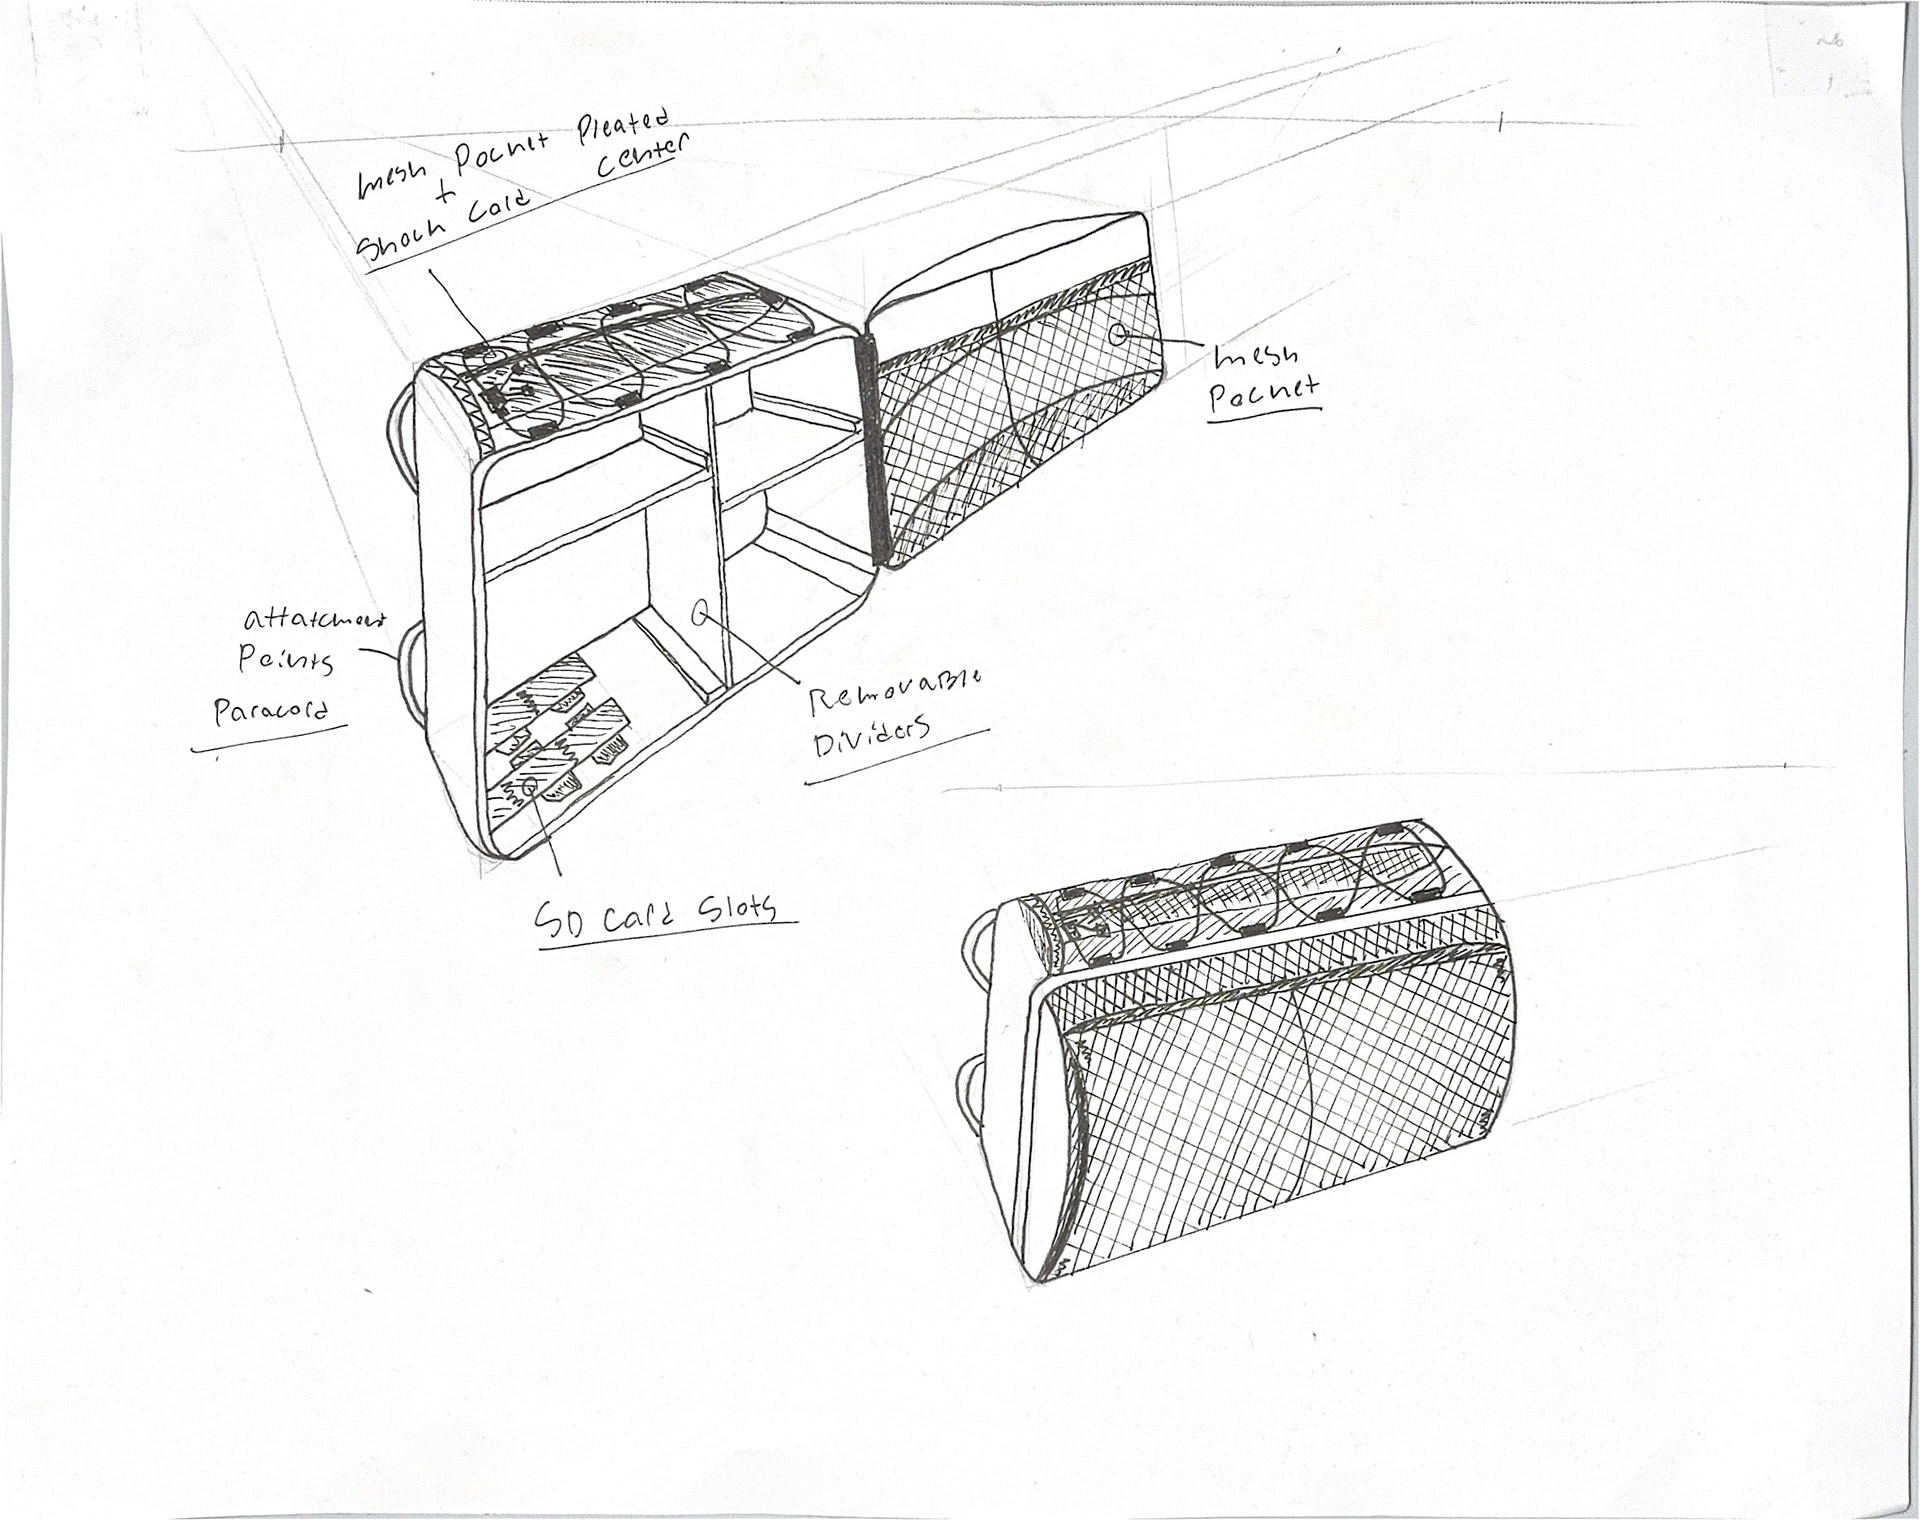
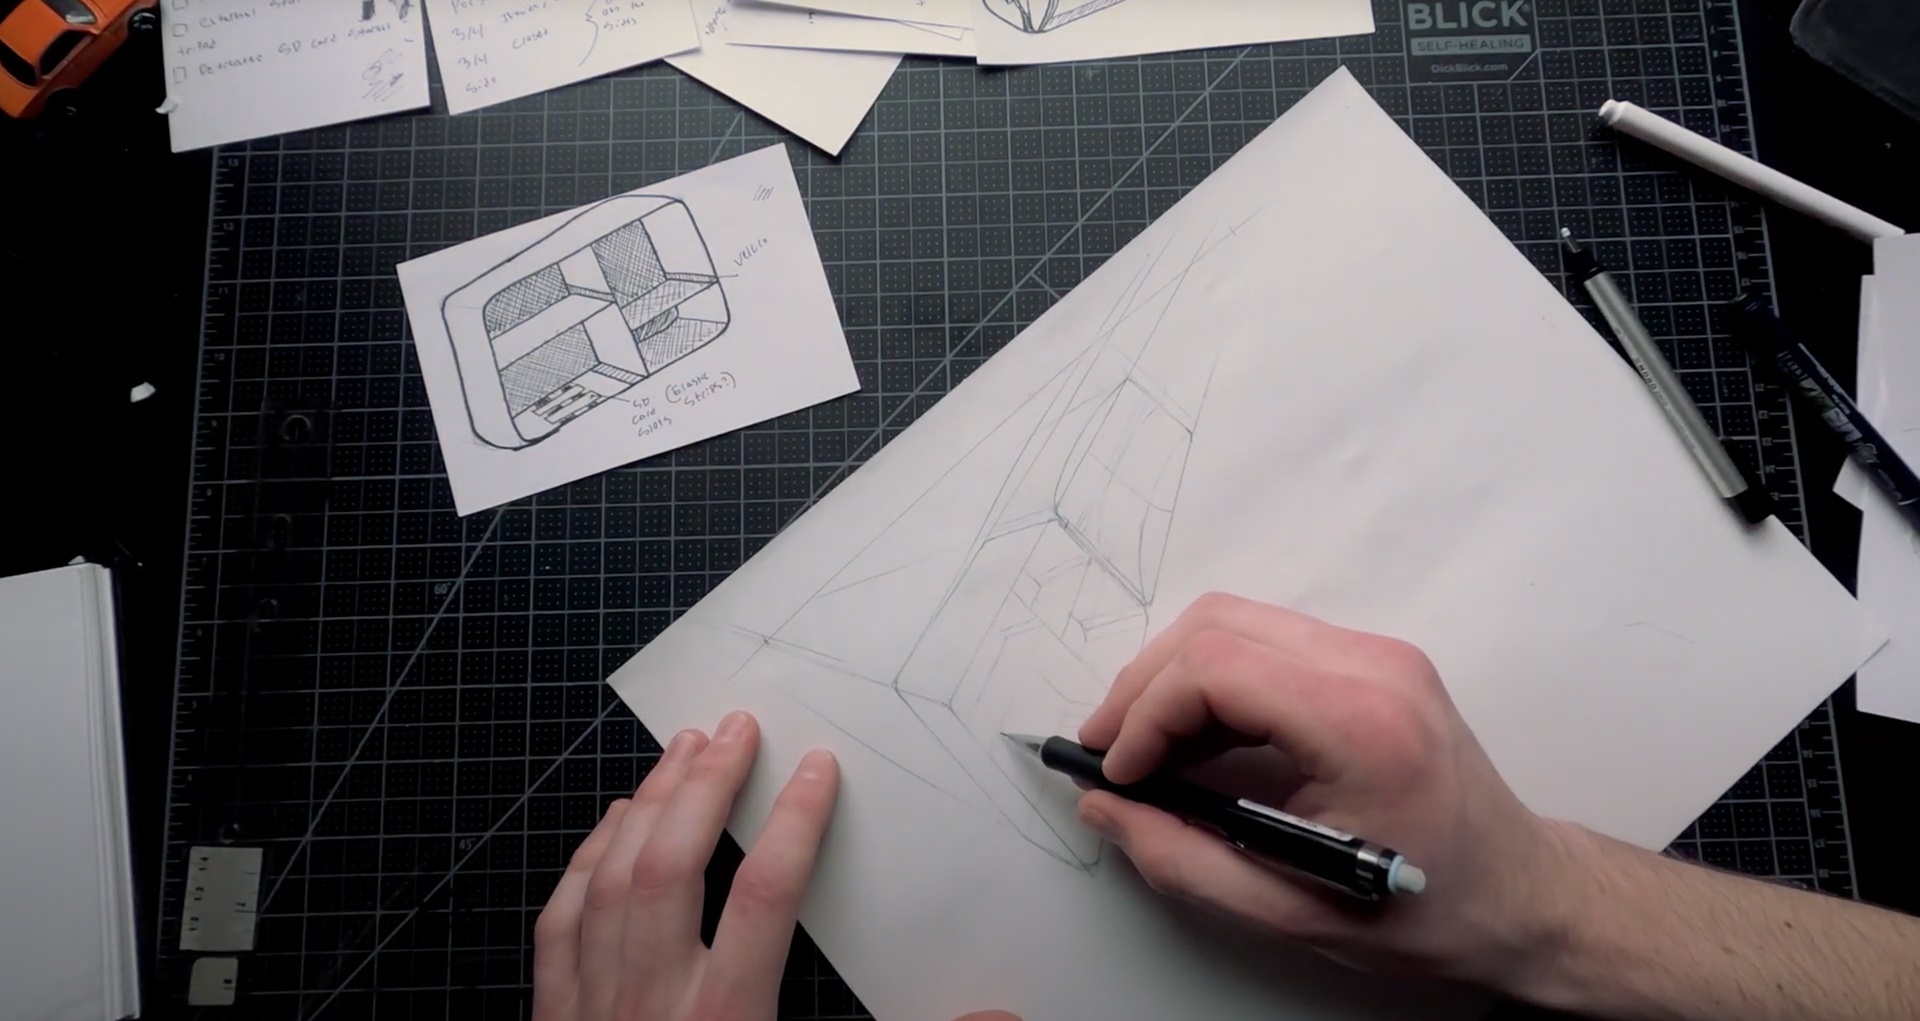
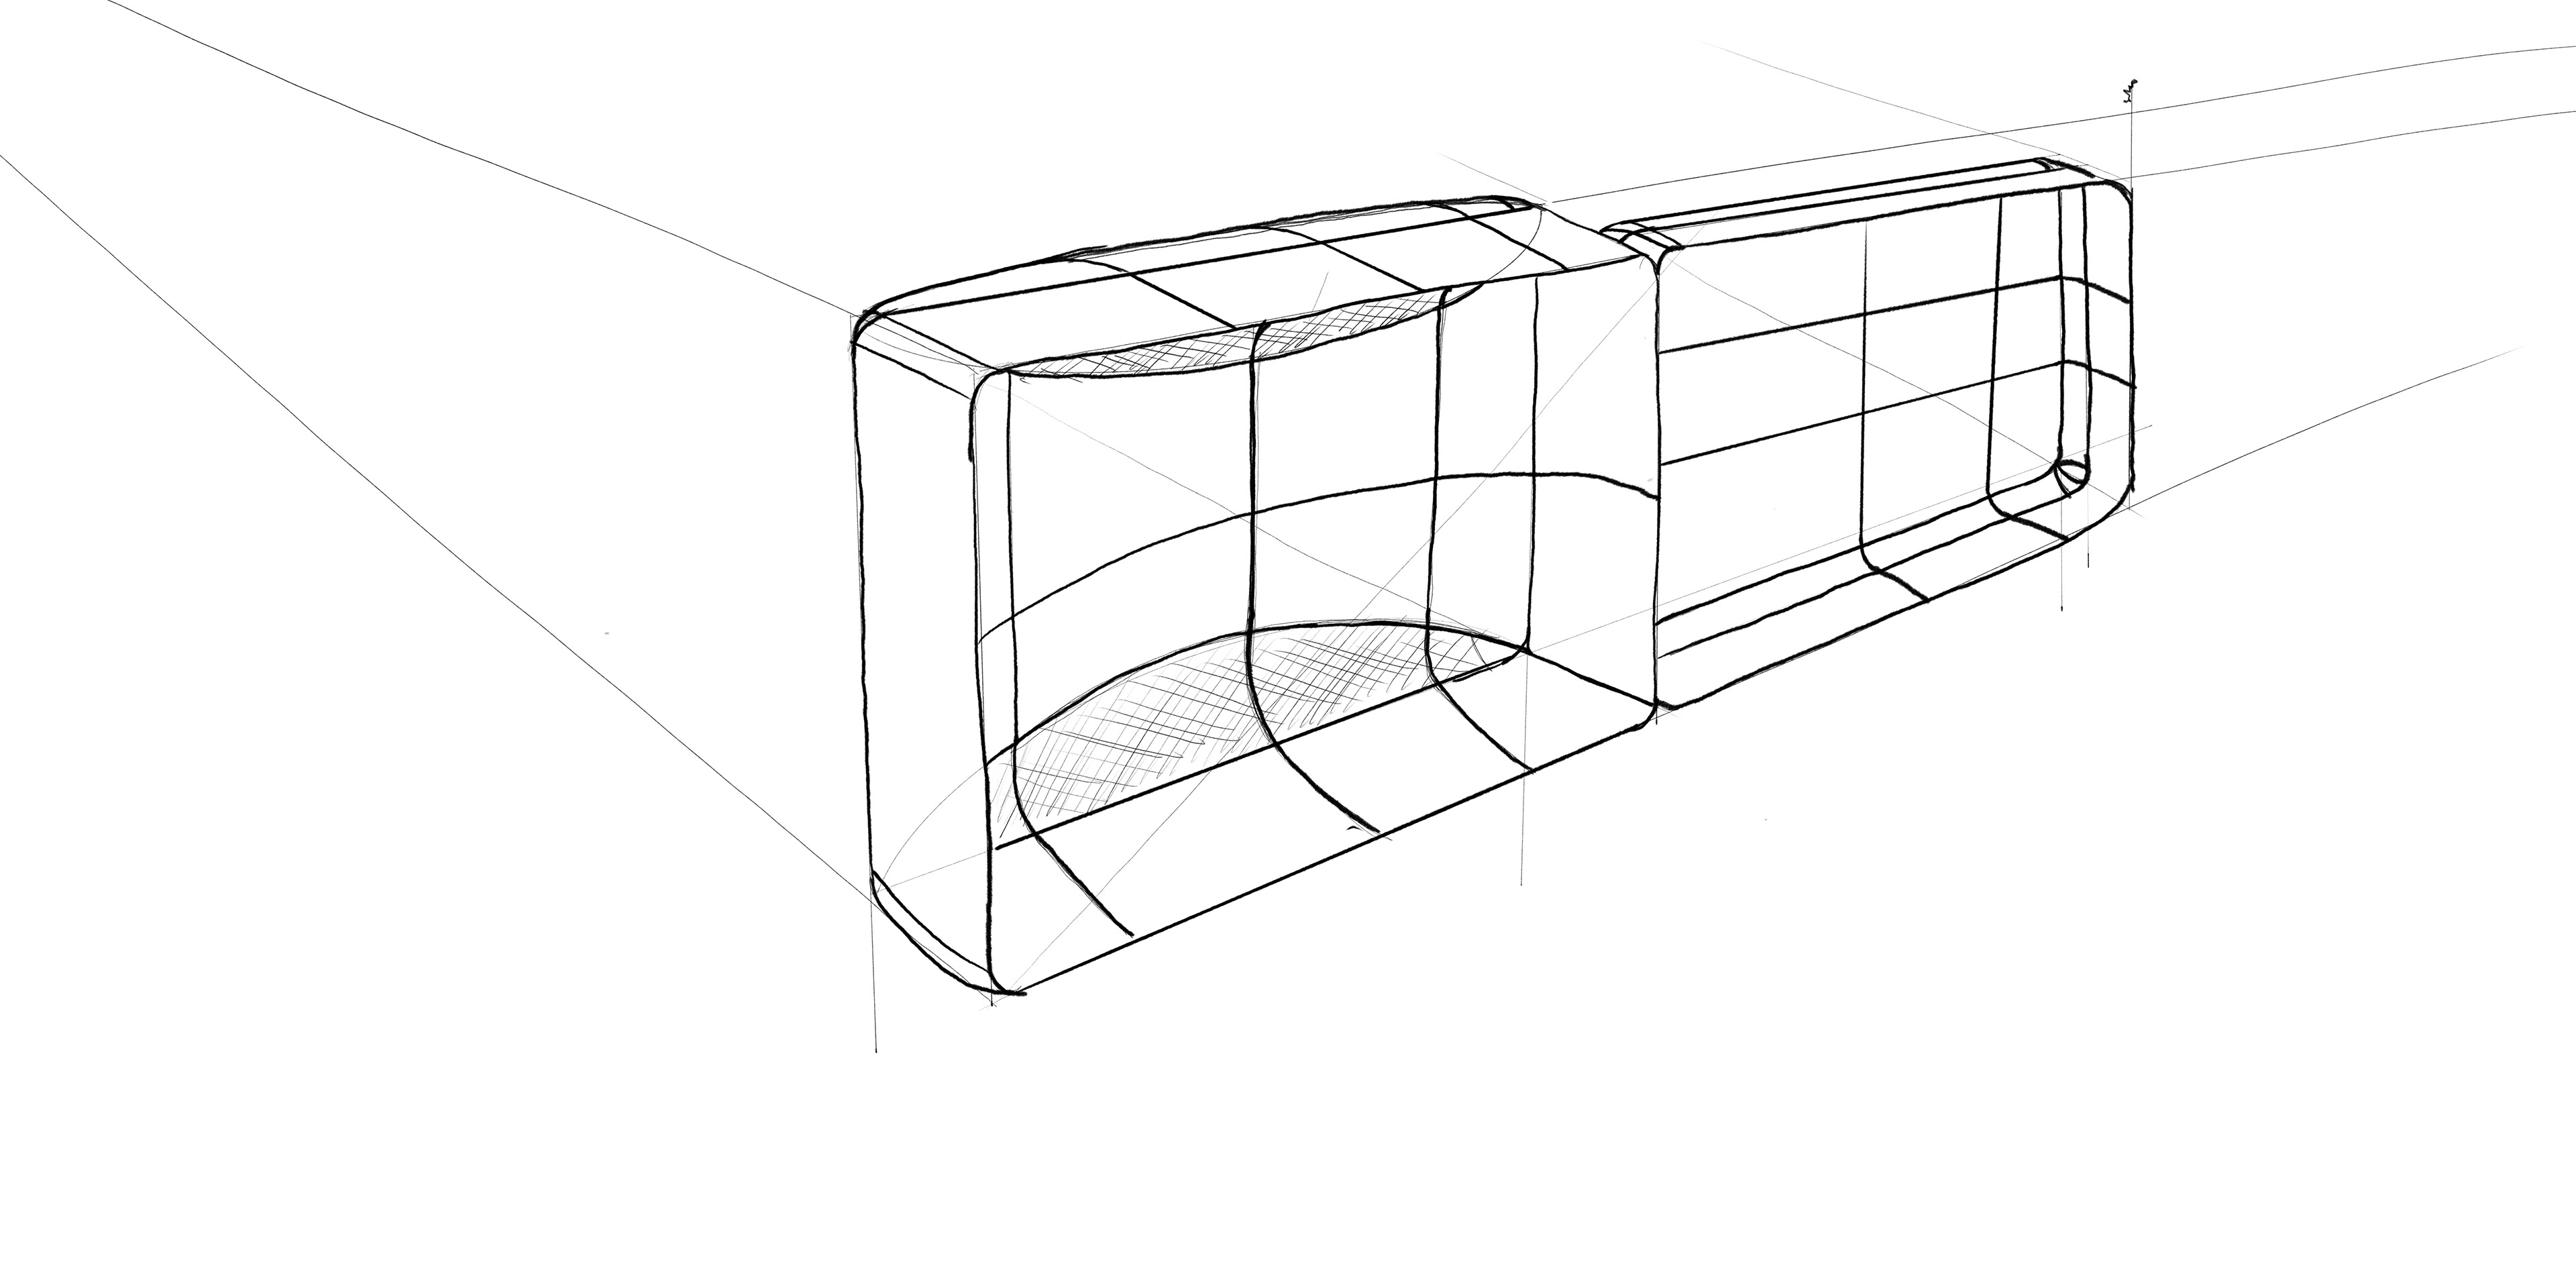
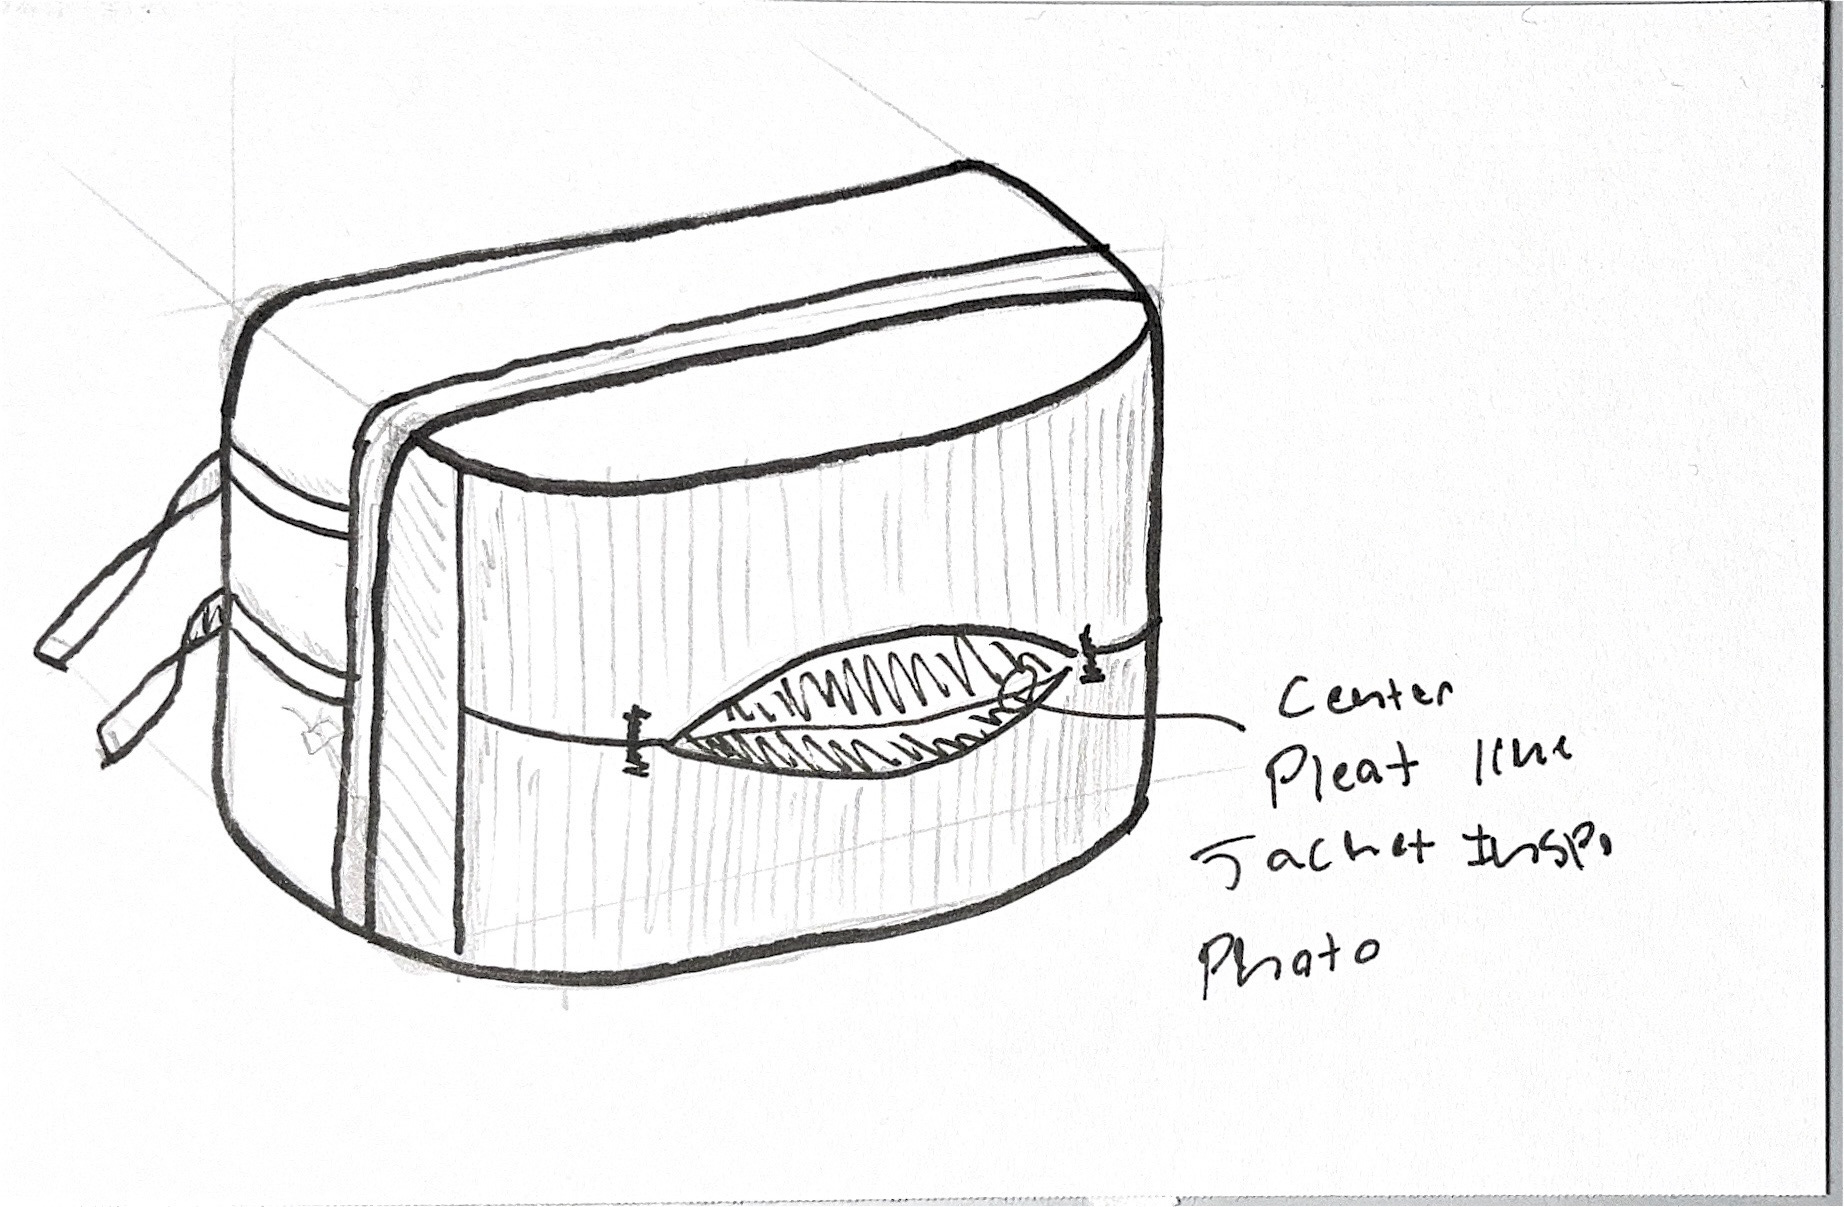
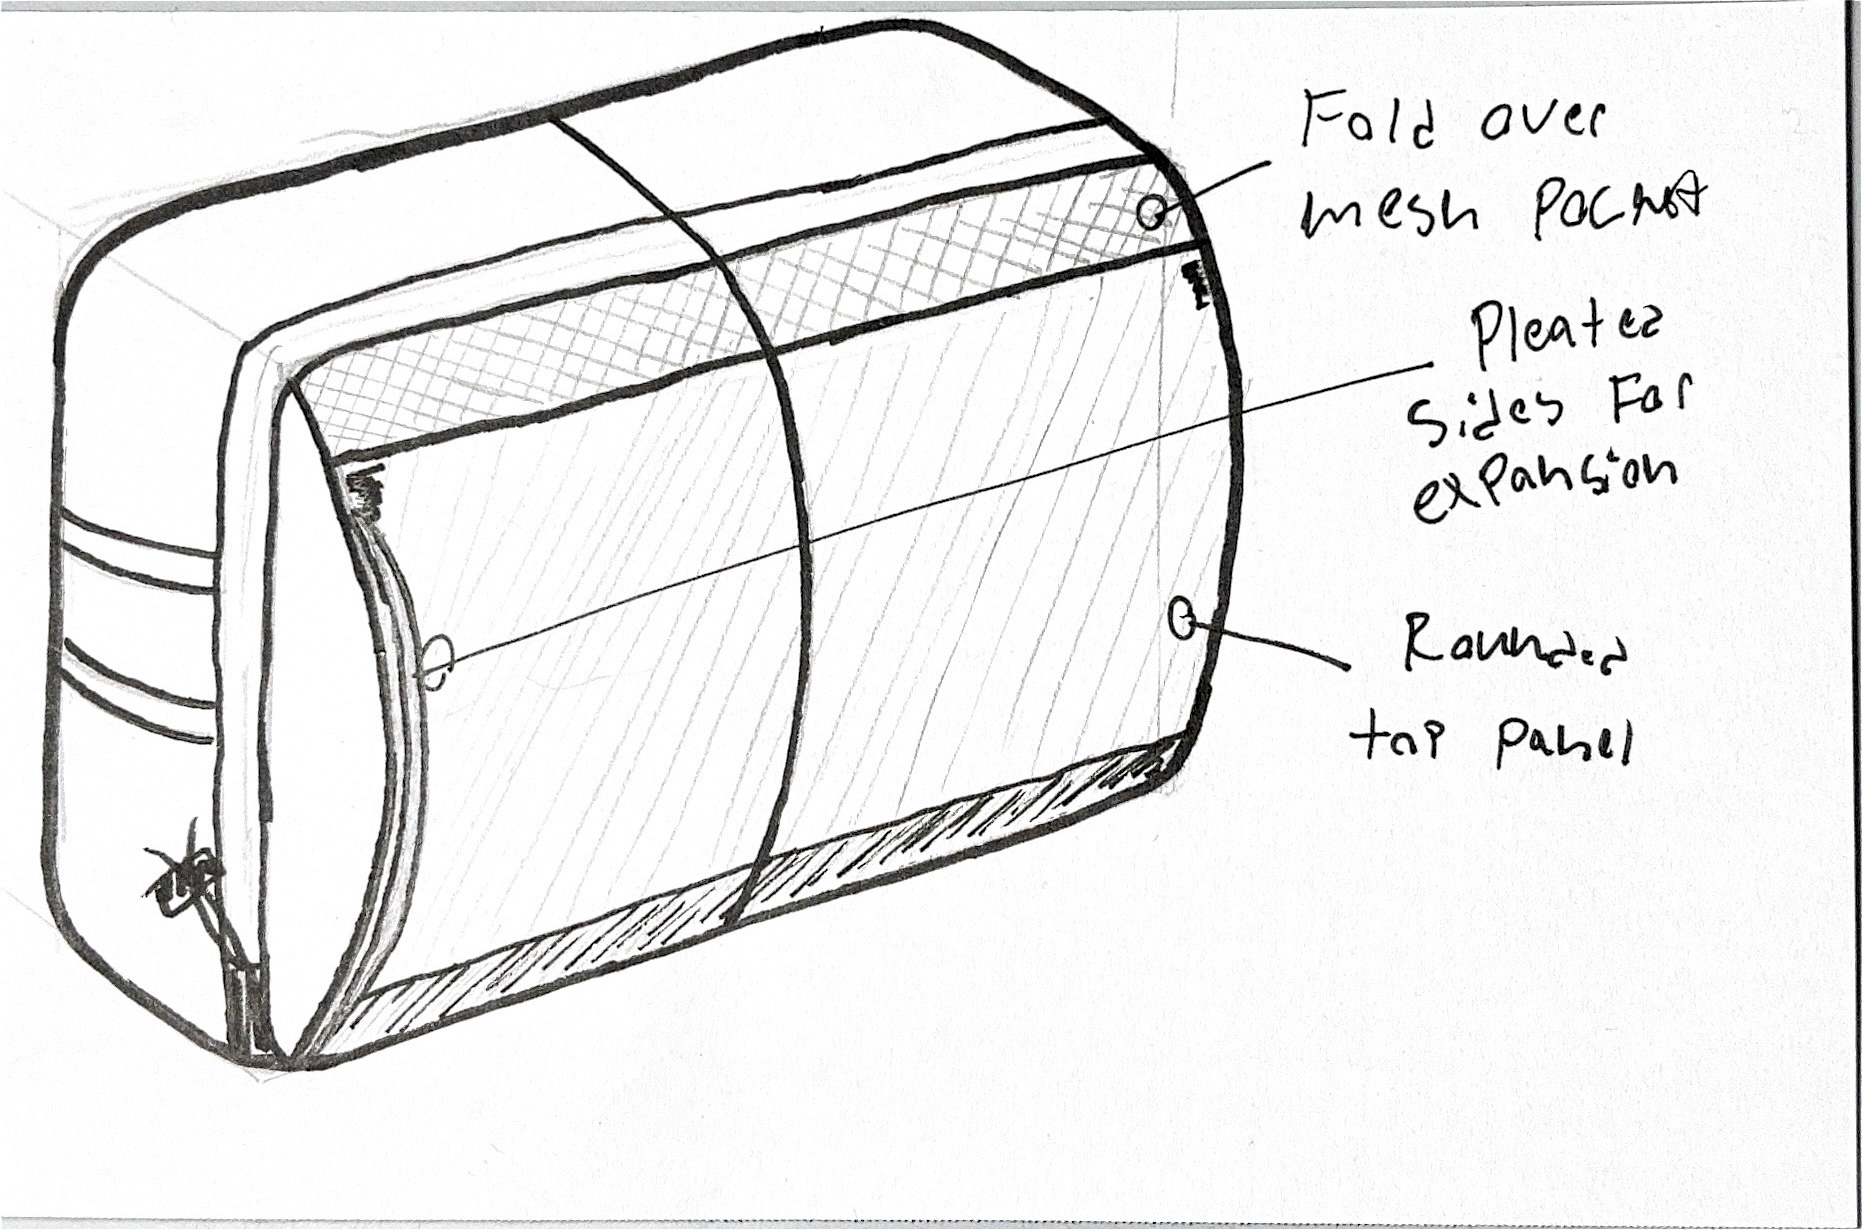
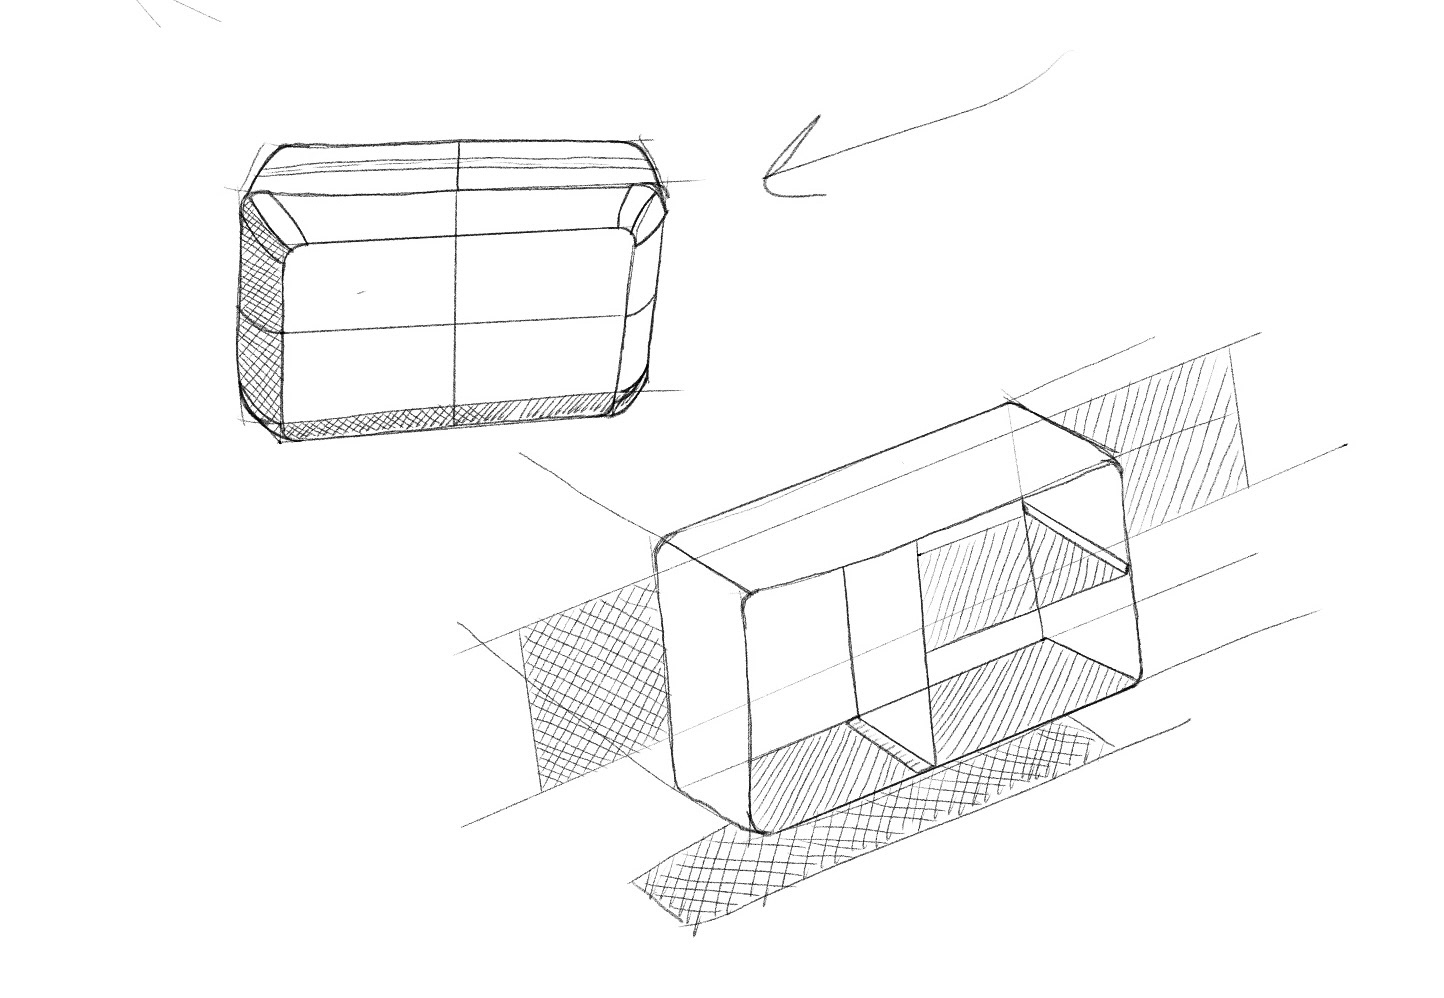
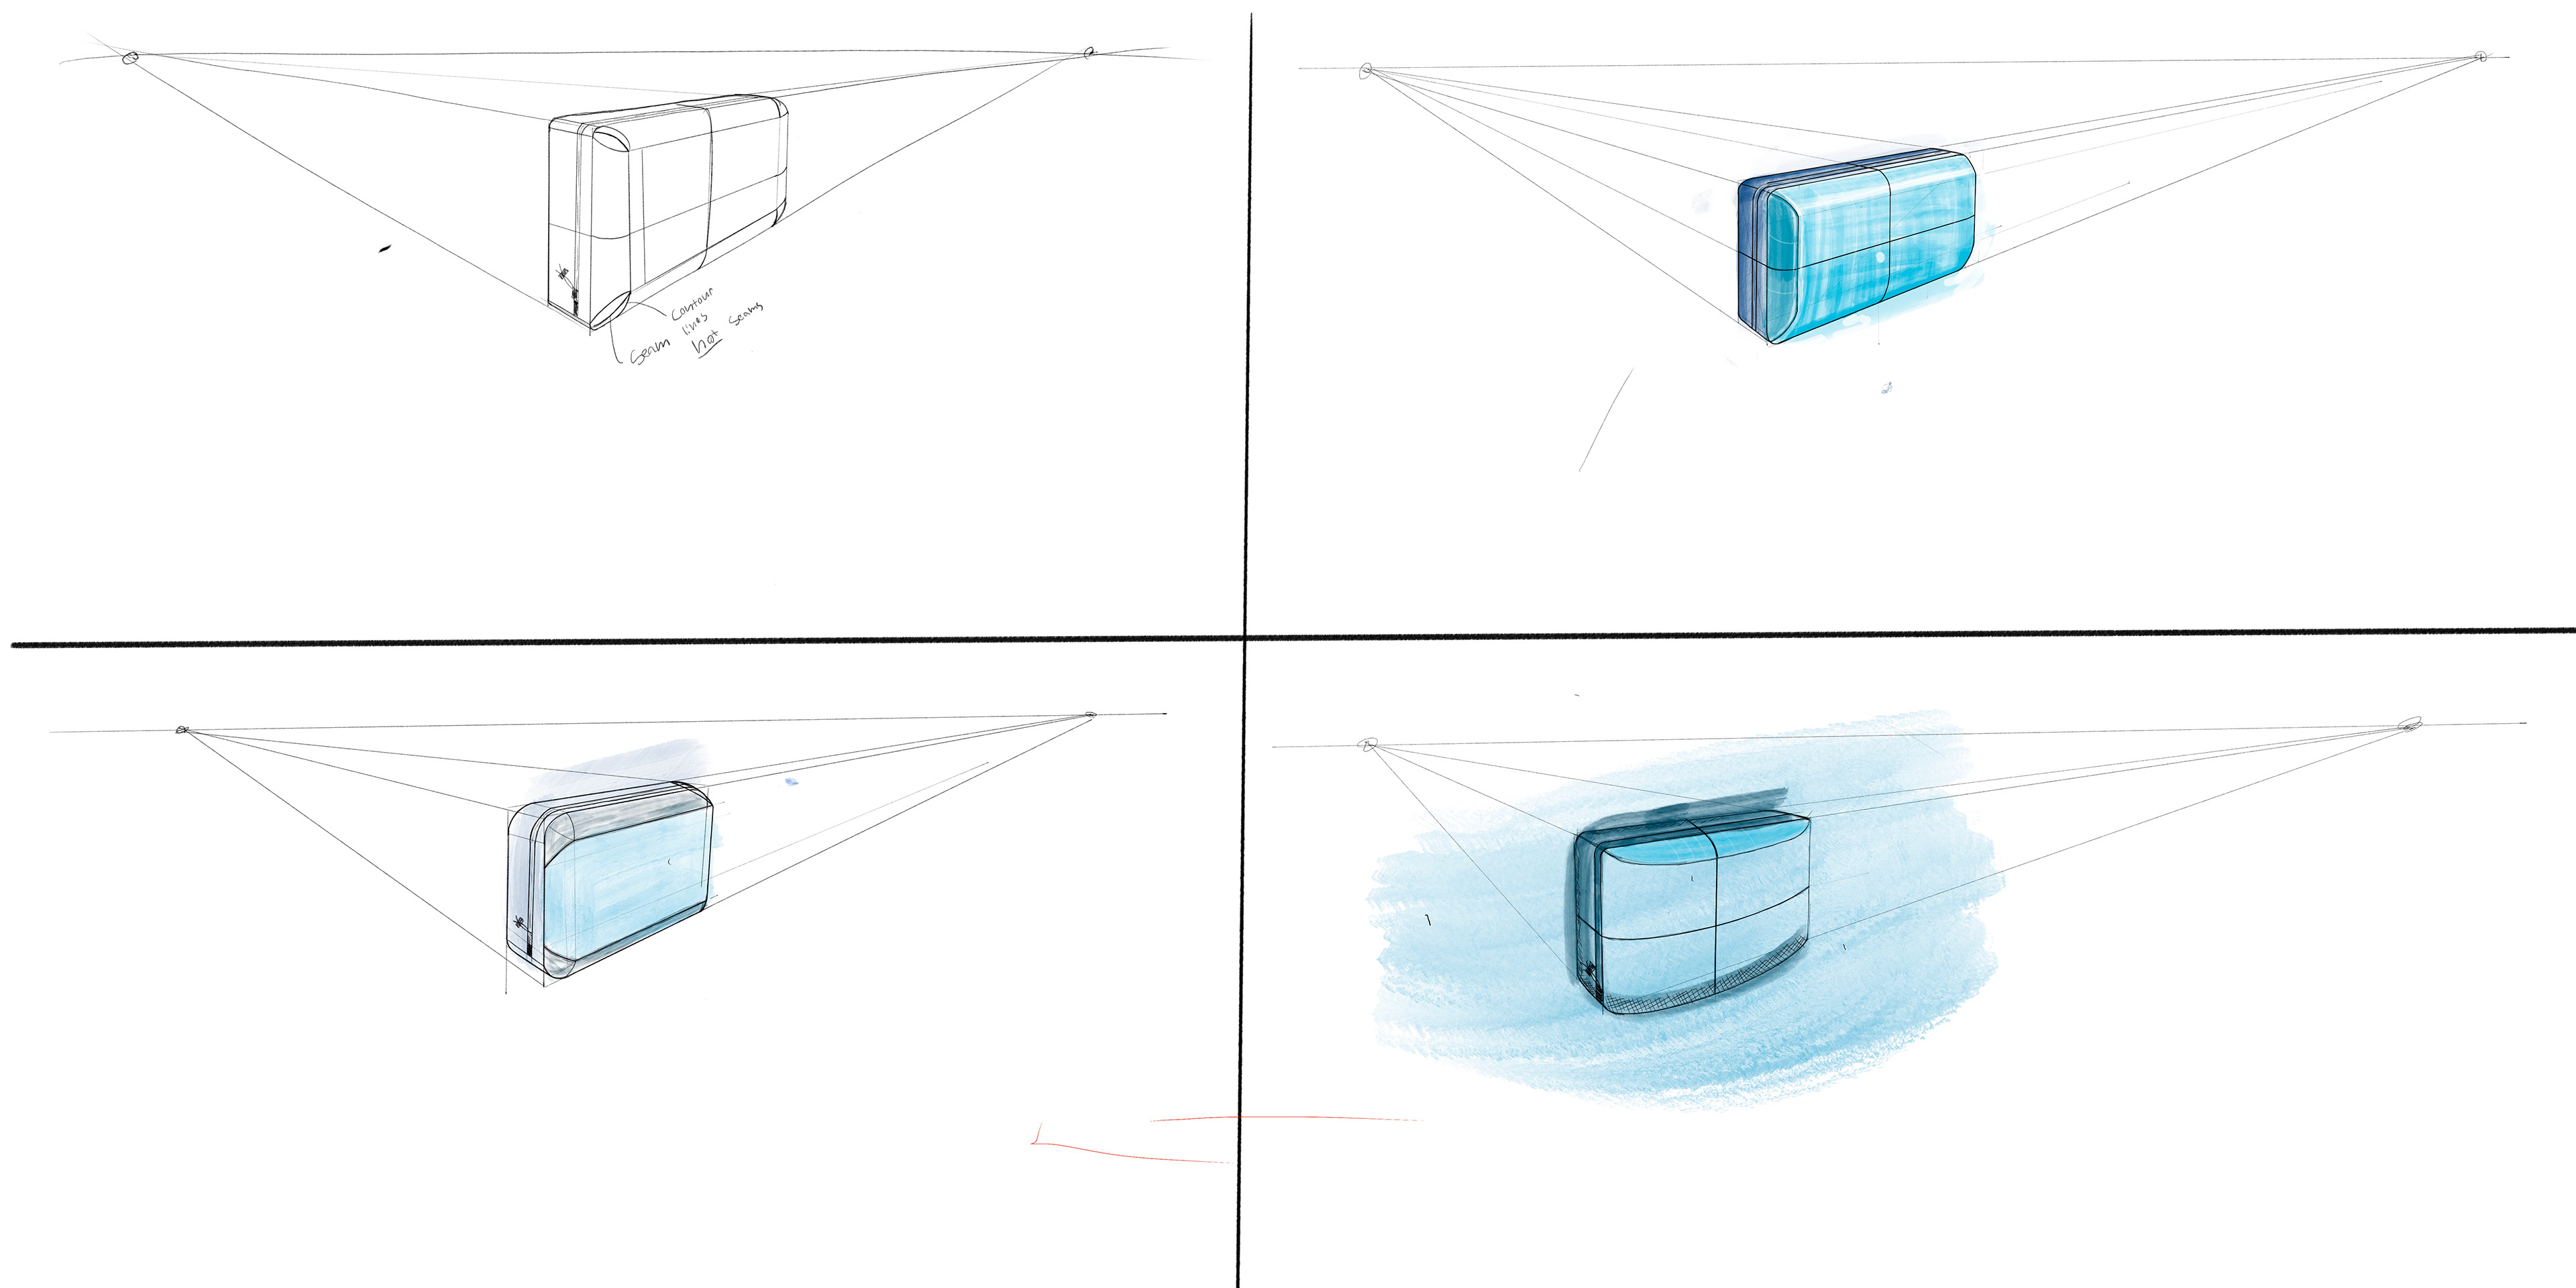
That mindset reminded me to look deeper than aesthetics, even when working fast. I moved quickly from inspiration to sketches, exploring proportions, pocket layouts, and key construction ideas. This project wasn’t about making the most inspired piece, it was about taking a simple idea from start to finish and testing my process.


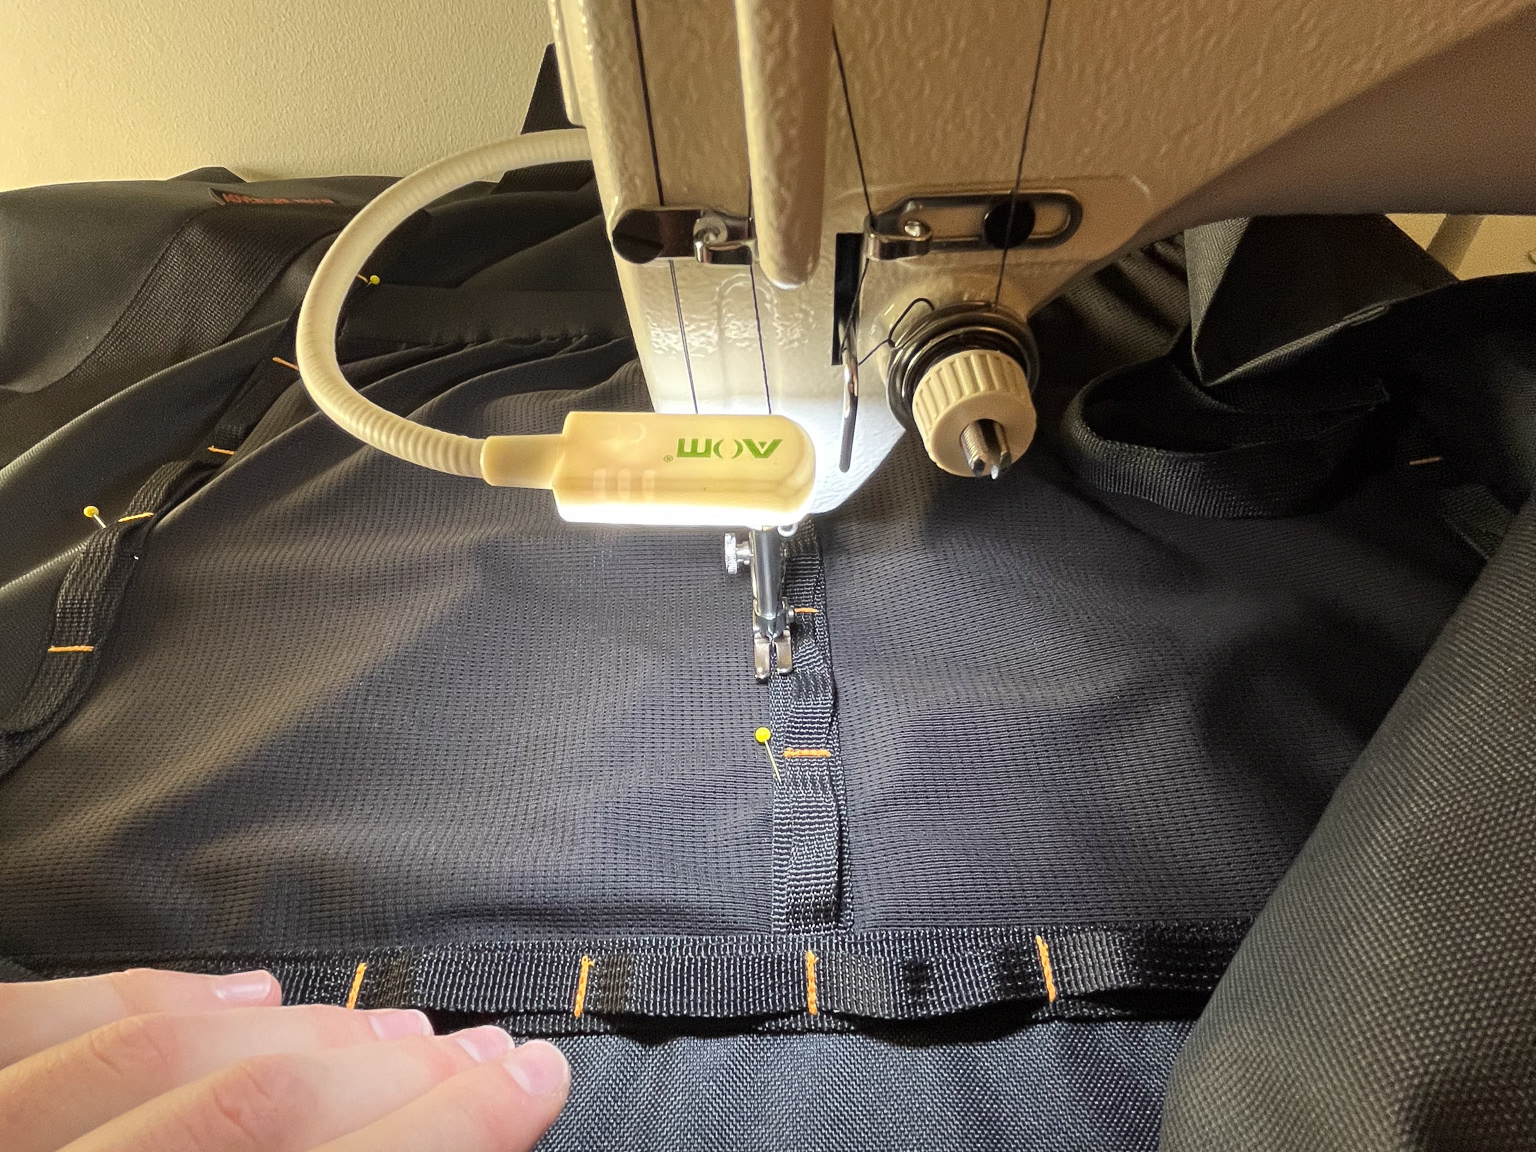
Prototyping:
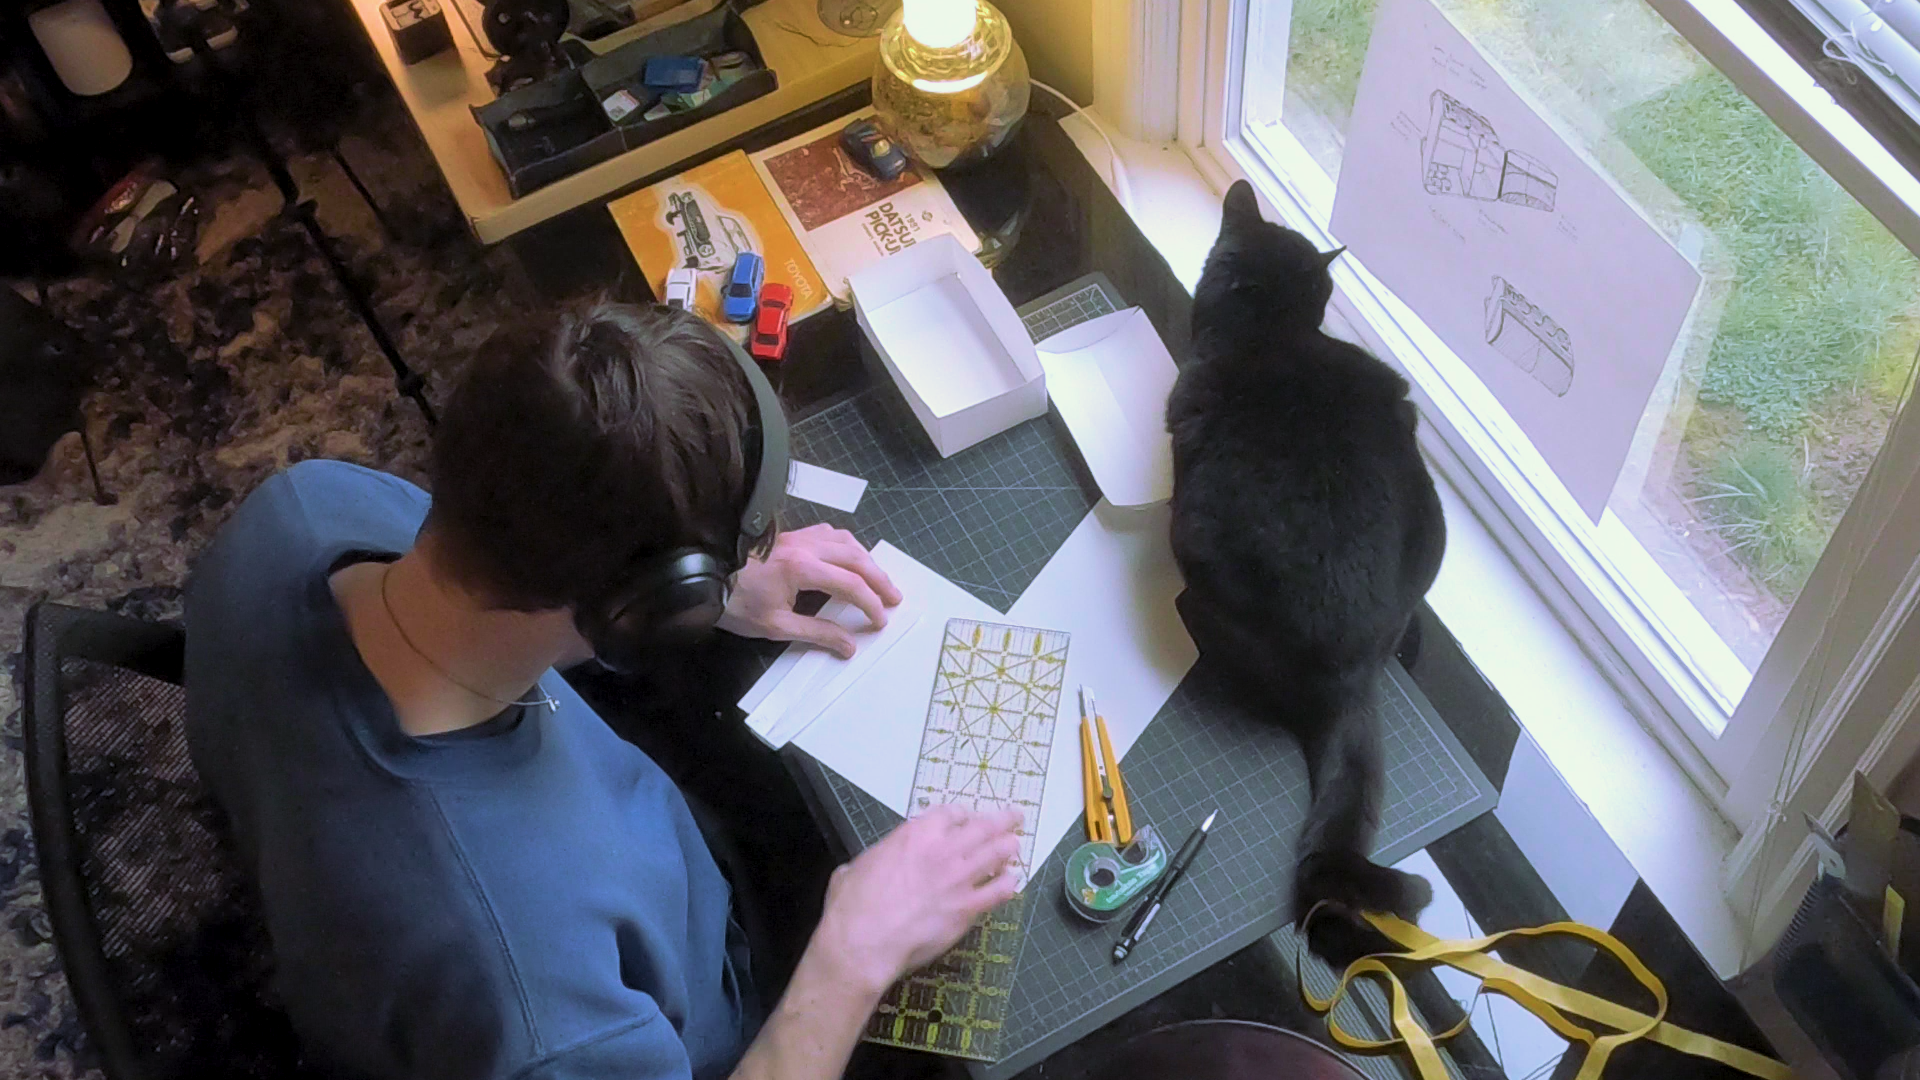
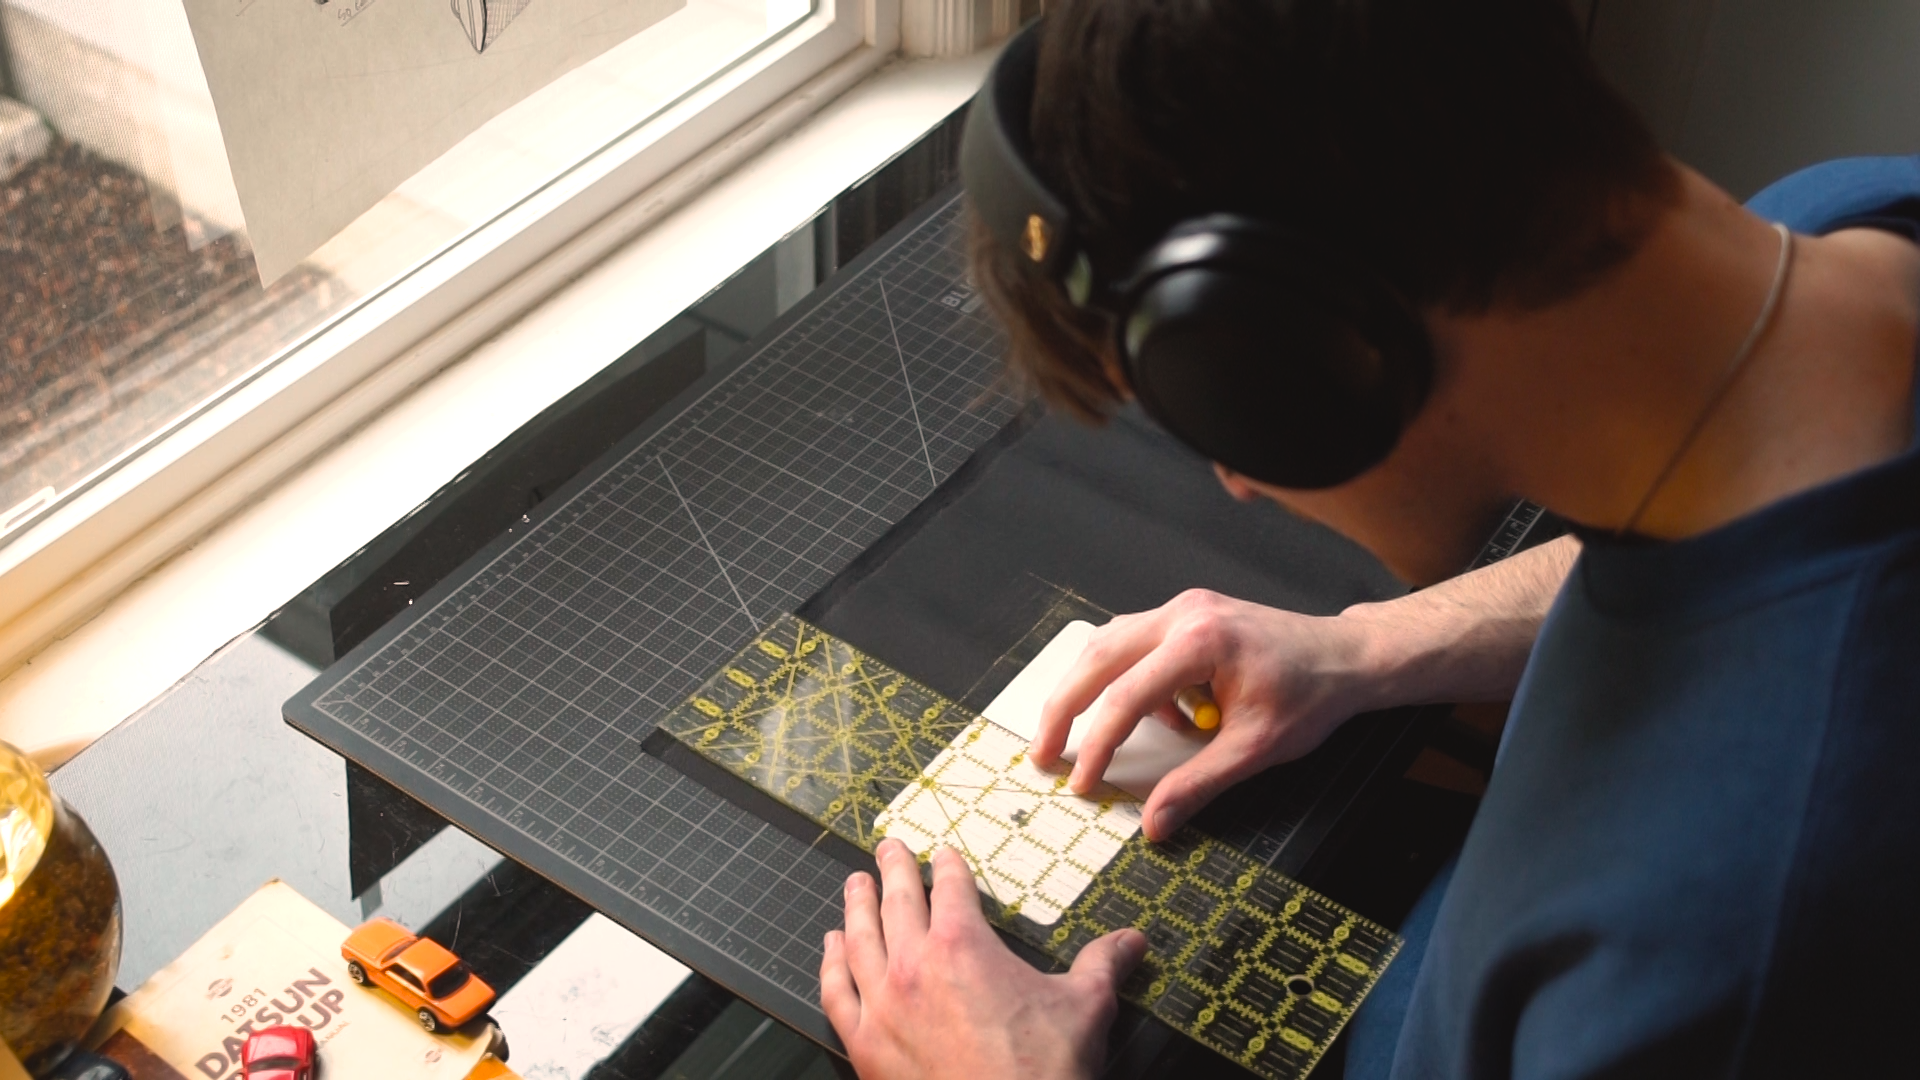
I love prototyping, In high school when I first started sewing and working with fabrics Its all I really did. The process of working through problems in physical space has always been the highlight of the creation process to me.

1st round:
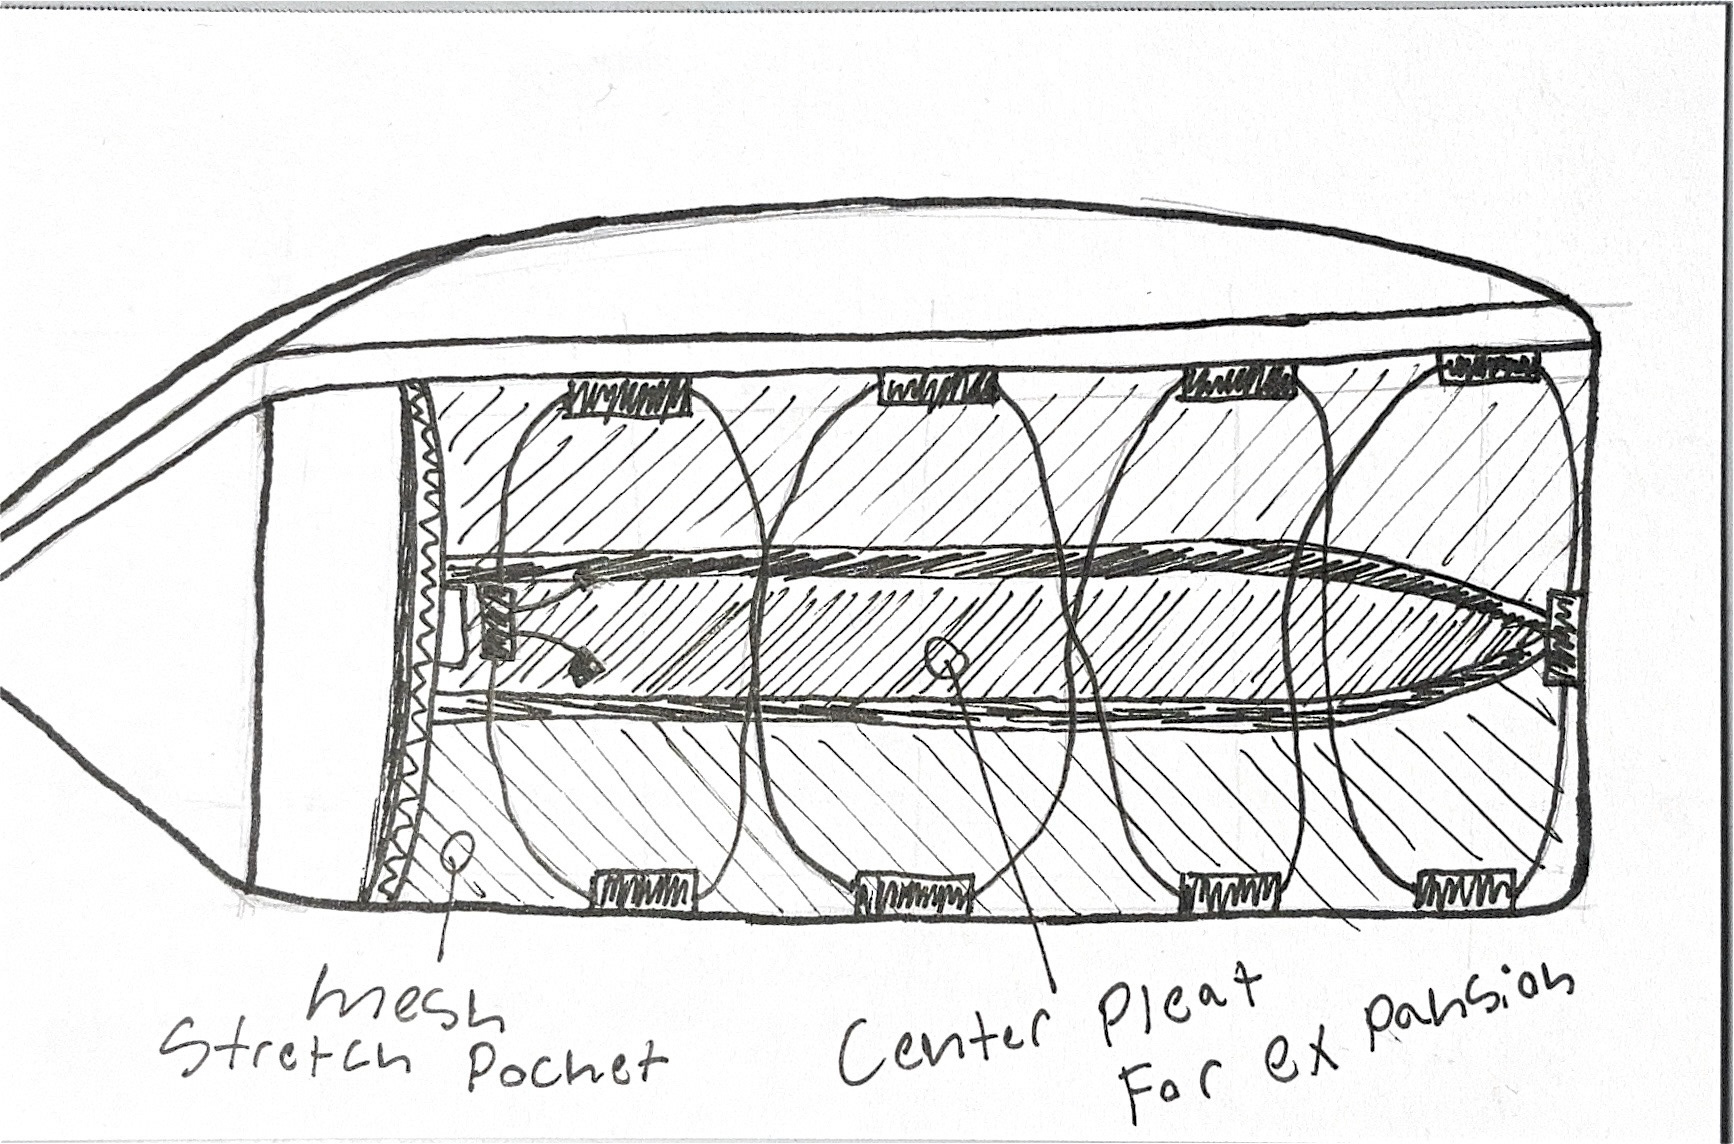
Has many fundamental fitment issues. Side panels do not match up with the bottom panel causing folds and a bowing of the sides. The first win was the pleats for the top mesh pocket coming out how I had planned.
2nd round:
Rough shape came together but there was still some pattern balancing to do. I learned that to achieve a tighter internal form, a floating liner would not work.
3rd round:
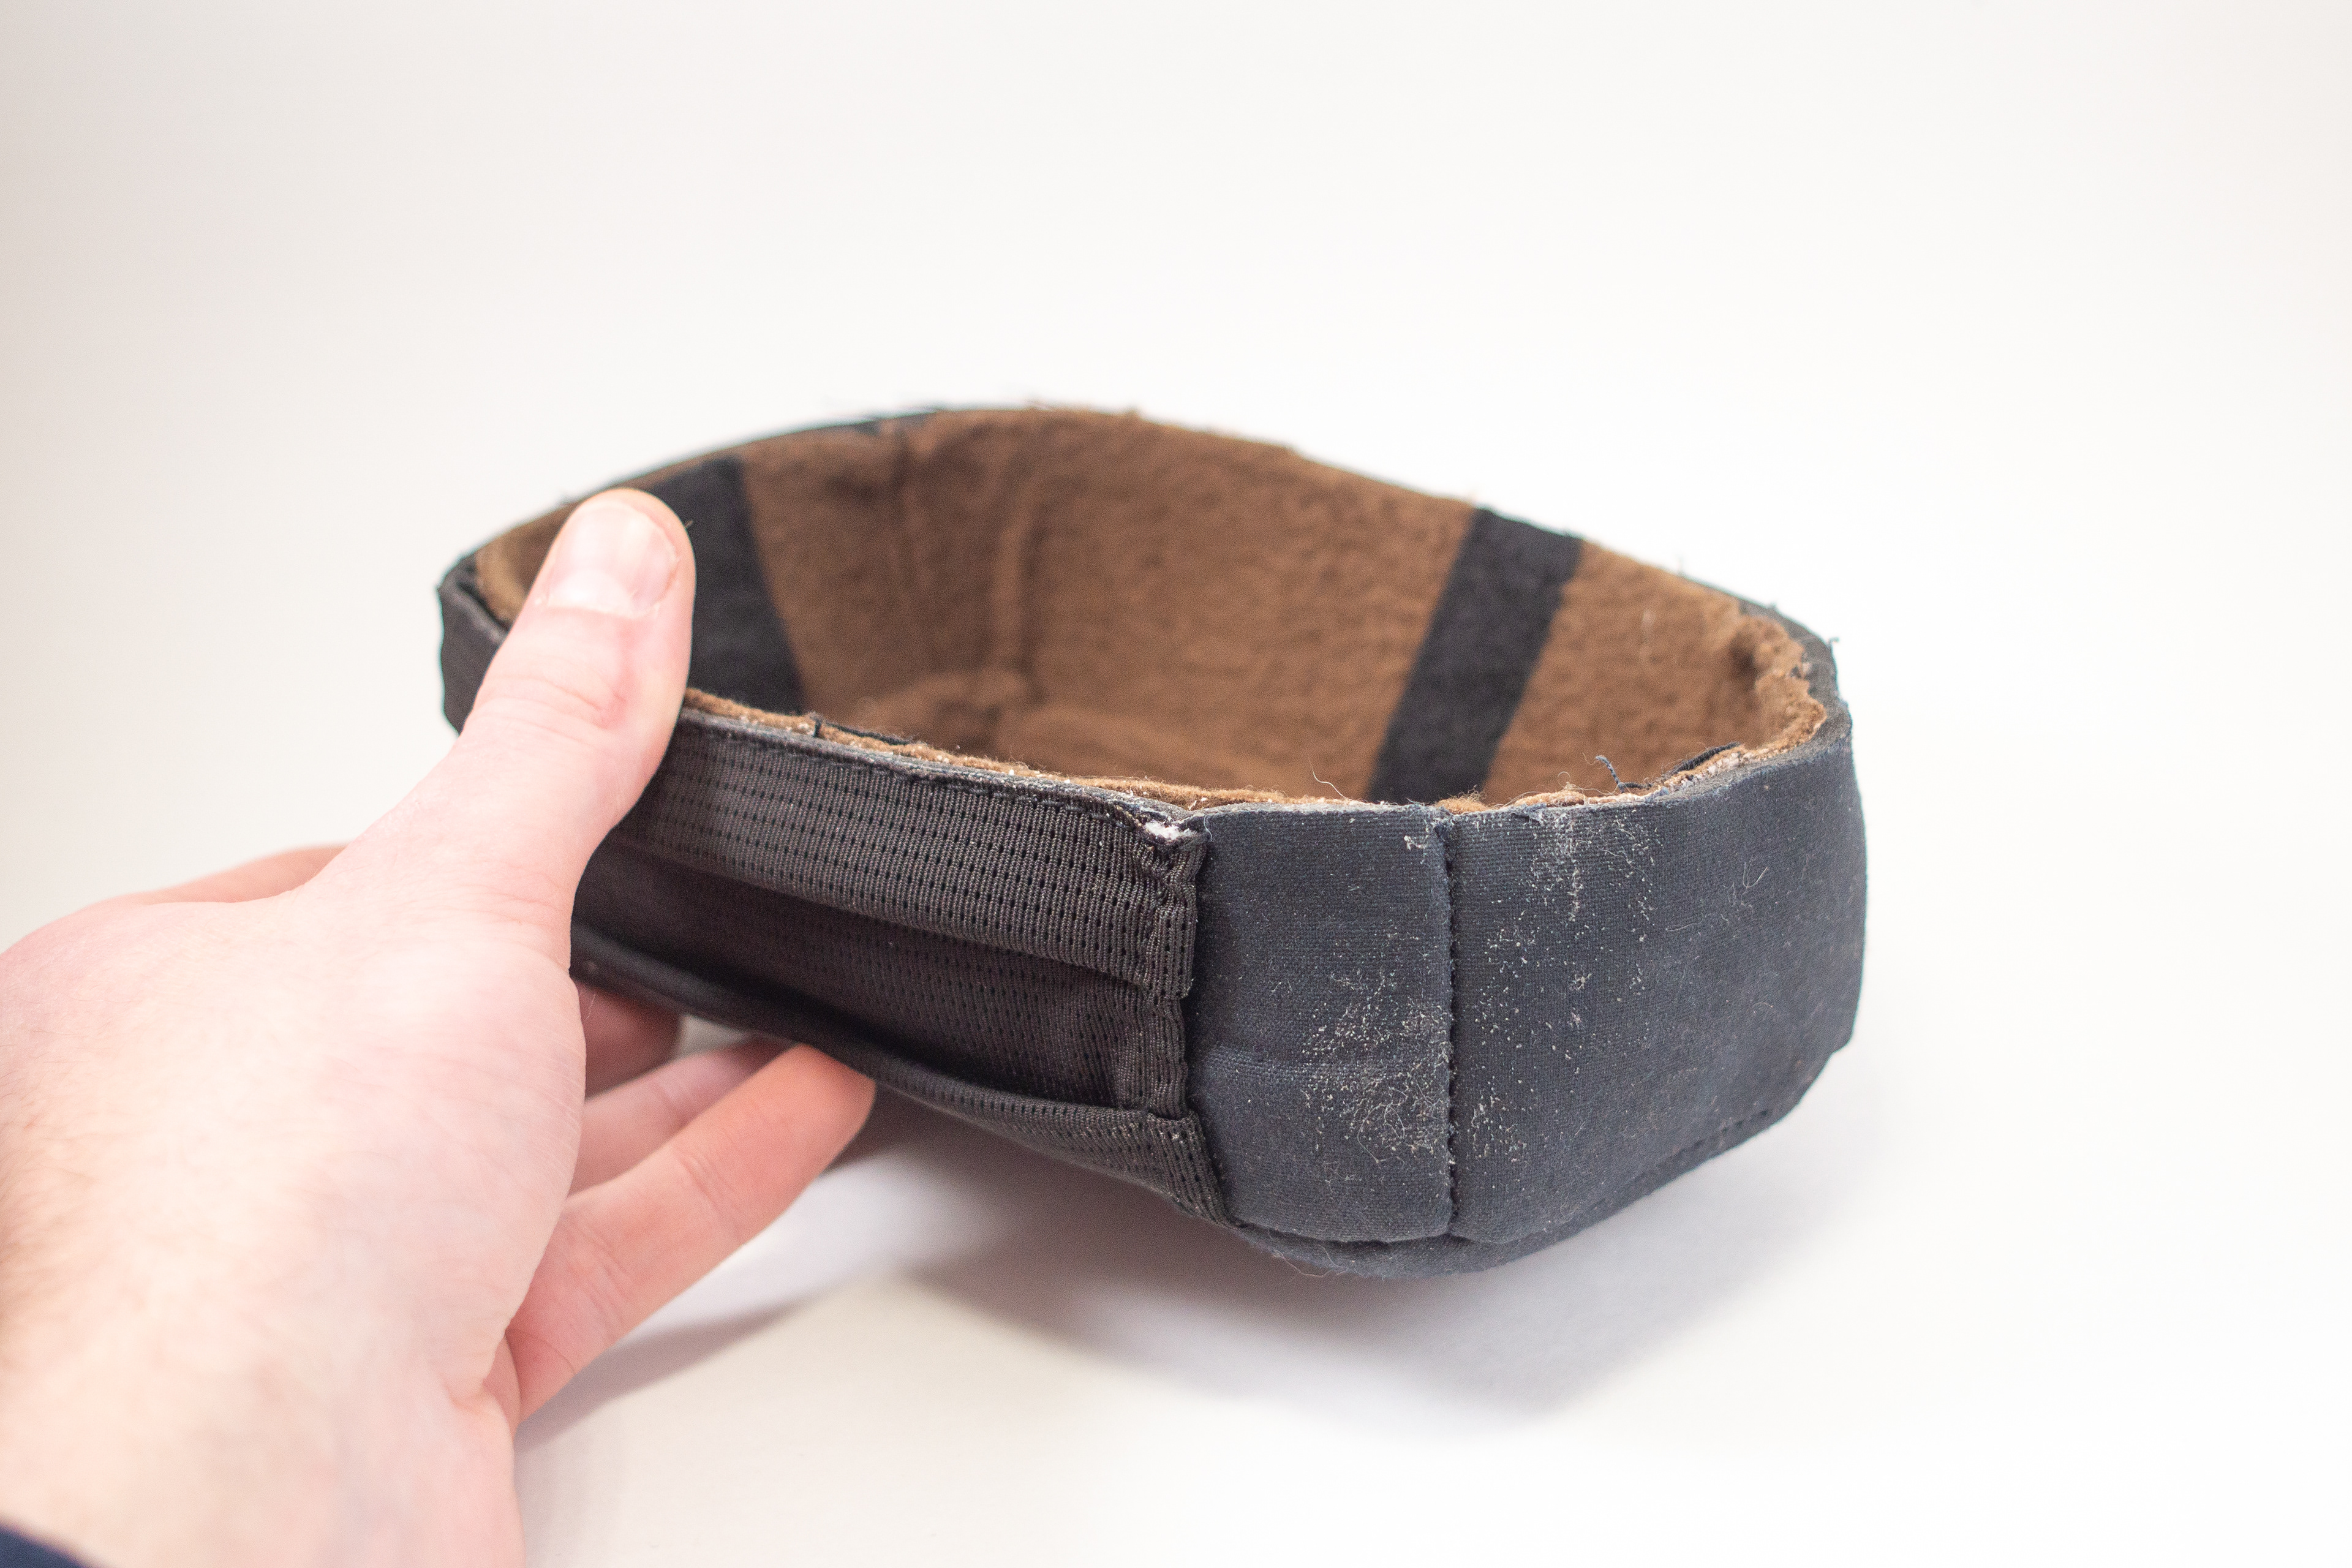
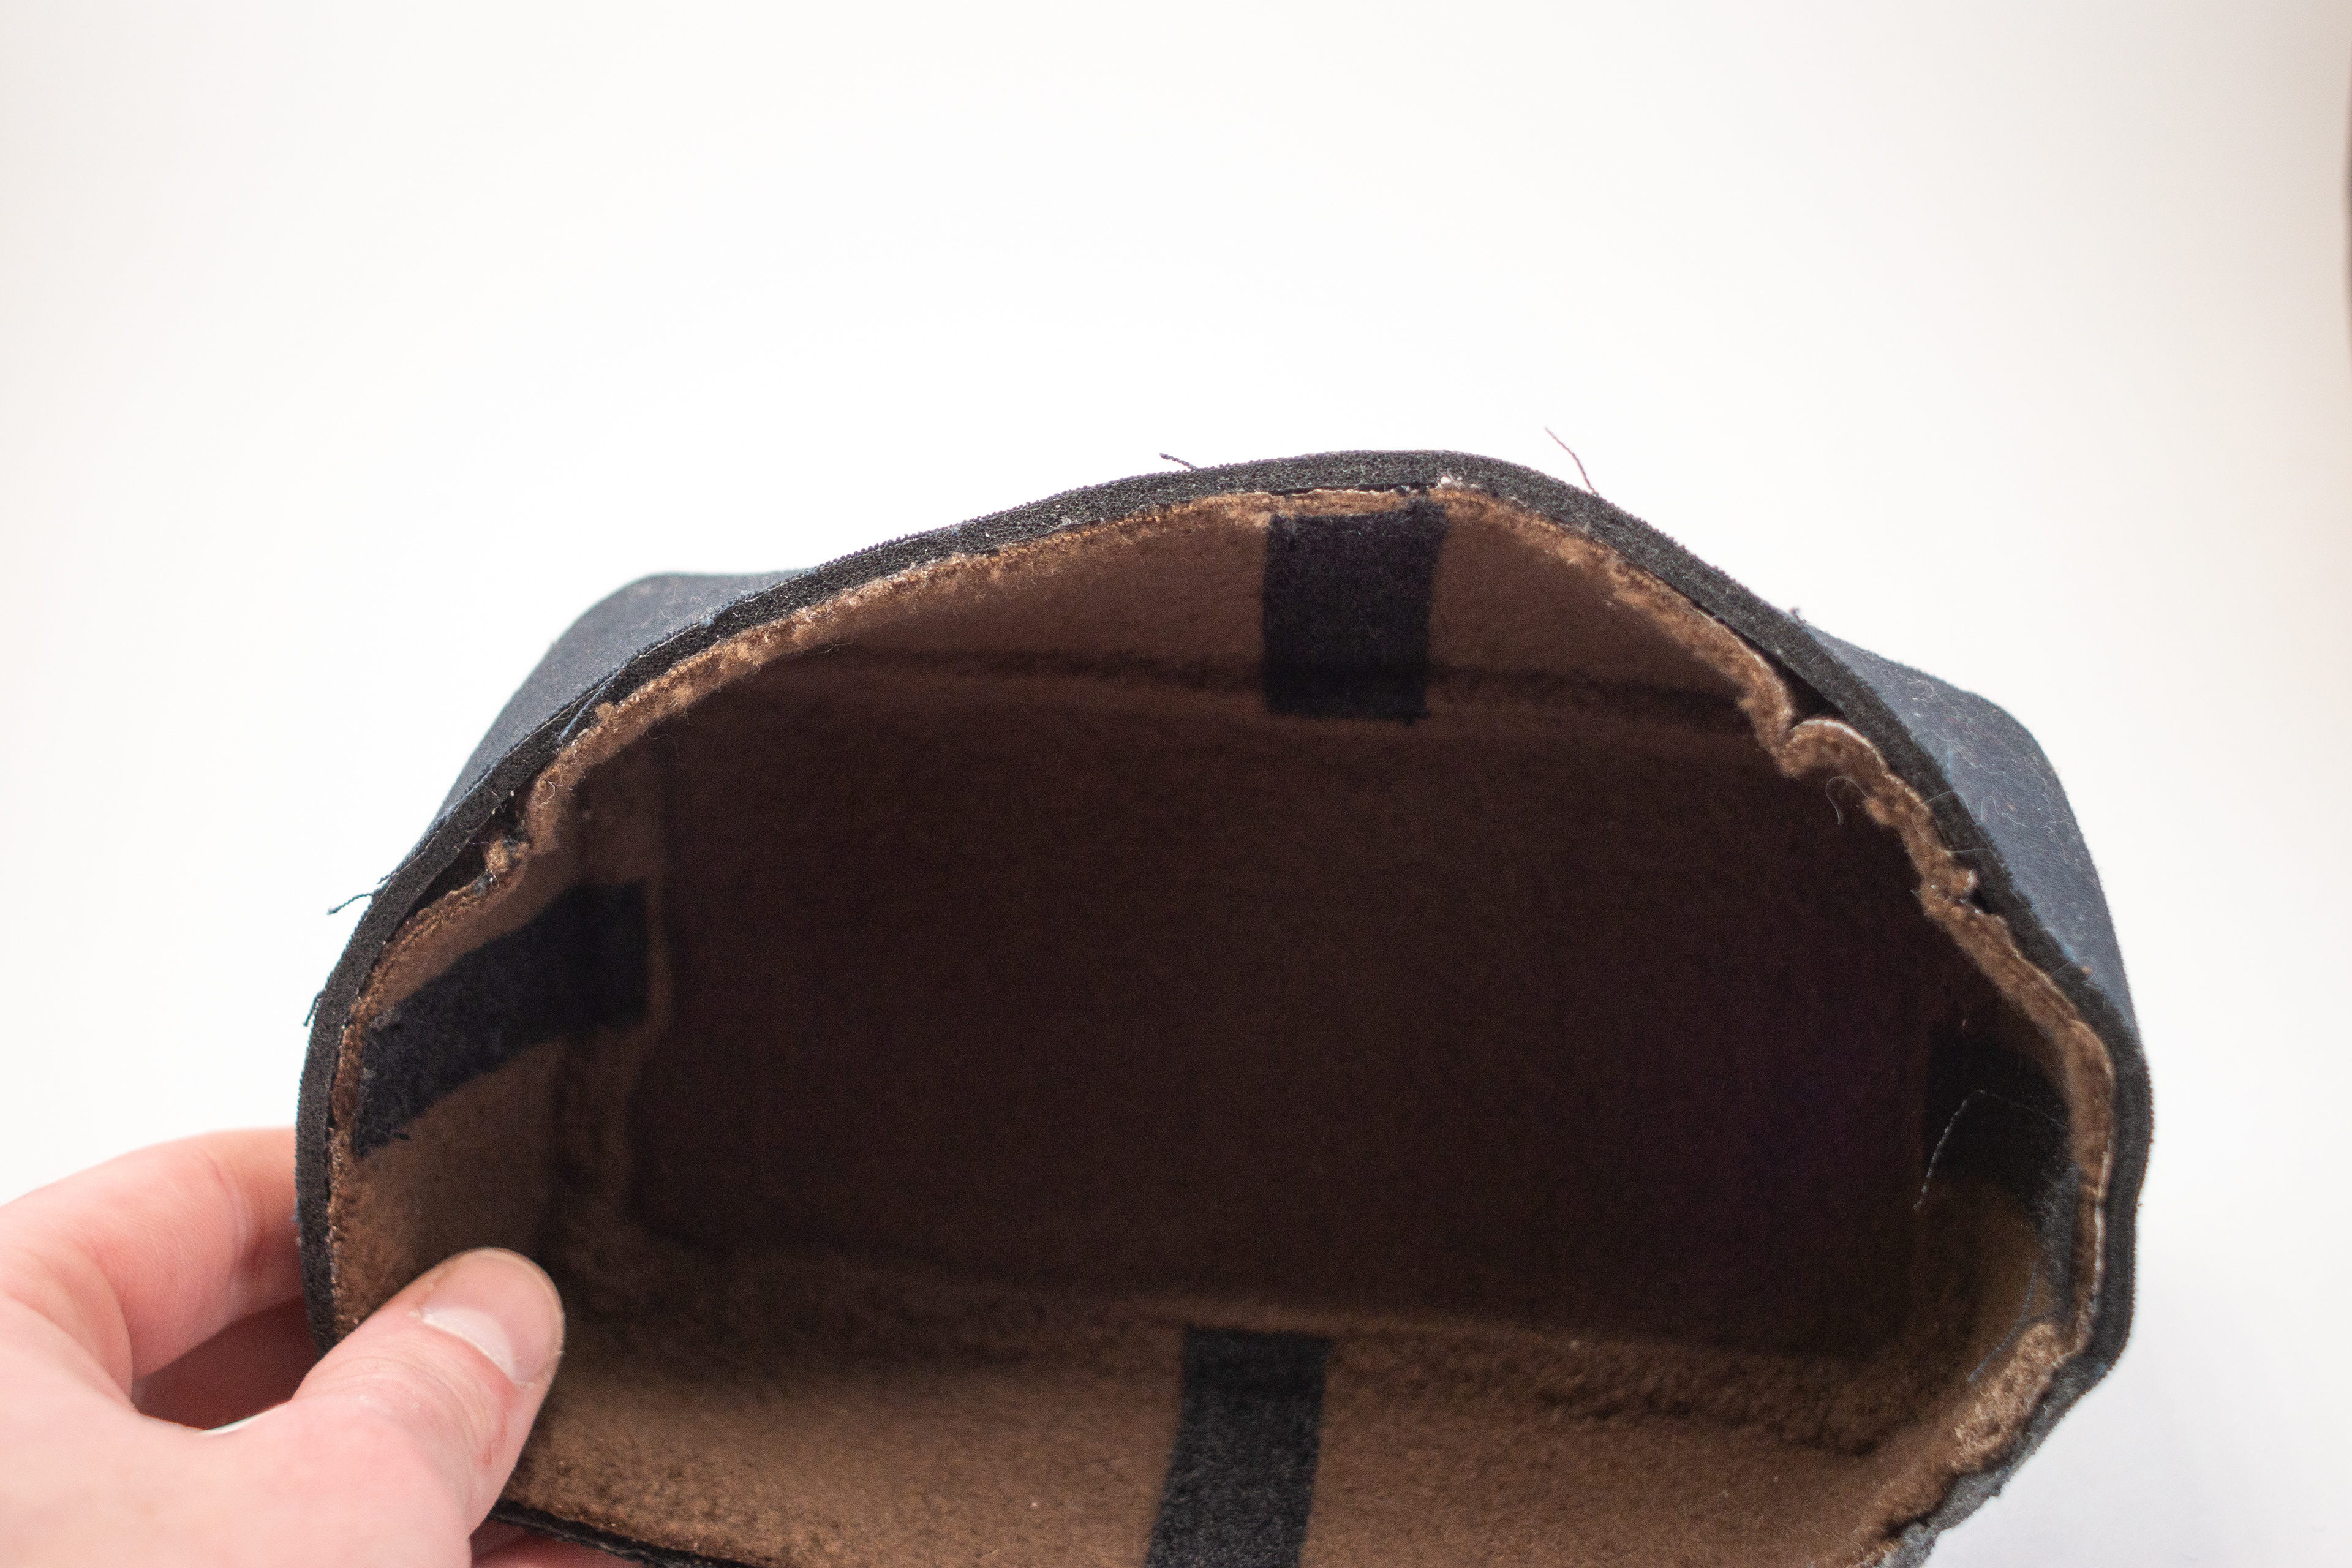
To solve the loose lining from the previous prototype, I tried adhering the liner to some closed cell foam, then the other side of the foam to the body fabric. This resulted in the form becoming quite rigid and taking on a neoprene like effect. This construction method likely has it's place but this was not what I was aiming for.
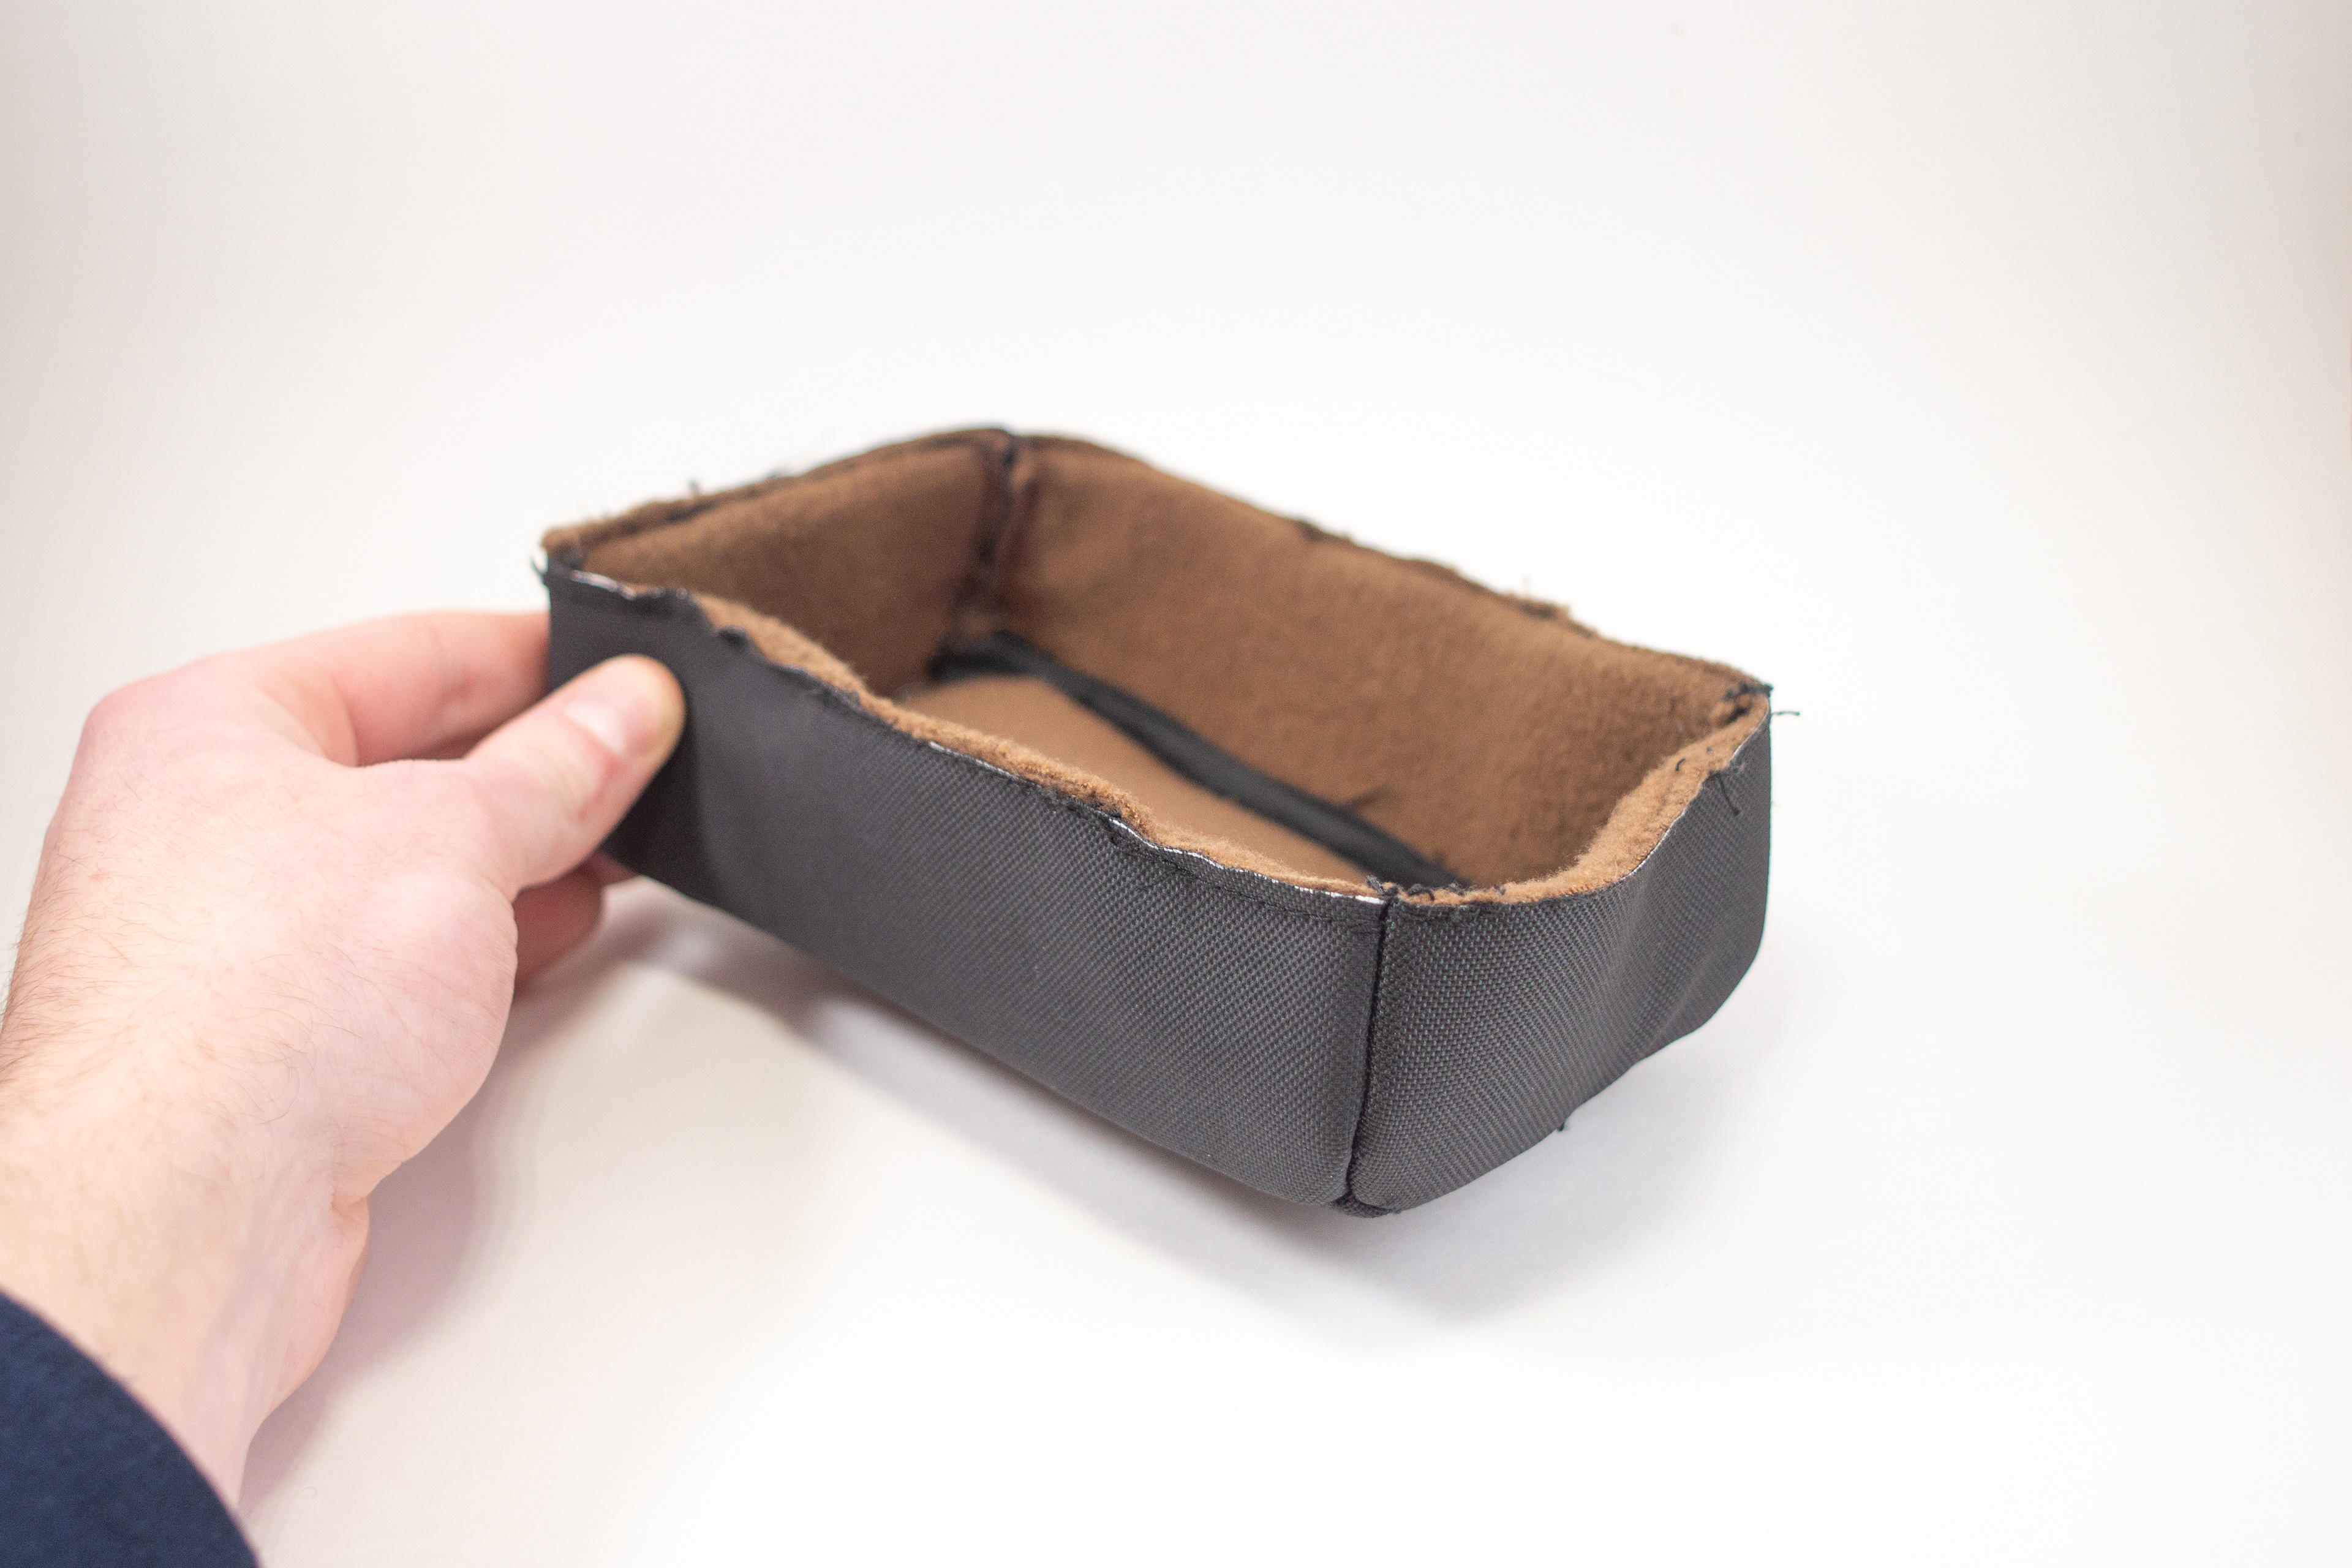
4th round:
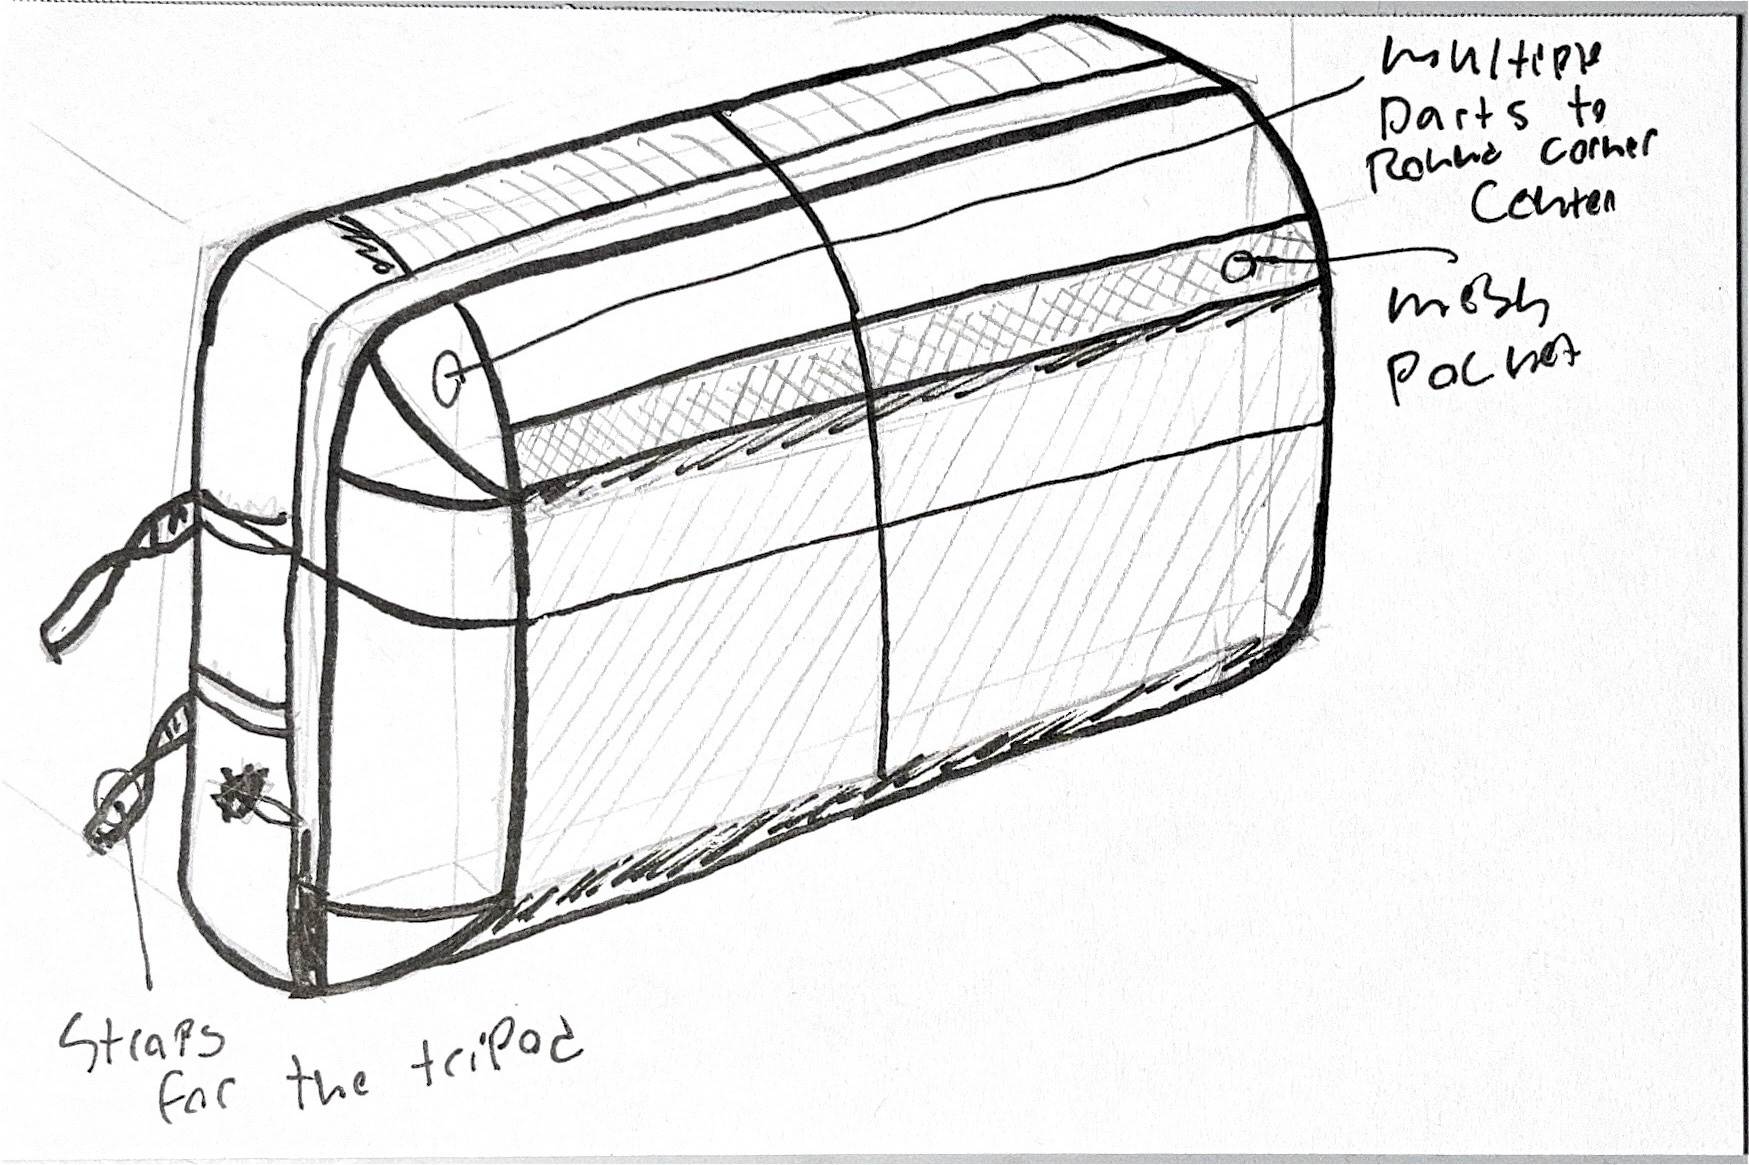
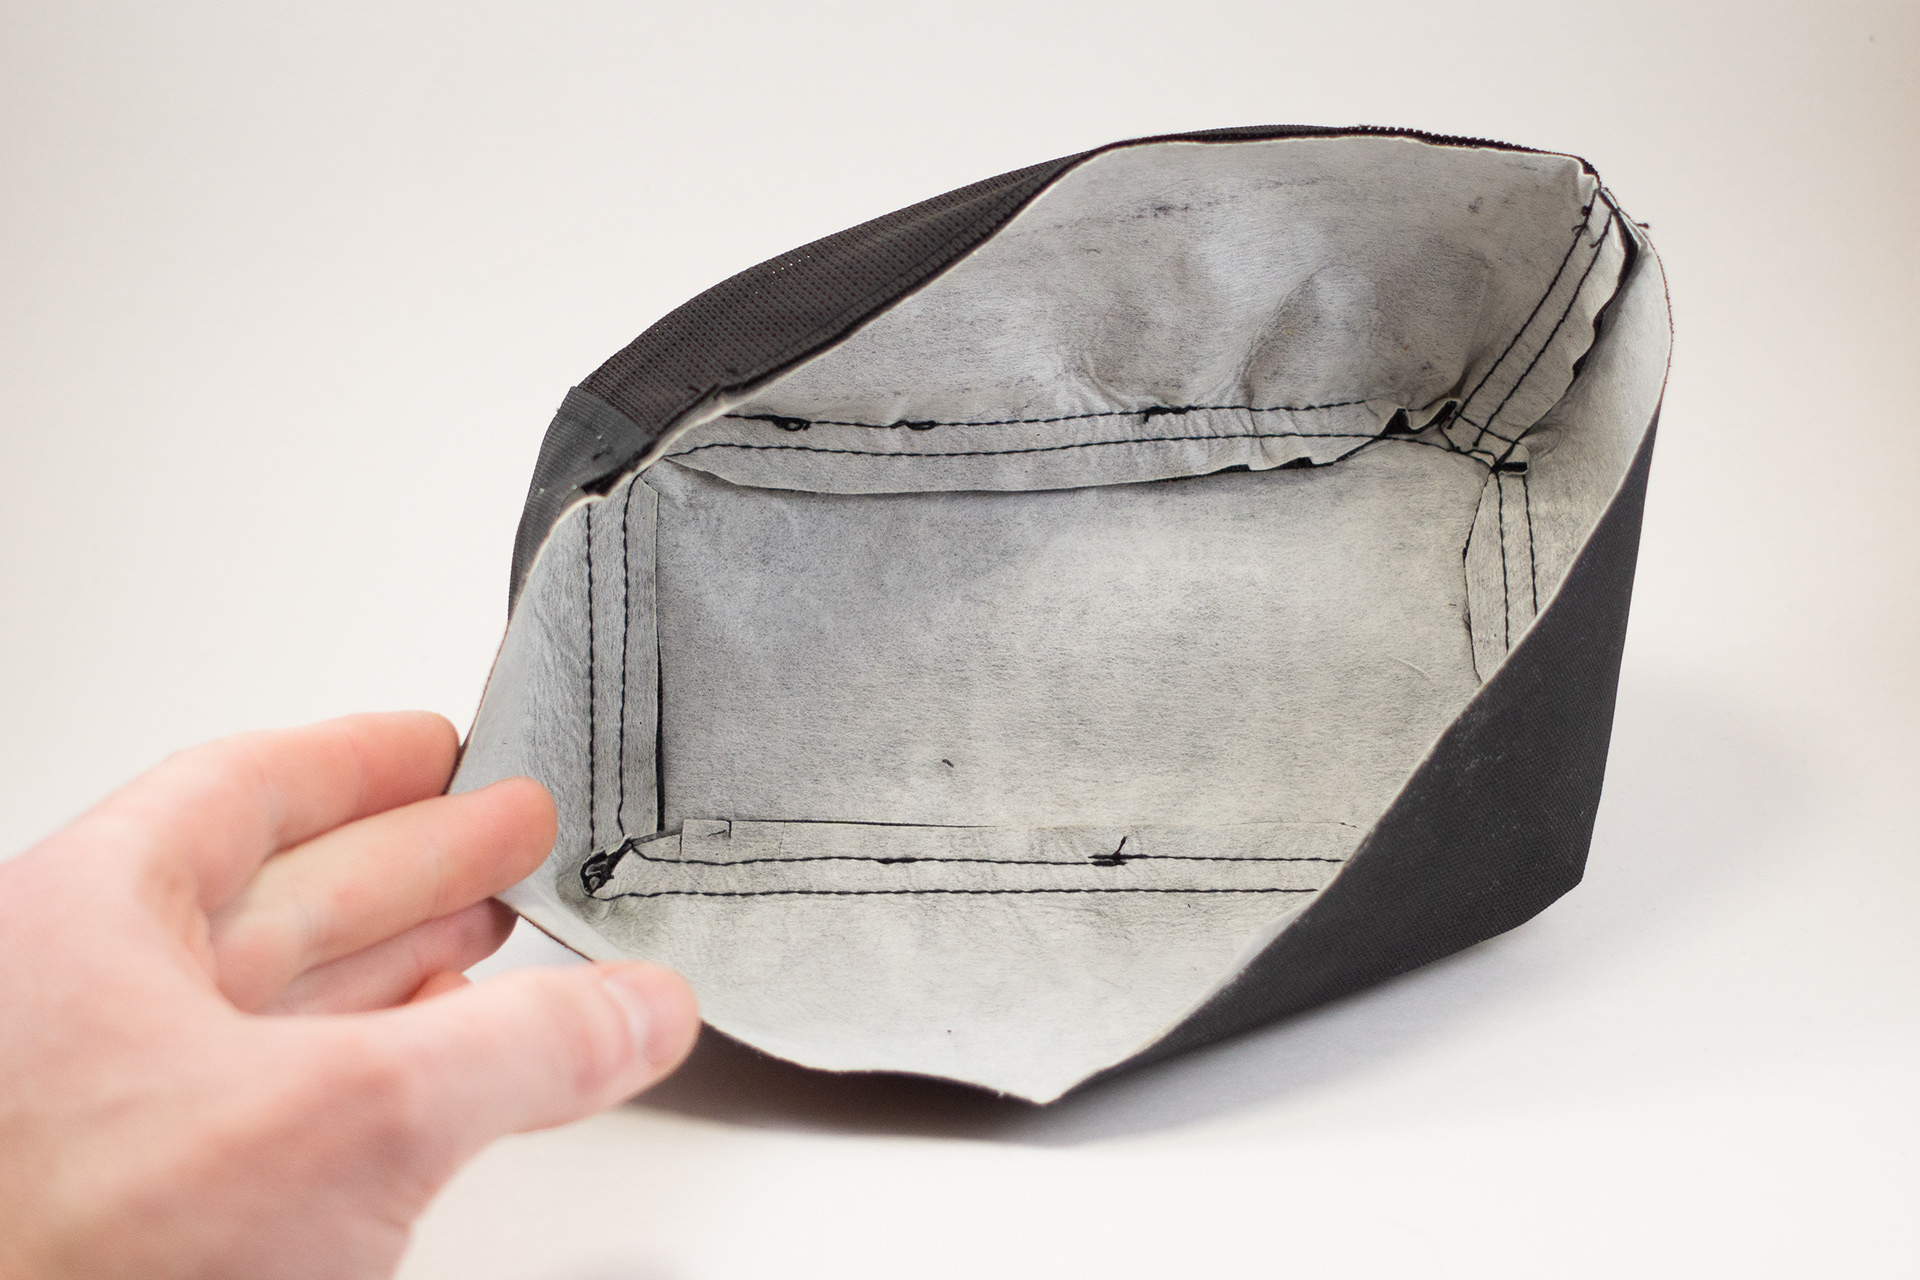
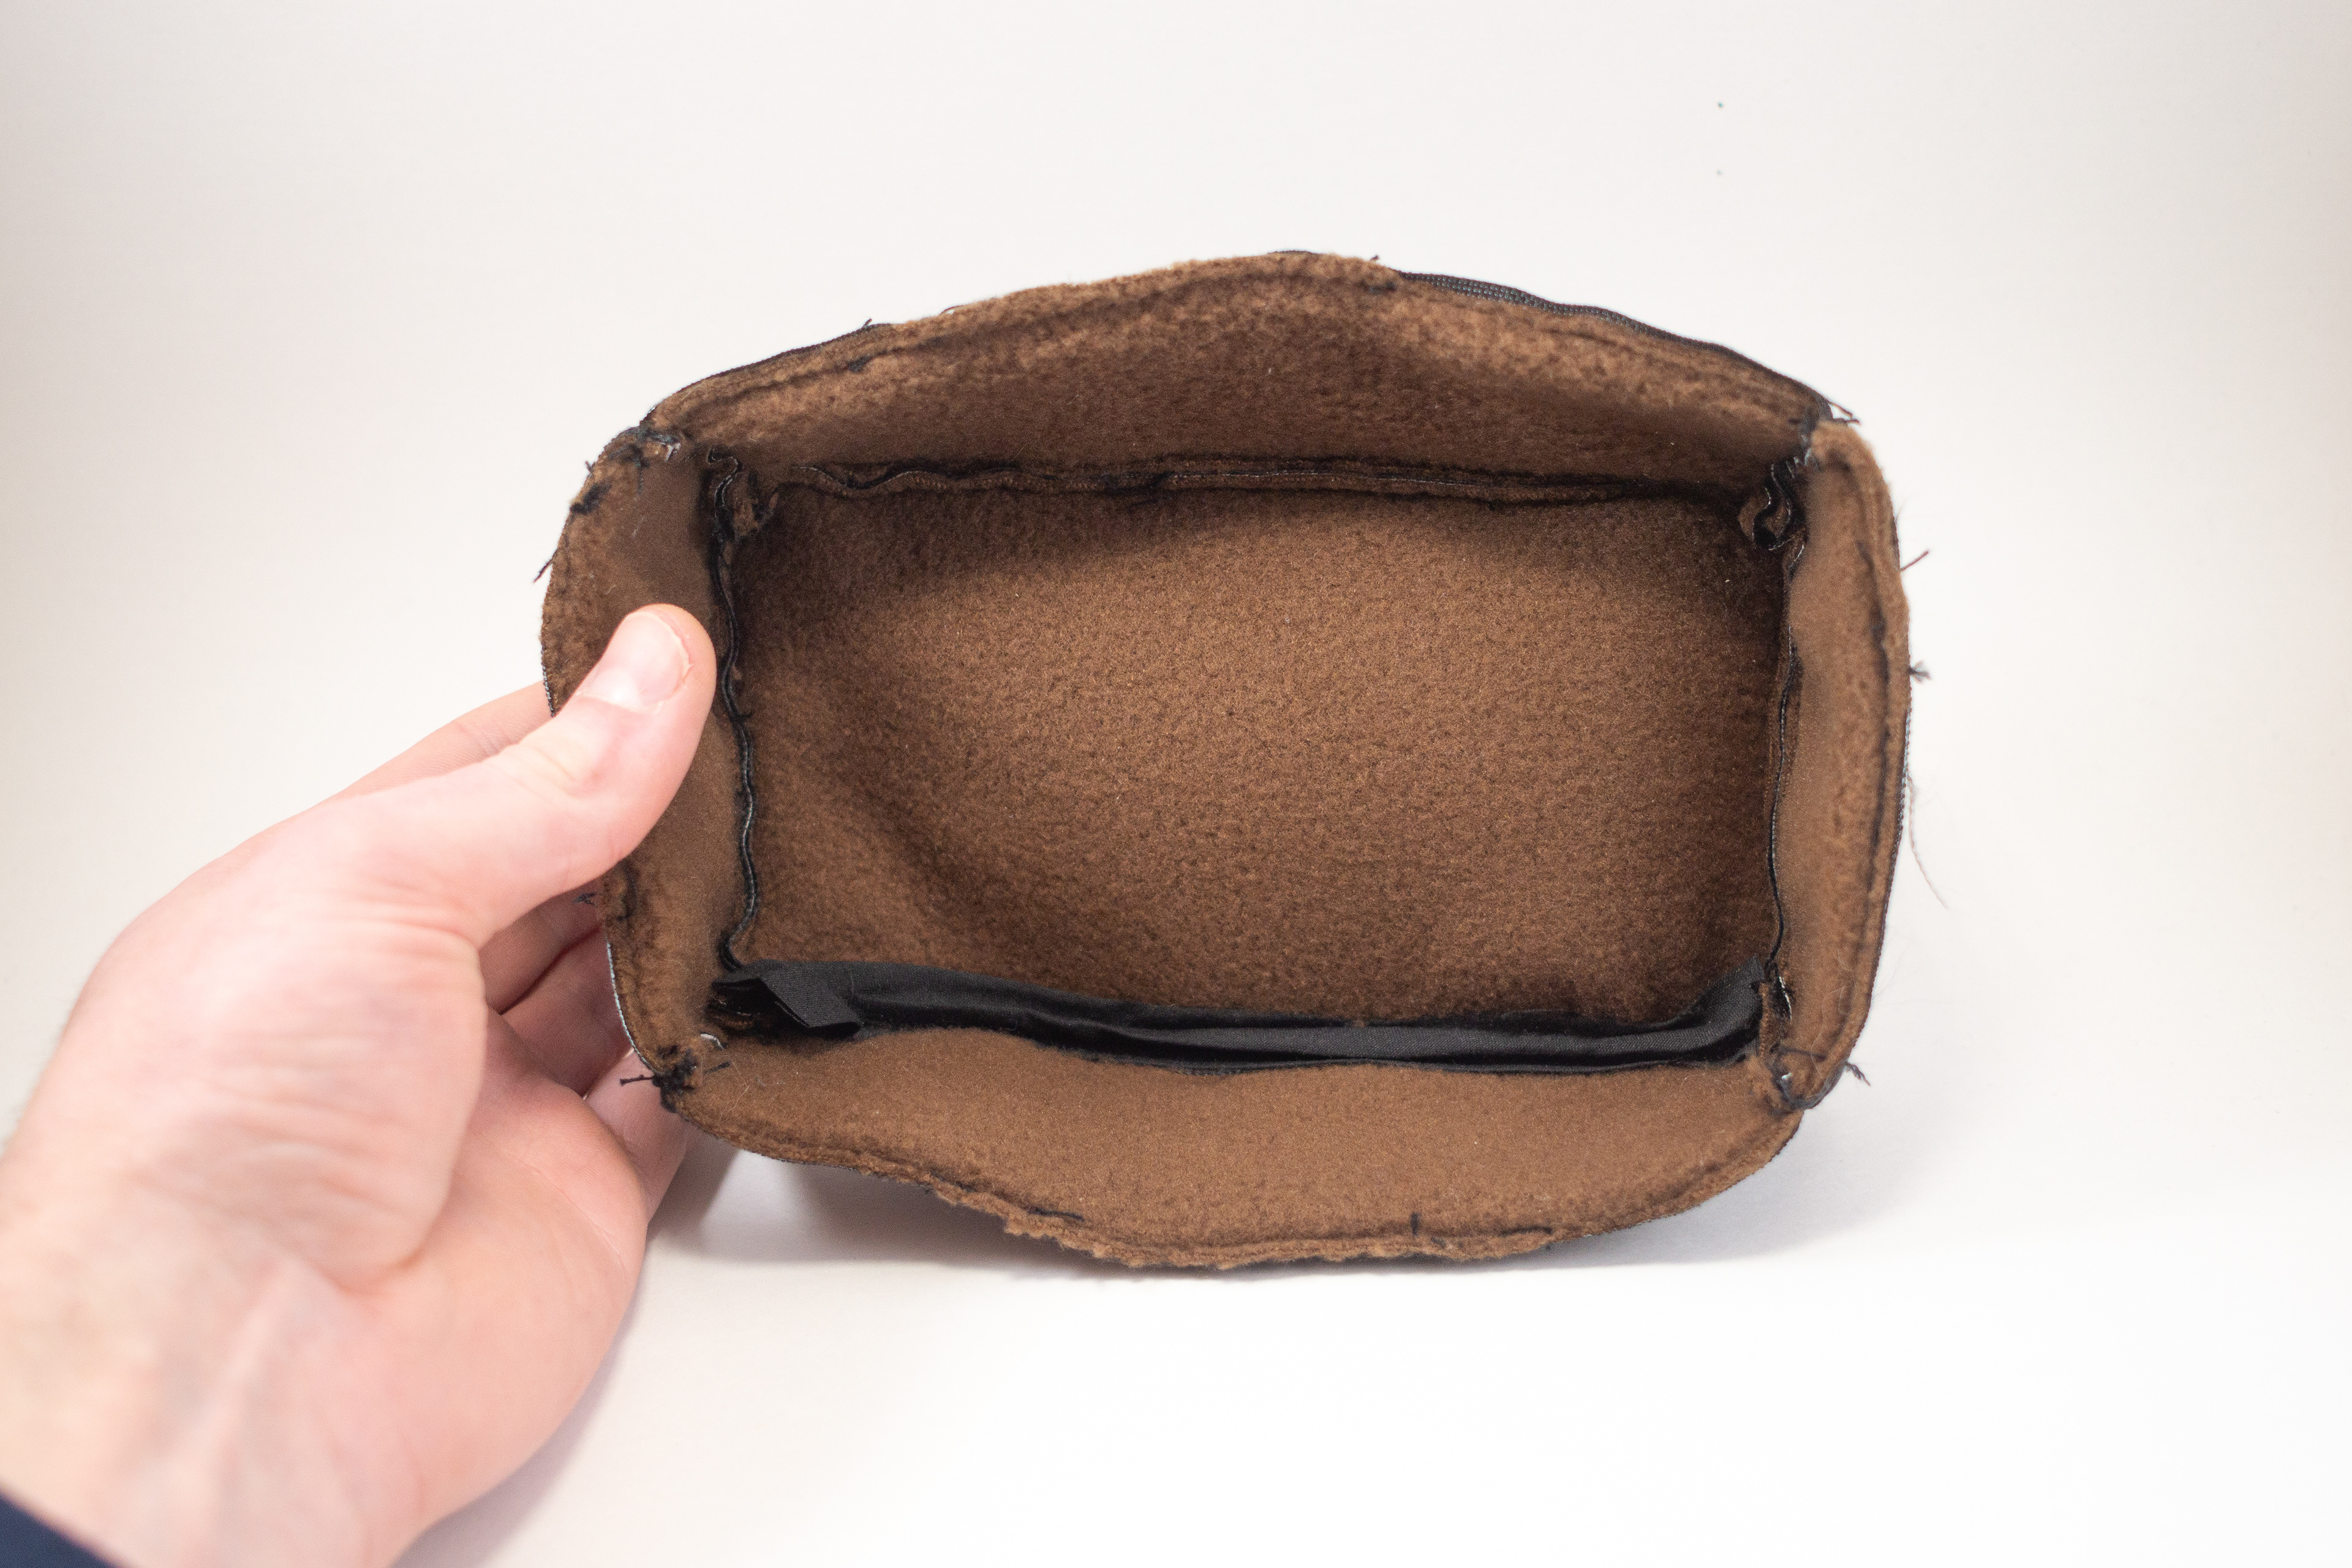
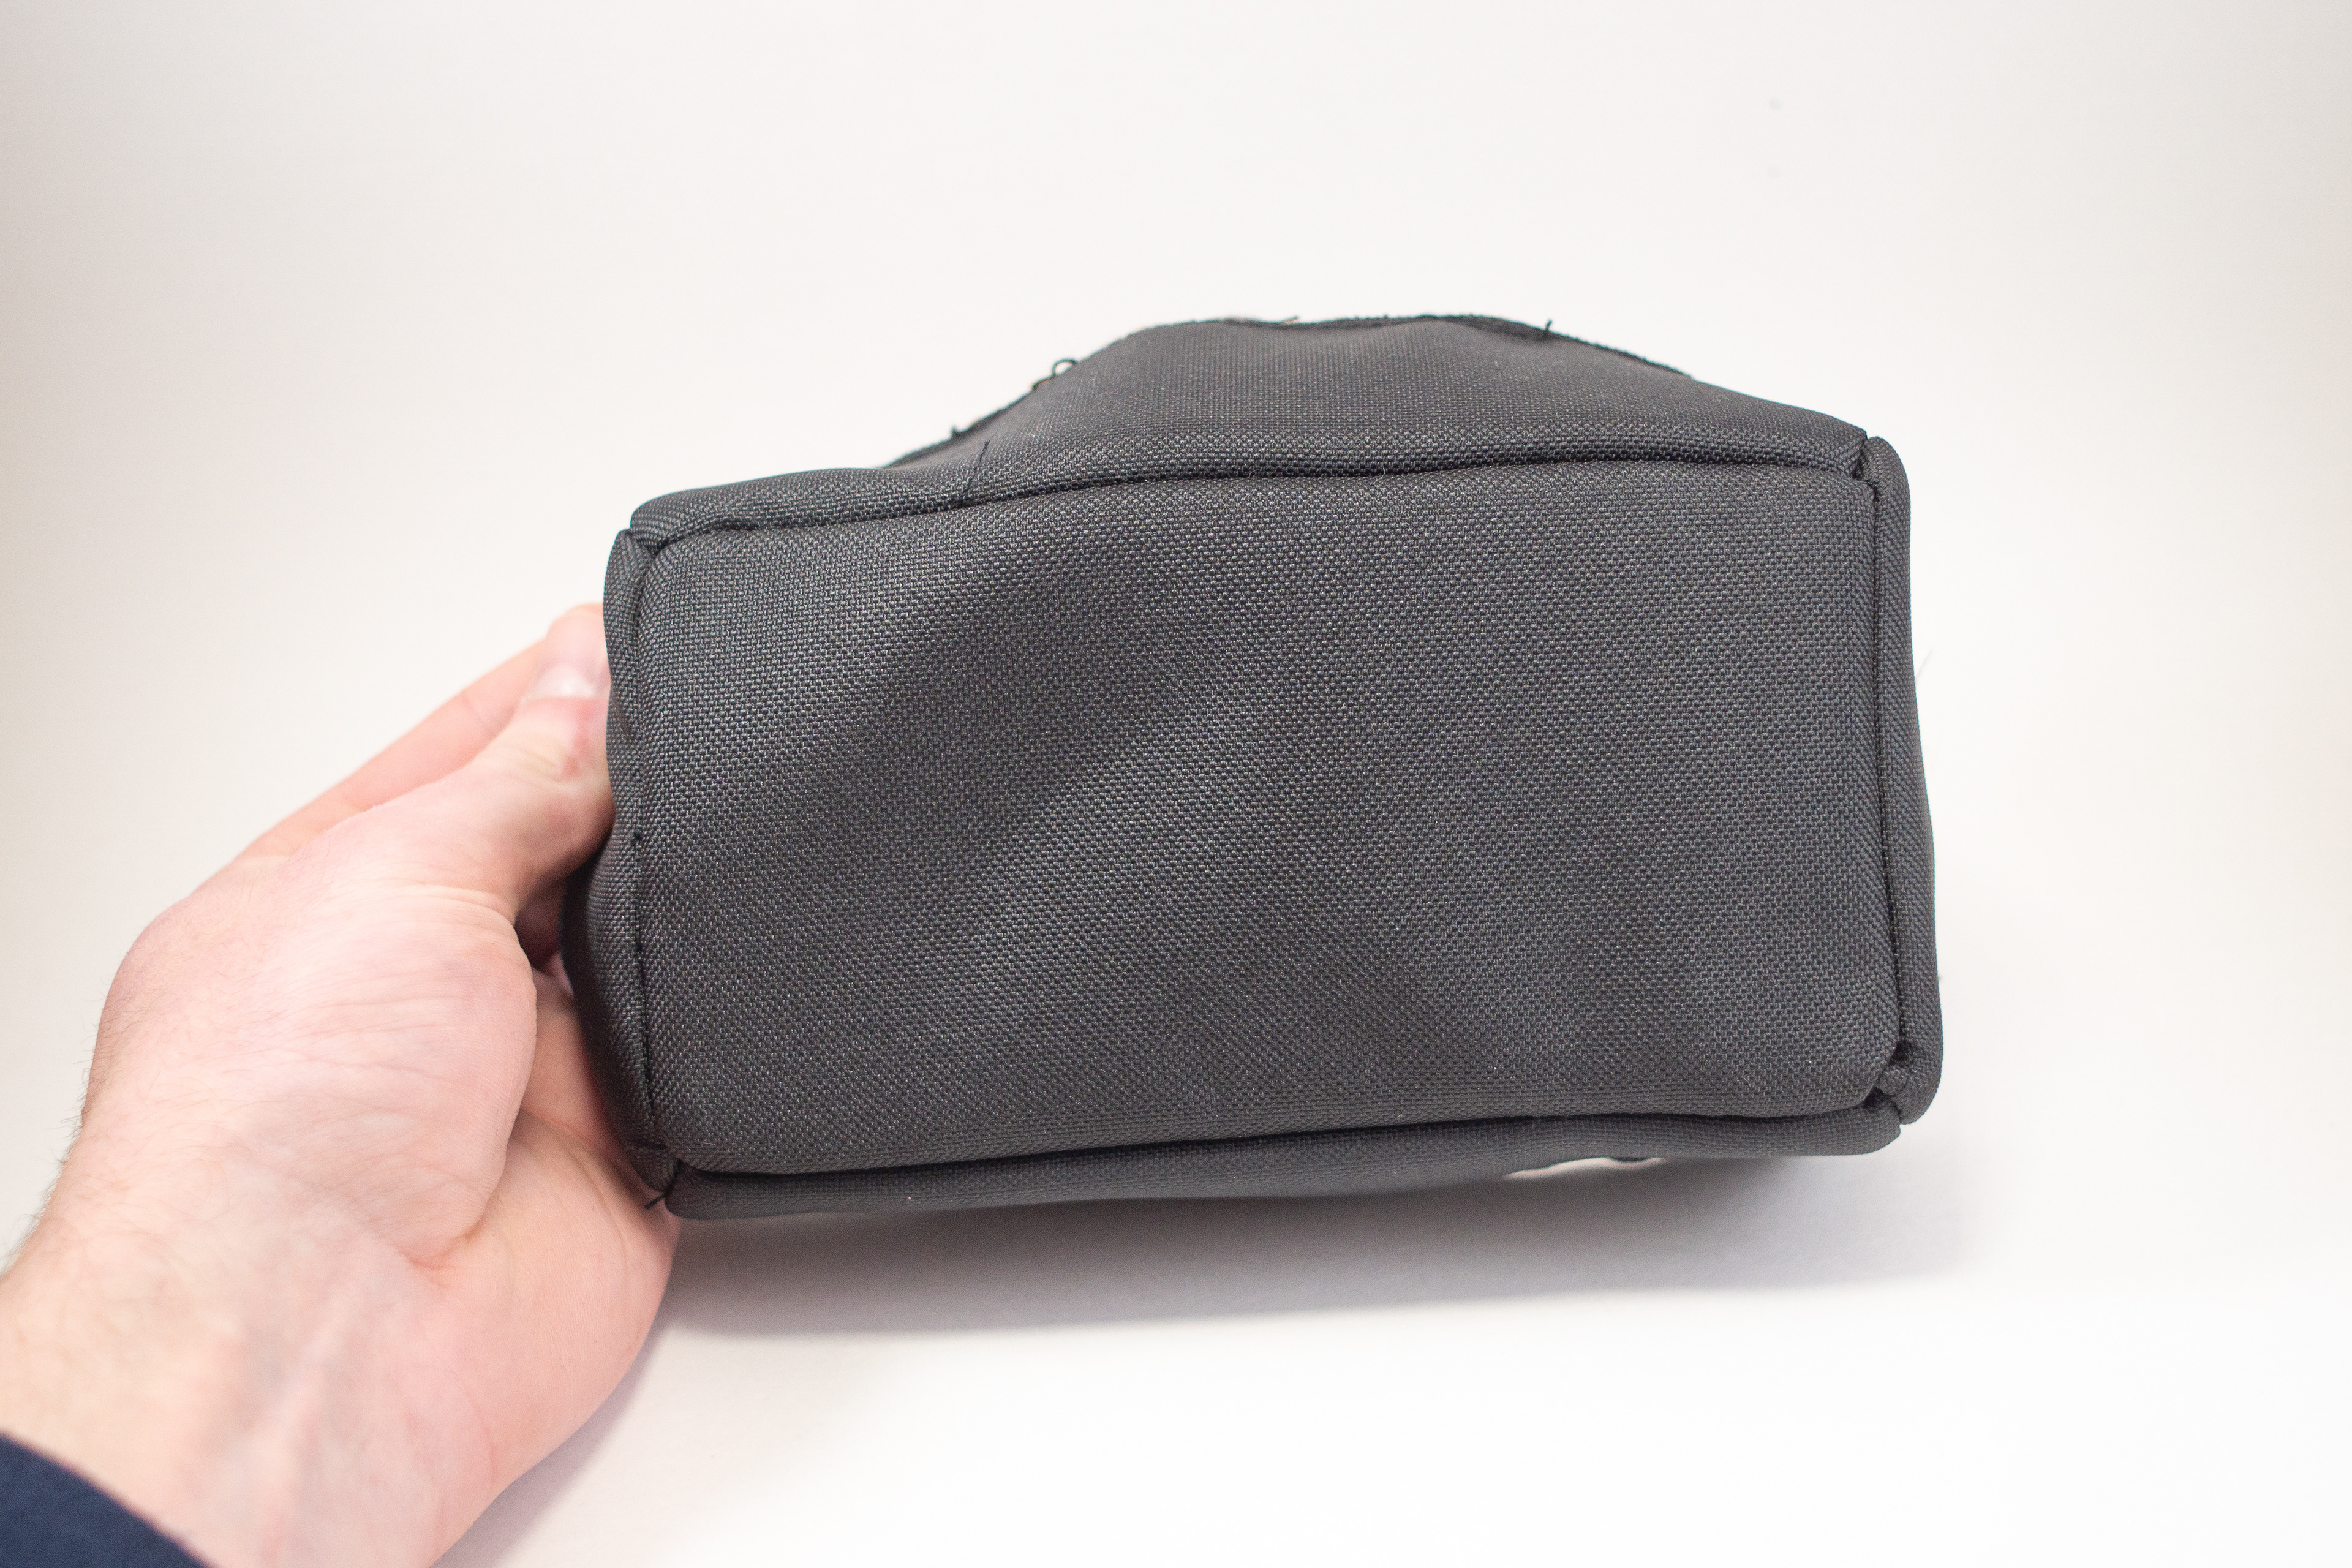
In this round I had balanced the pattern, going from a 2 panel side to a 4 panel side, making it easier to line up the side seams with the corners of the bottom panel. I also looked at a camera bag I had laying around, something I should have done from the start. I realized that the foam was enclosed between the body and the liner fabric creating a pocket for it to sit in. This method worked out and as an unintended side affect created a path for the binding to sit within between the creases of the foam panels meeting.
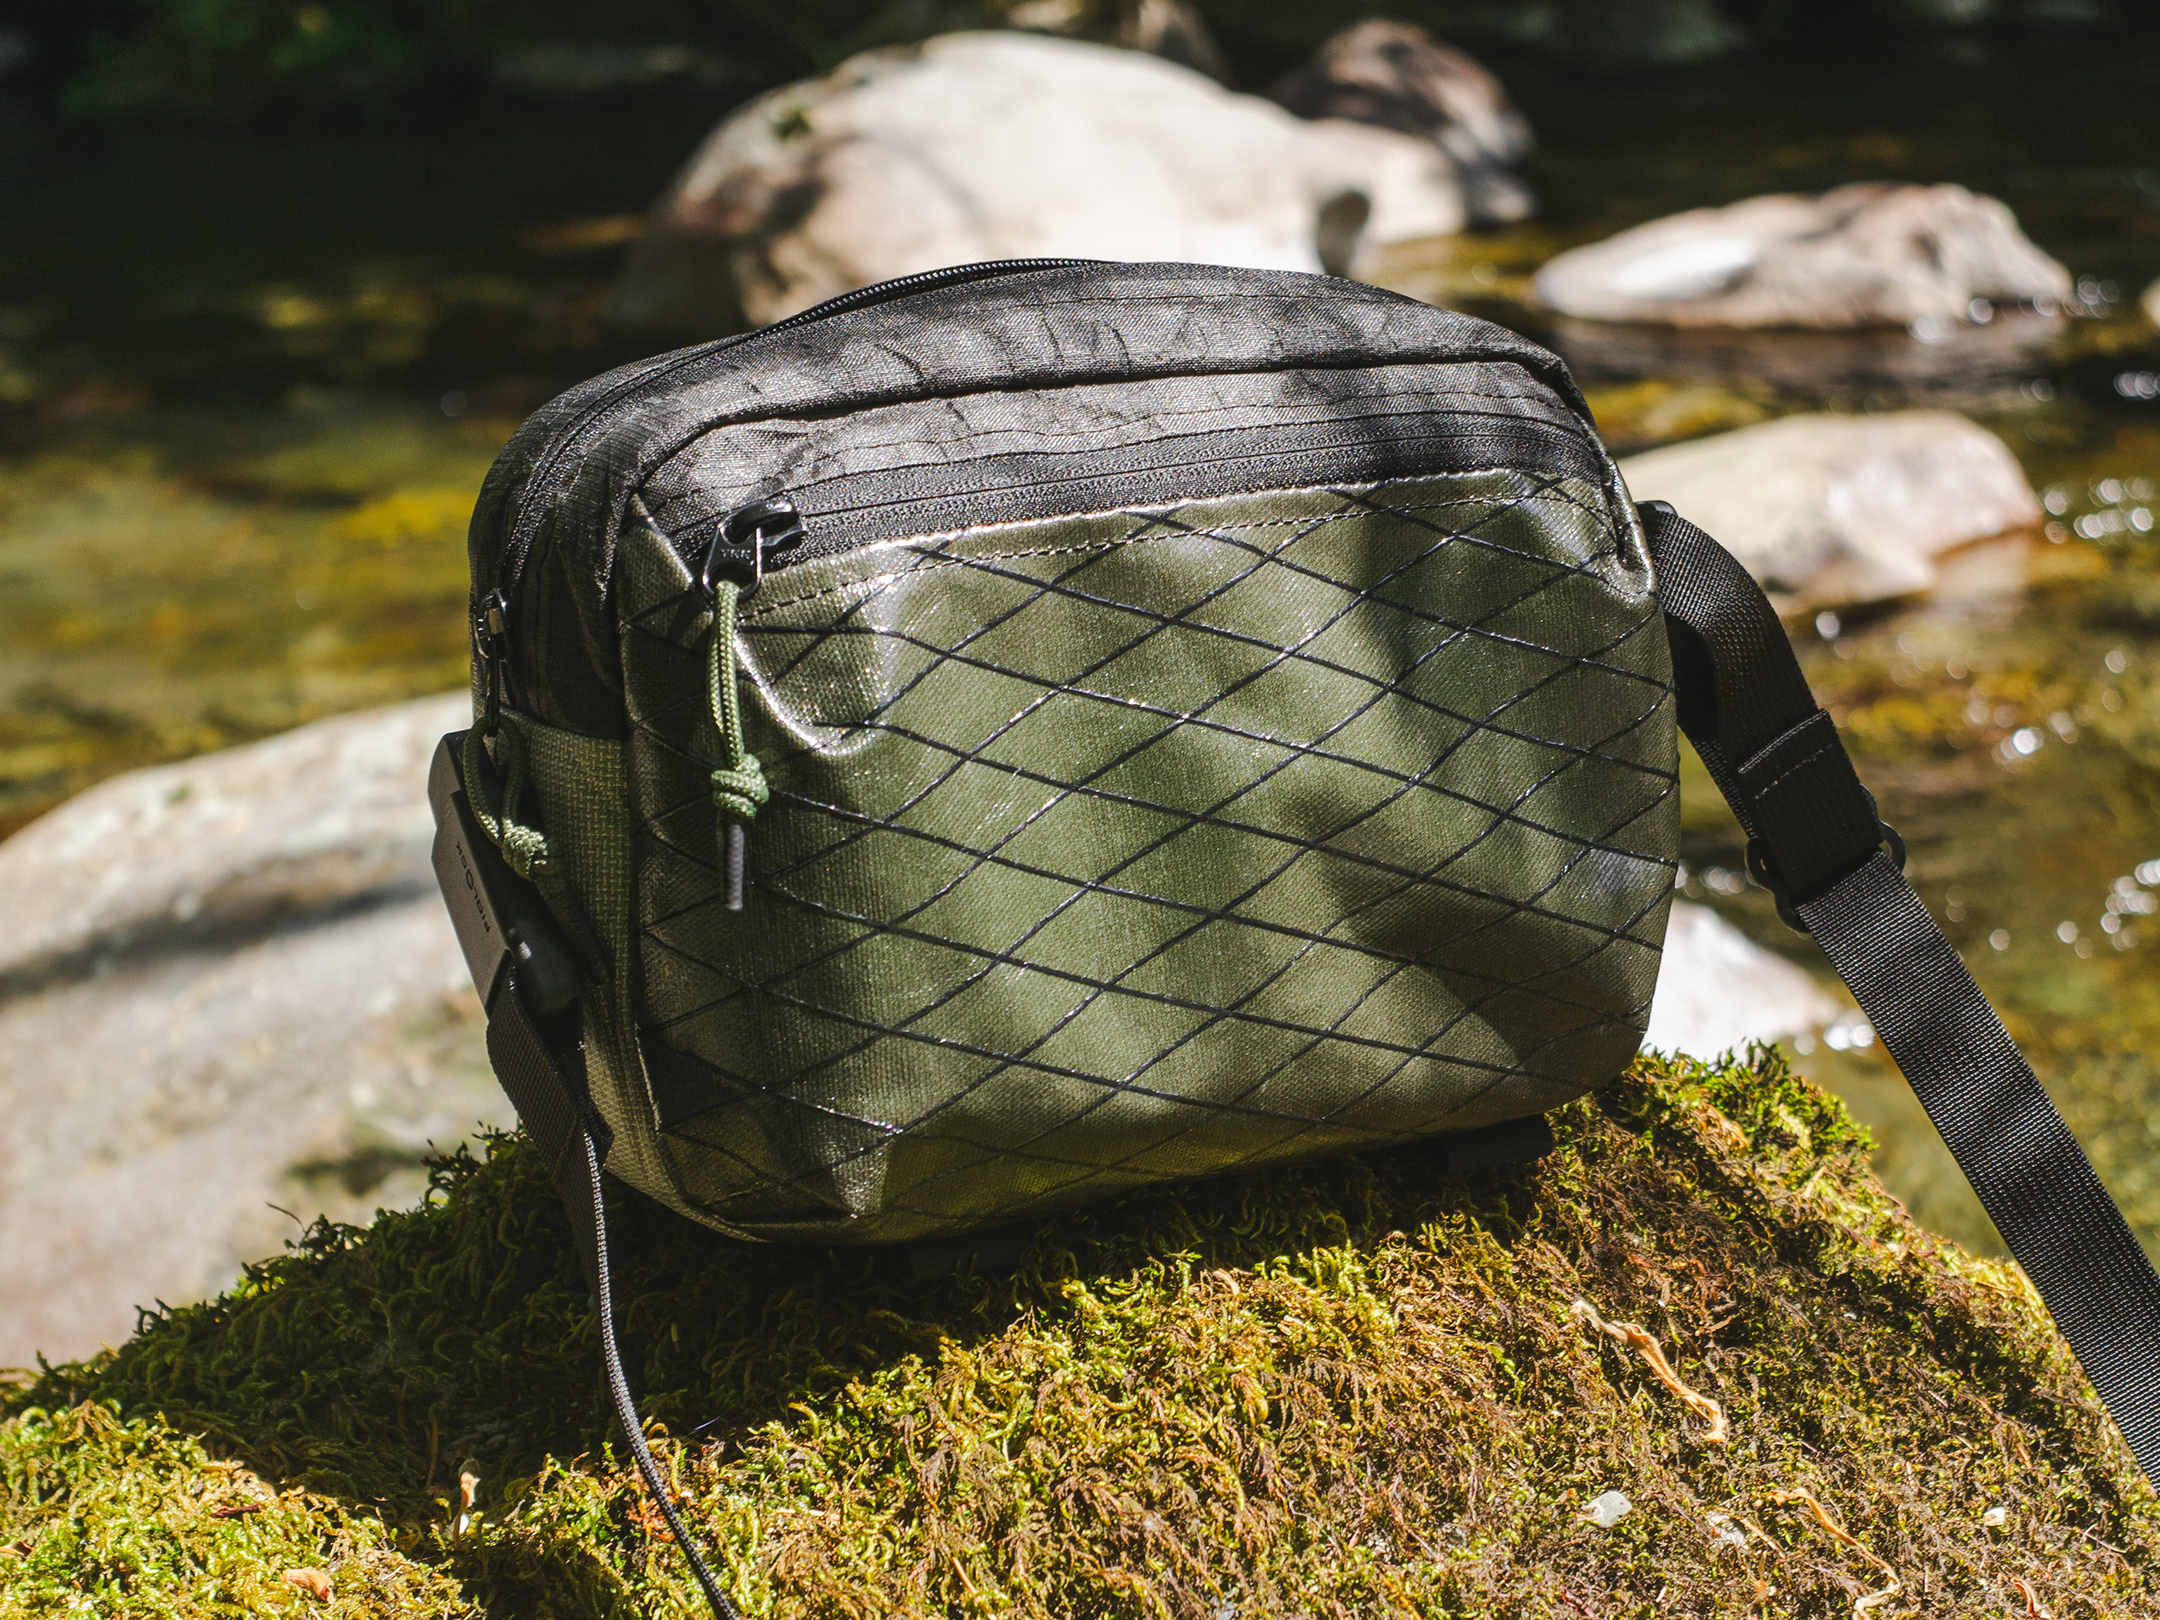
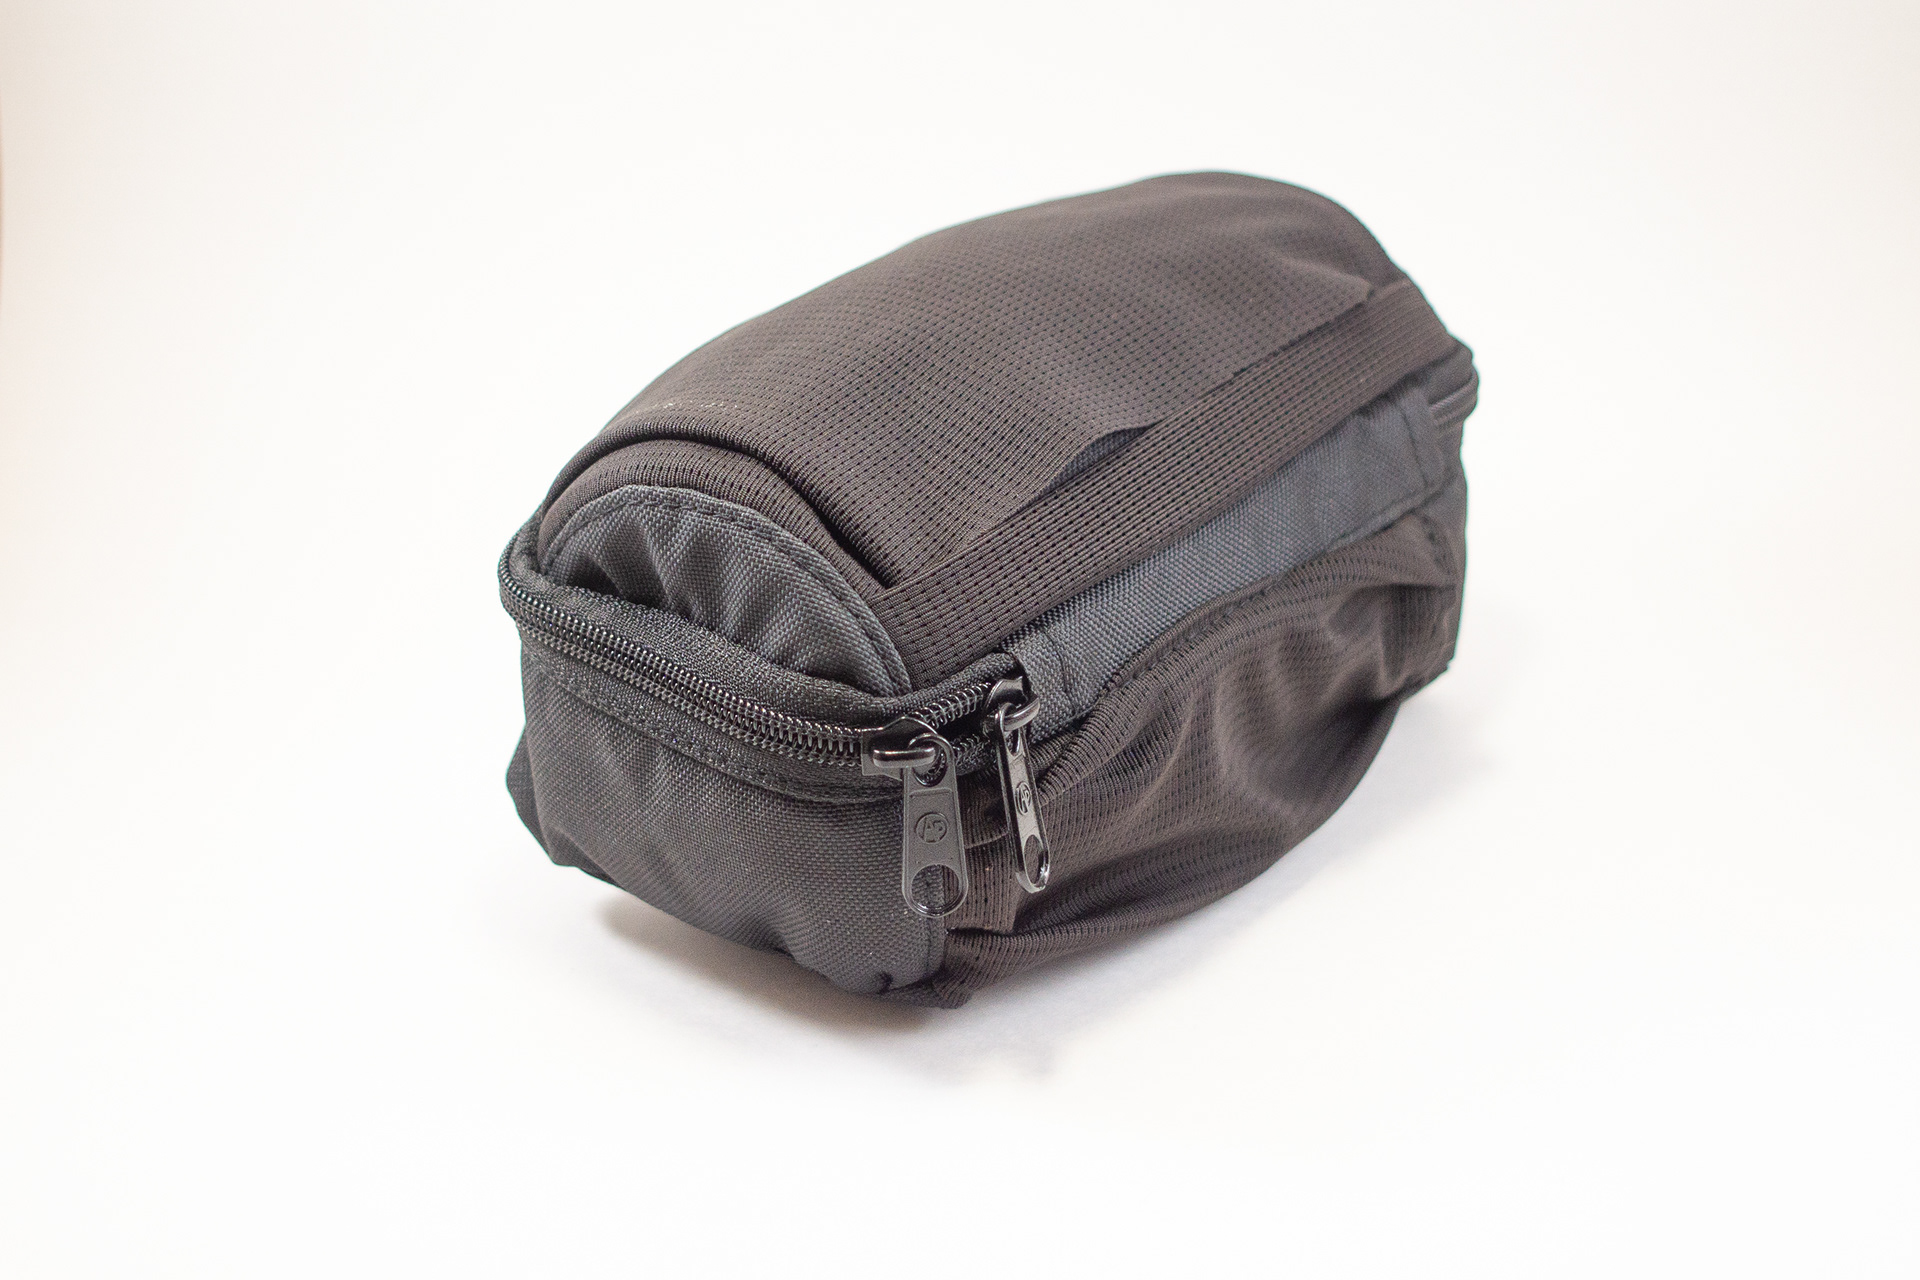
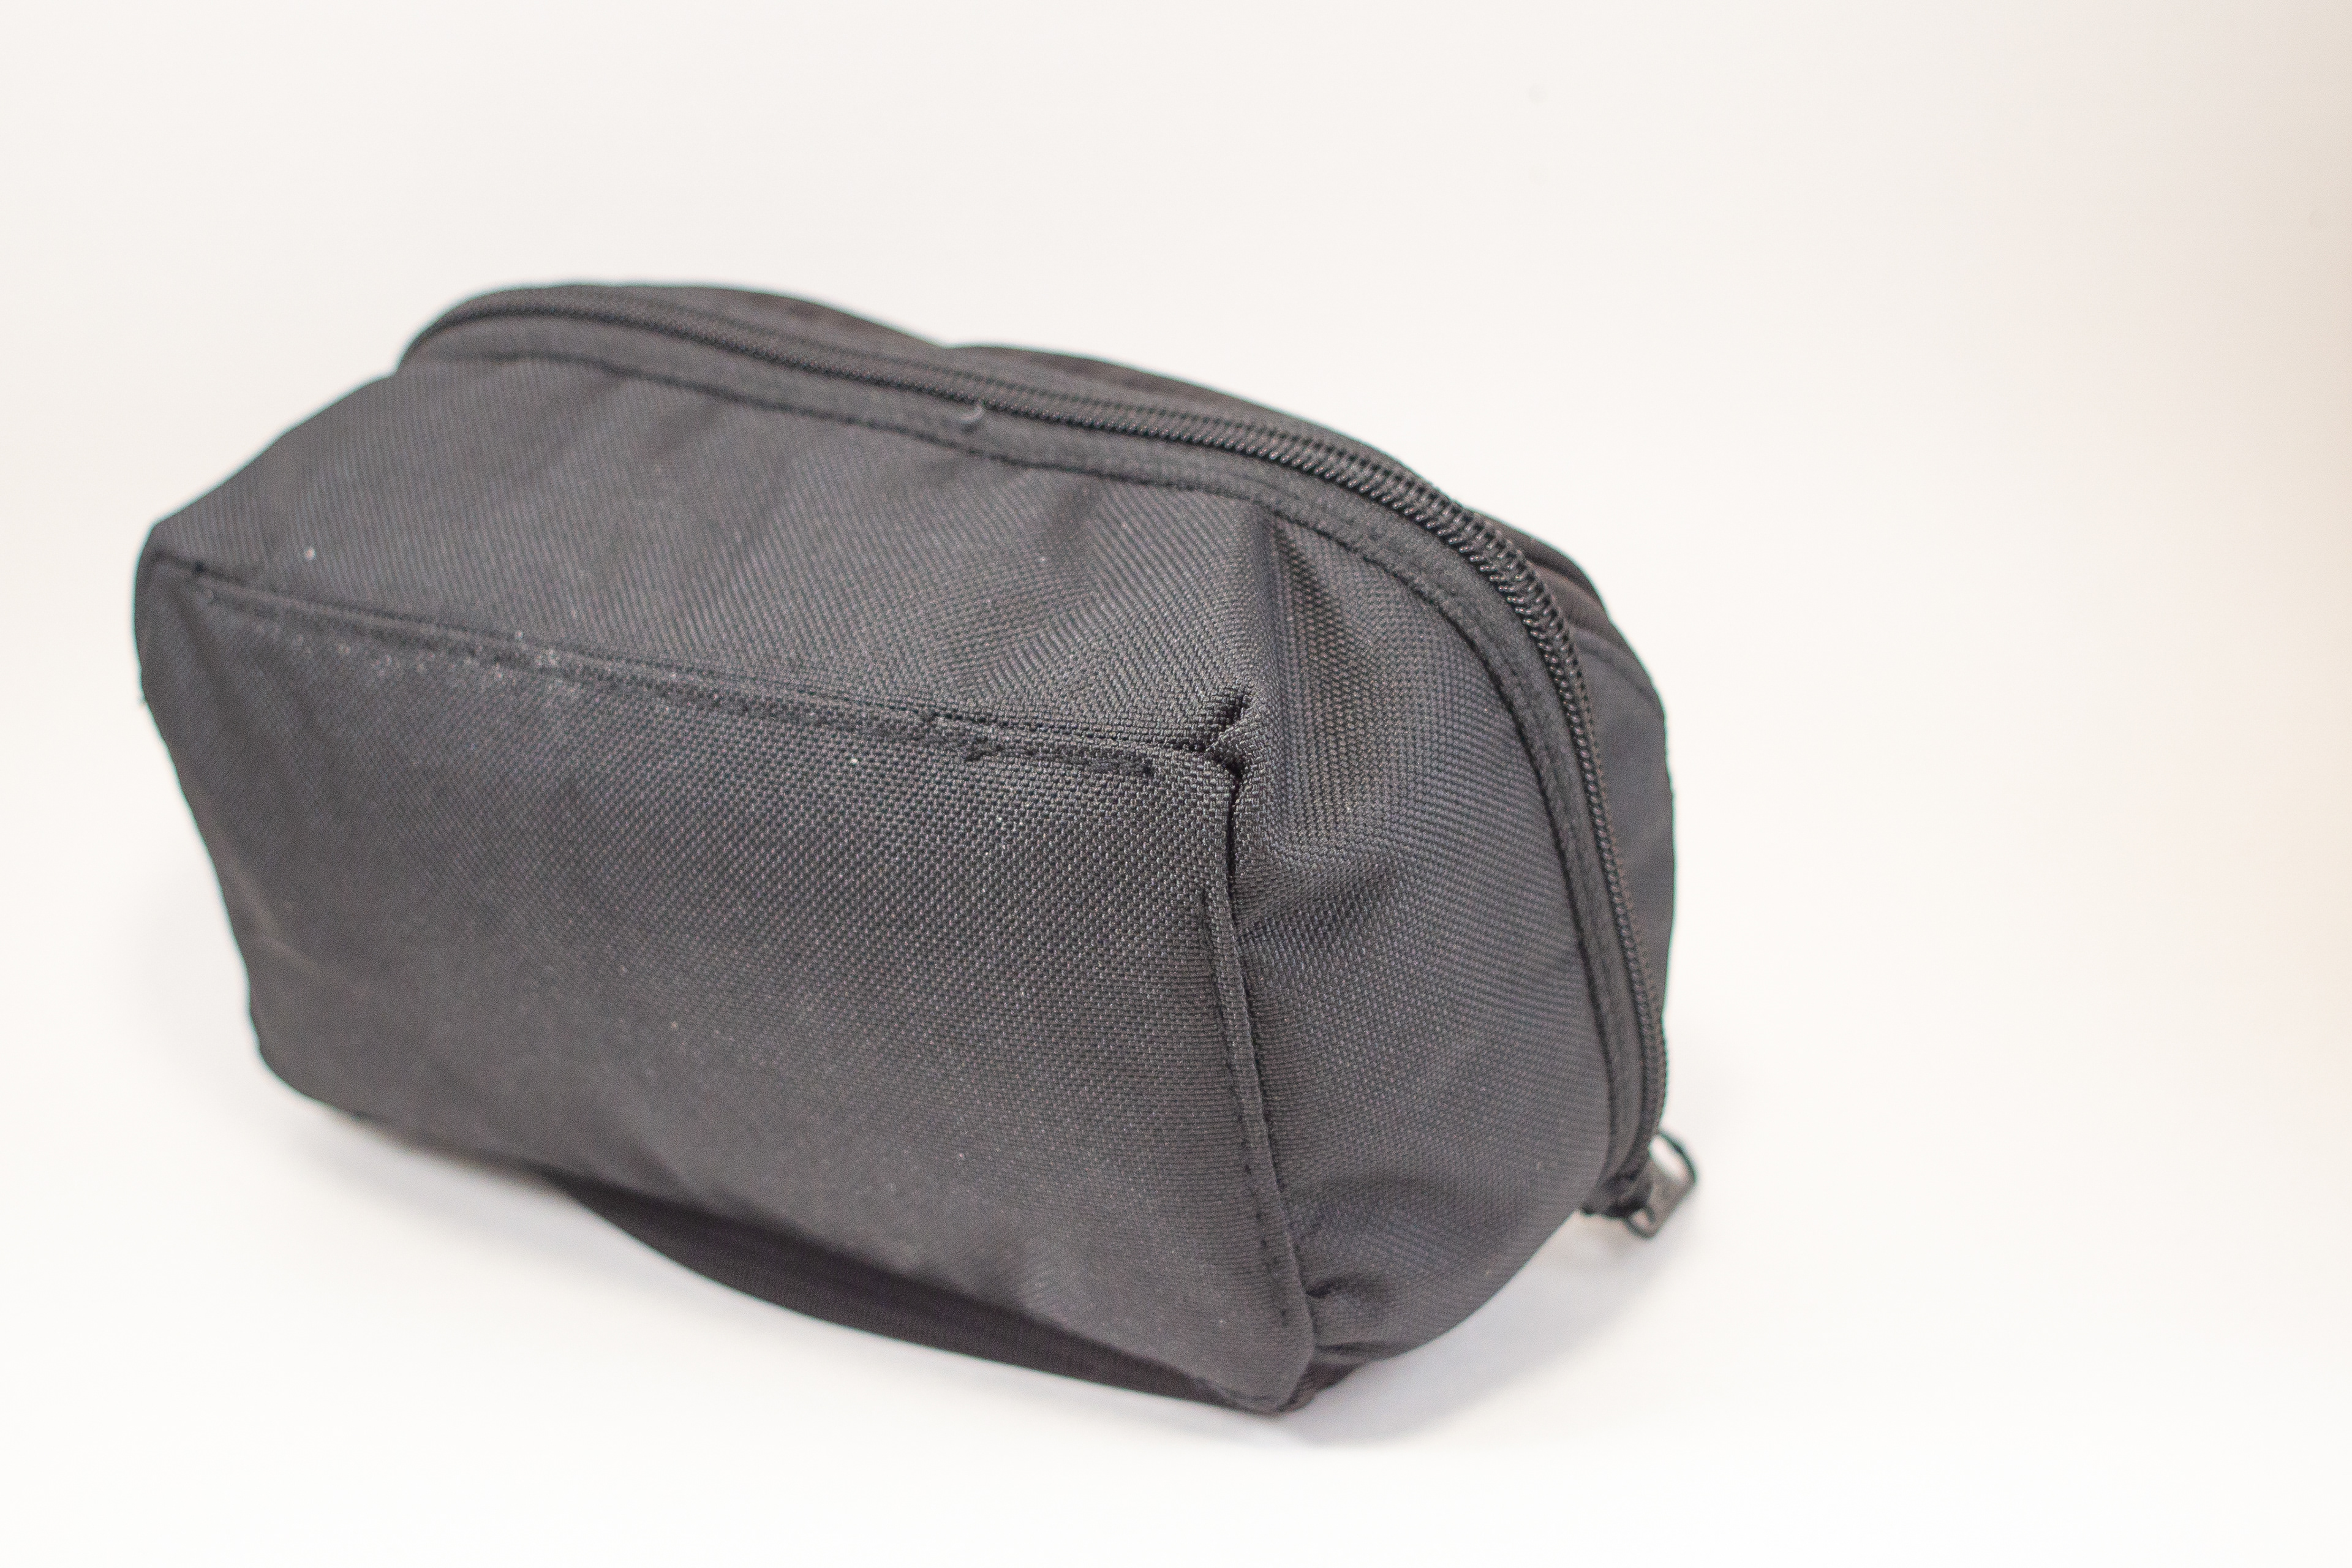
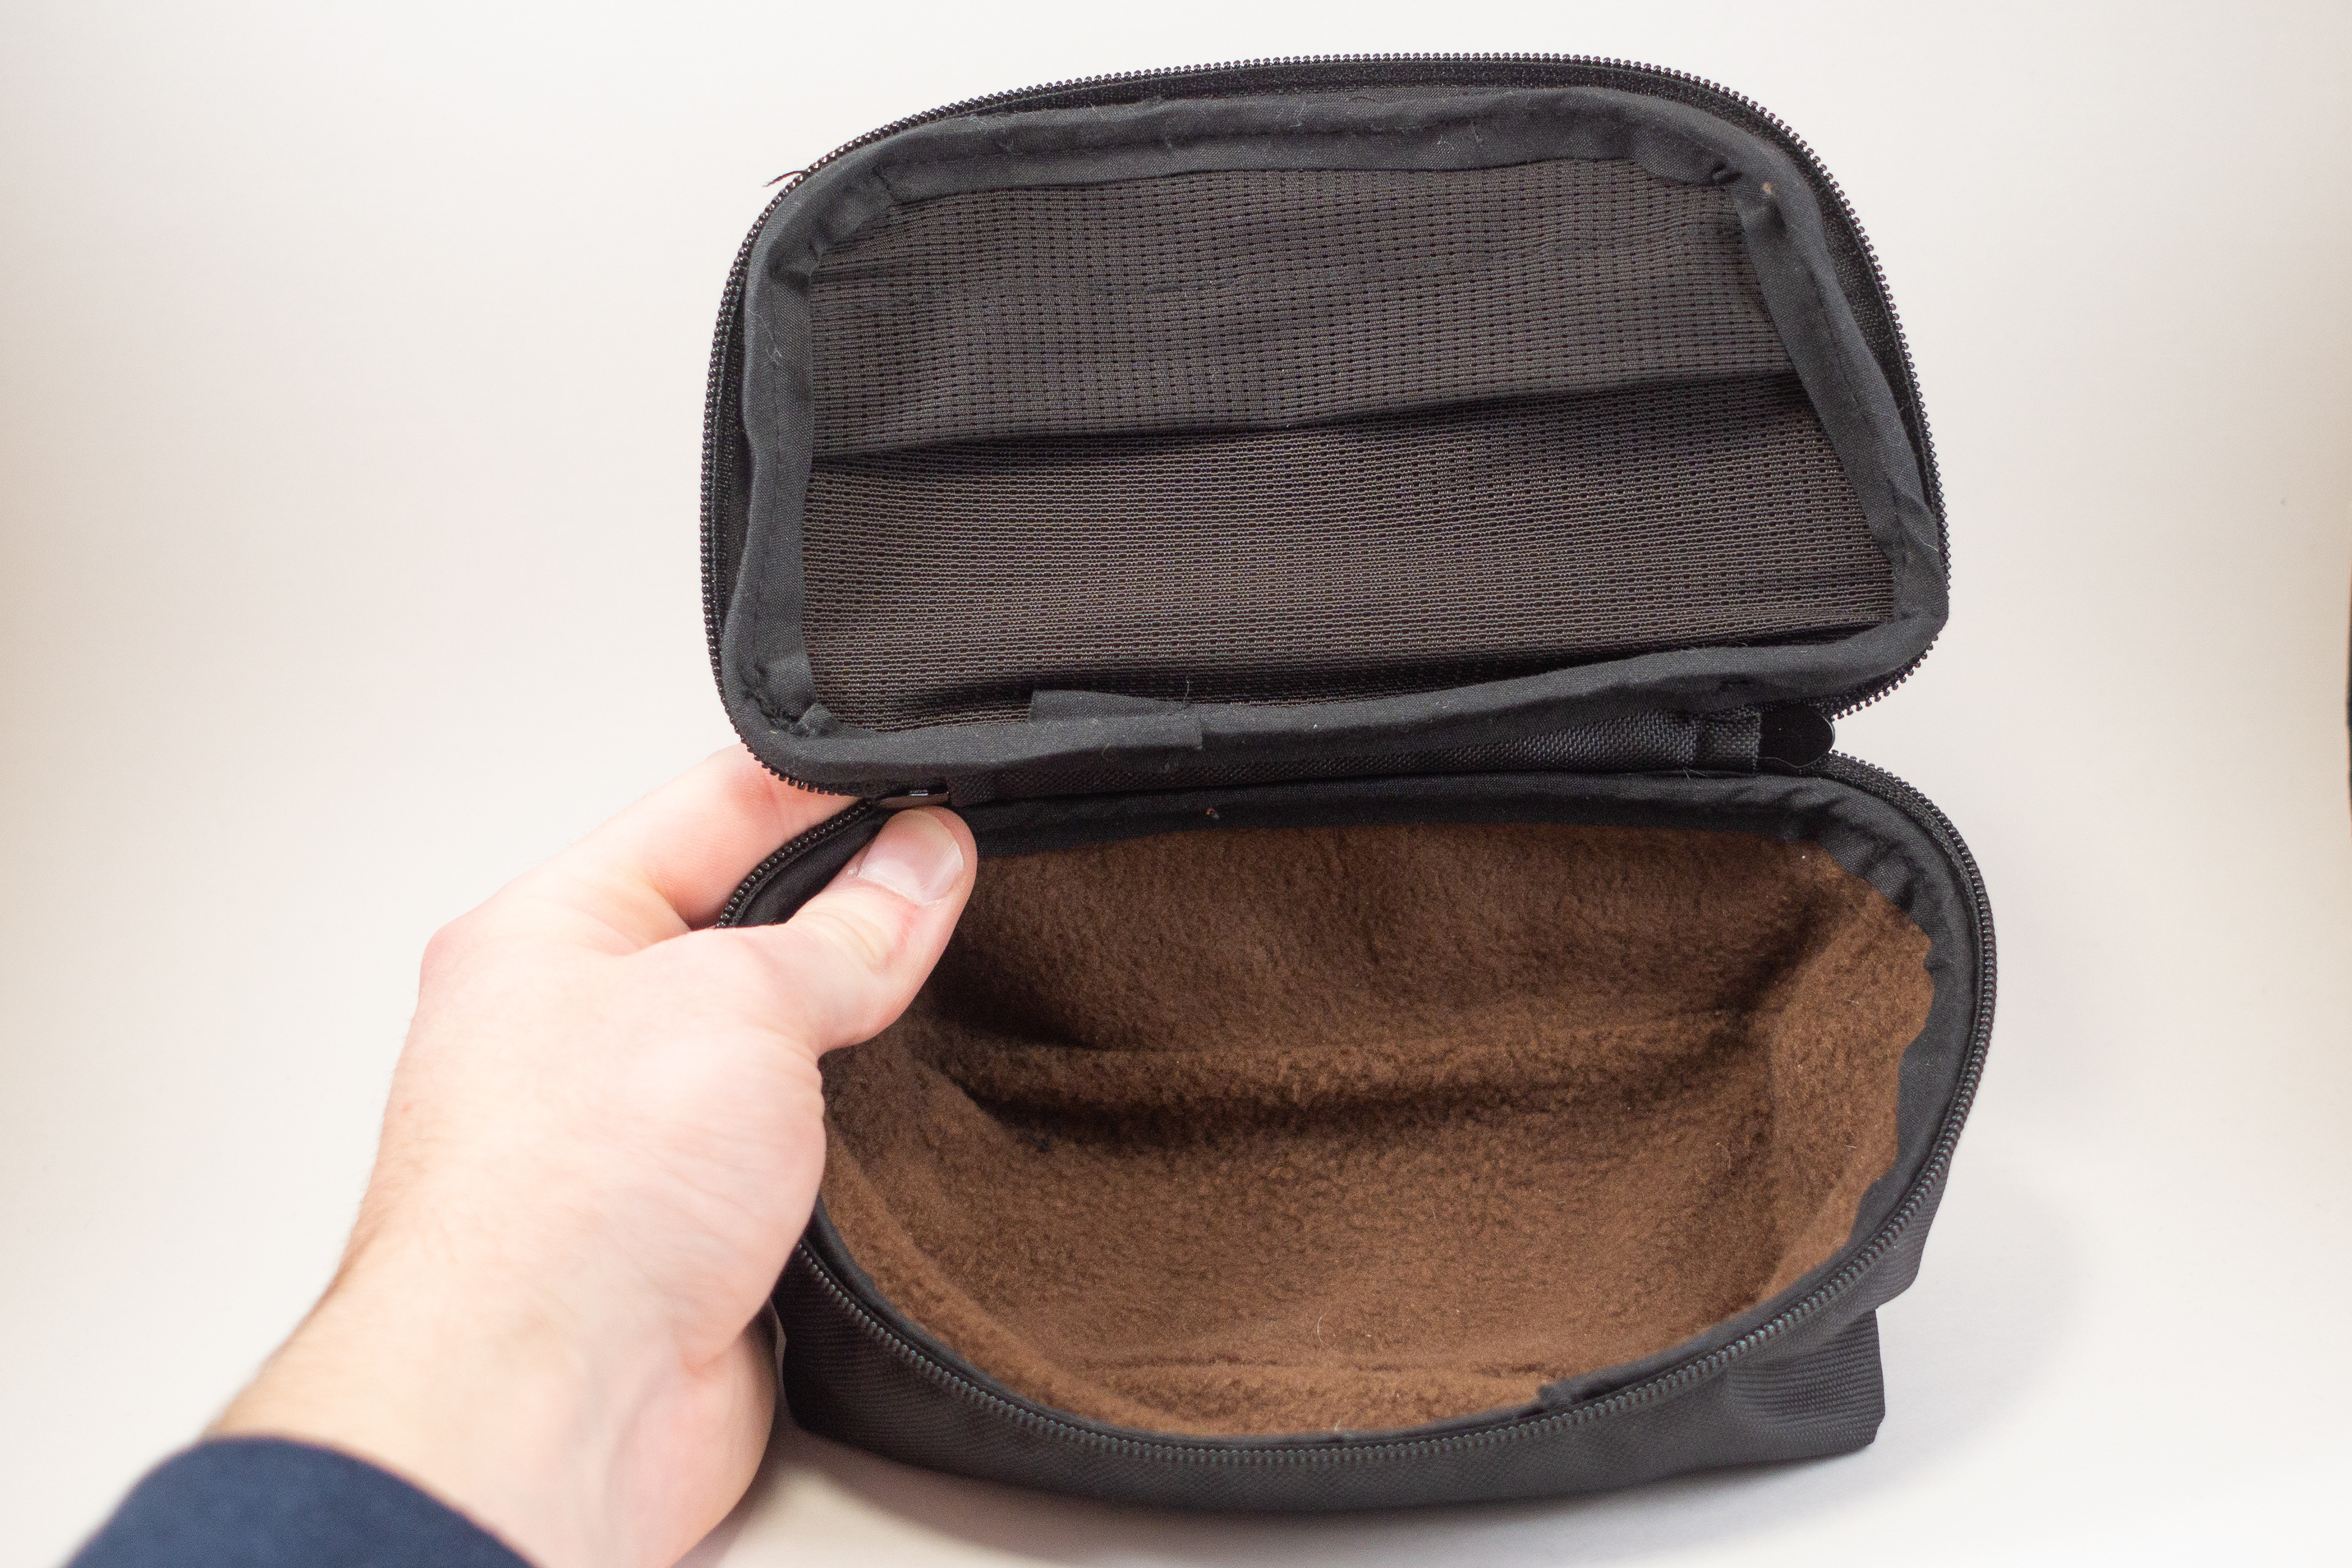
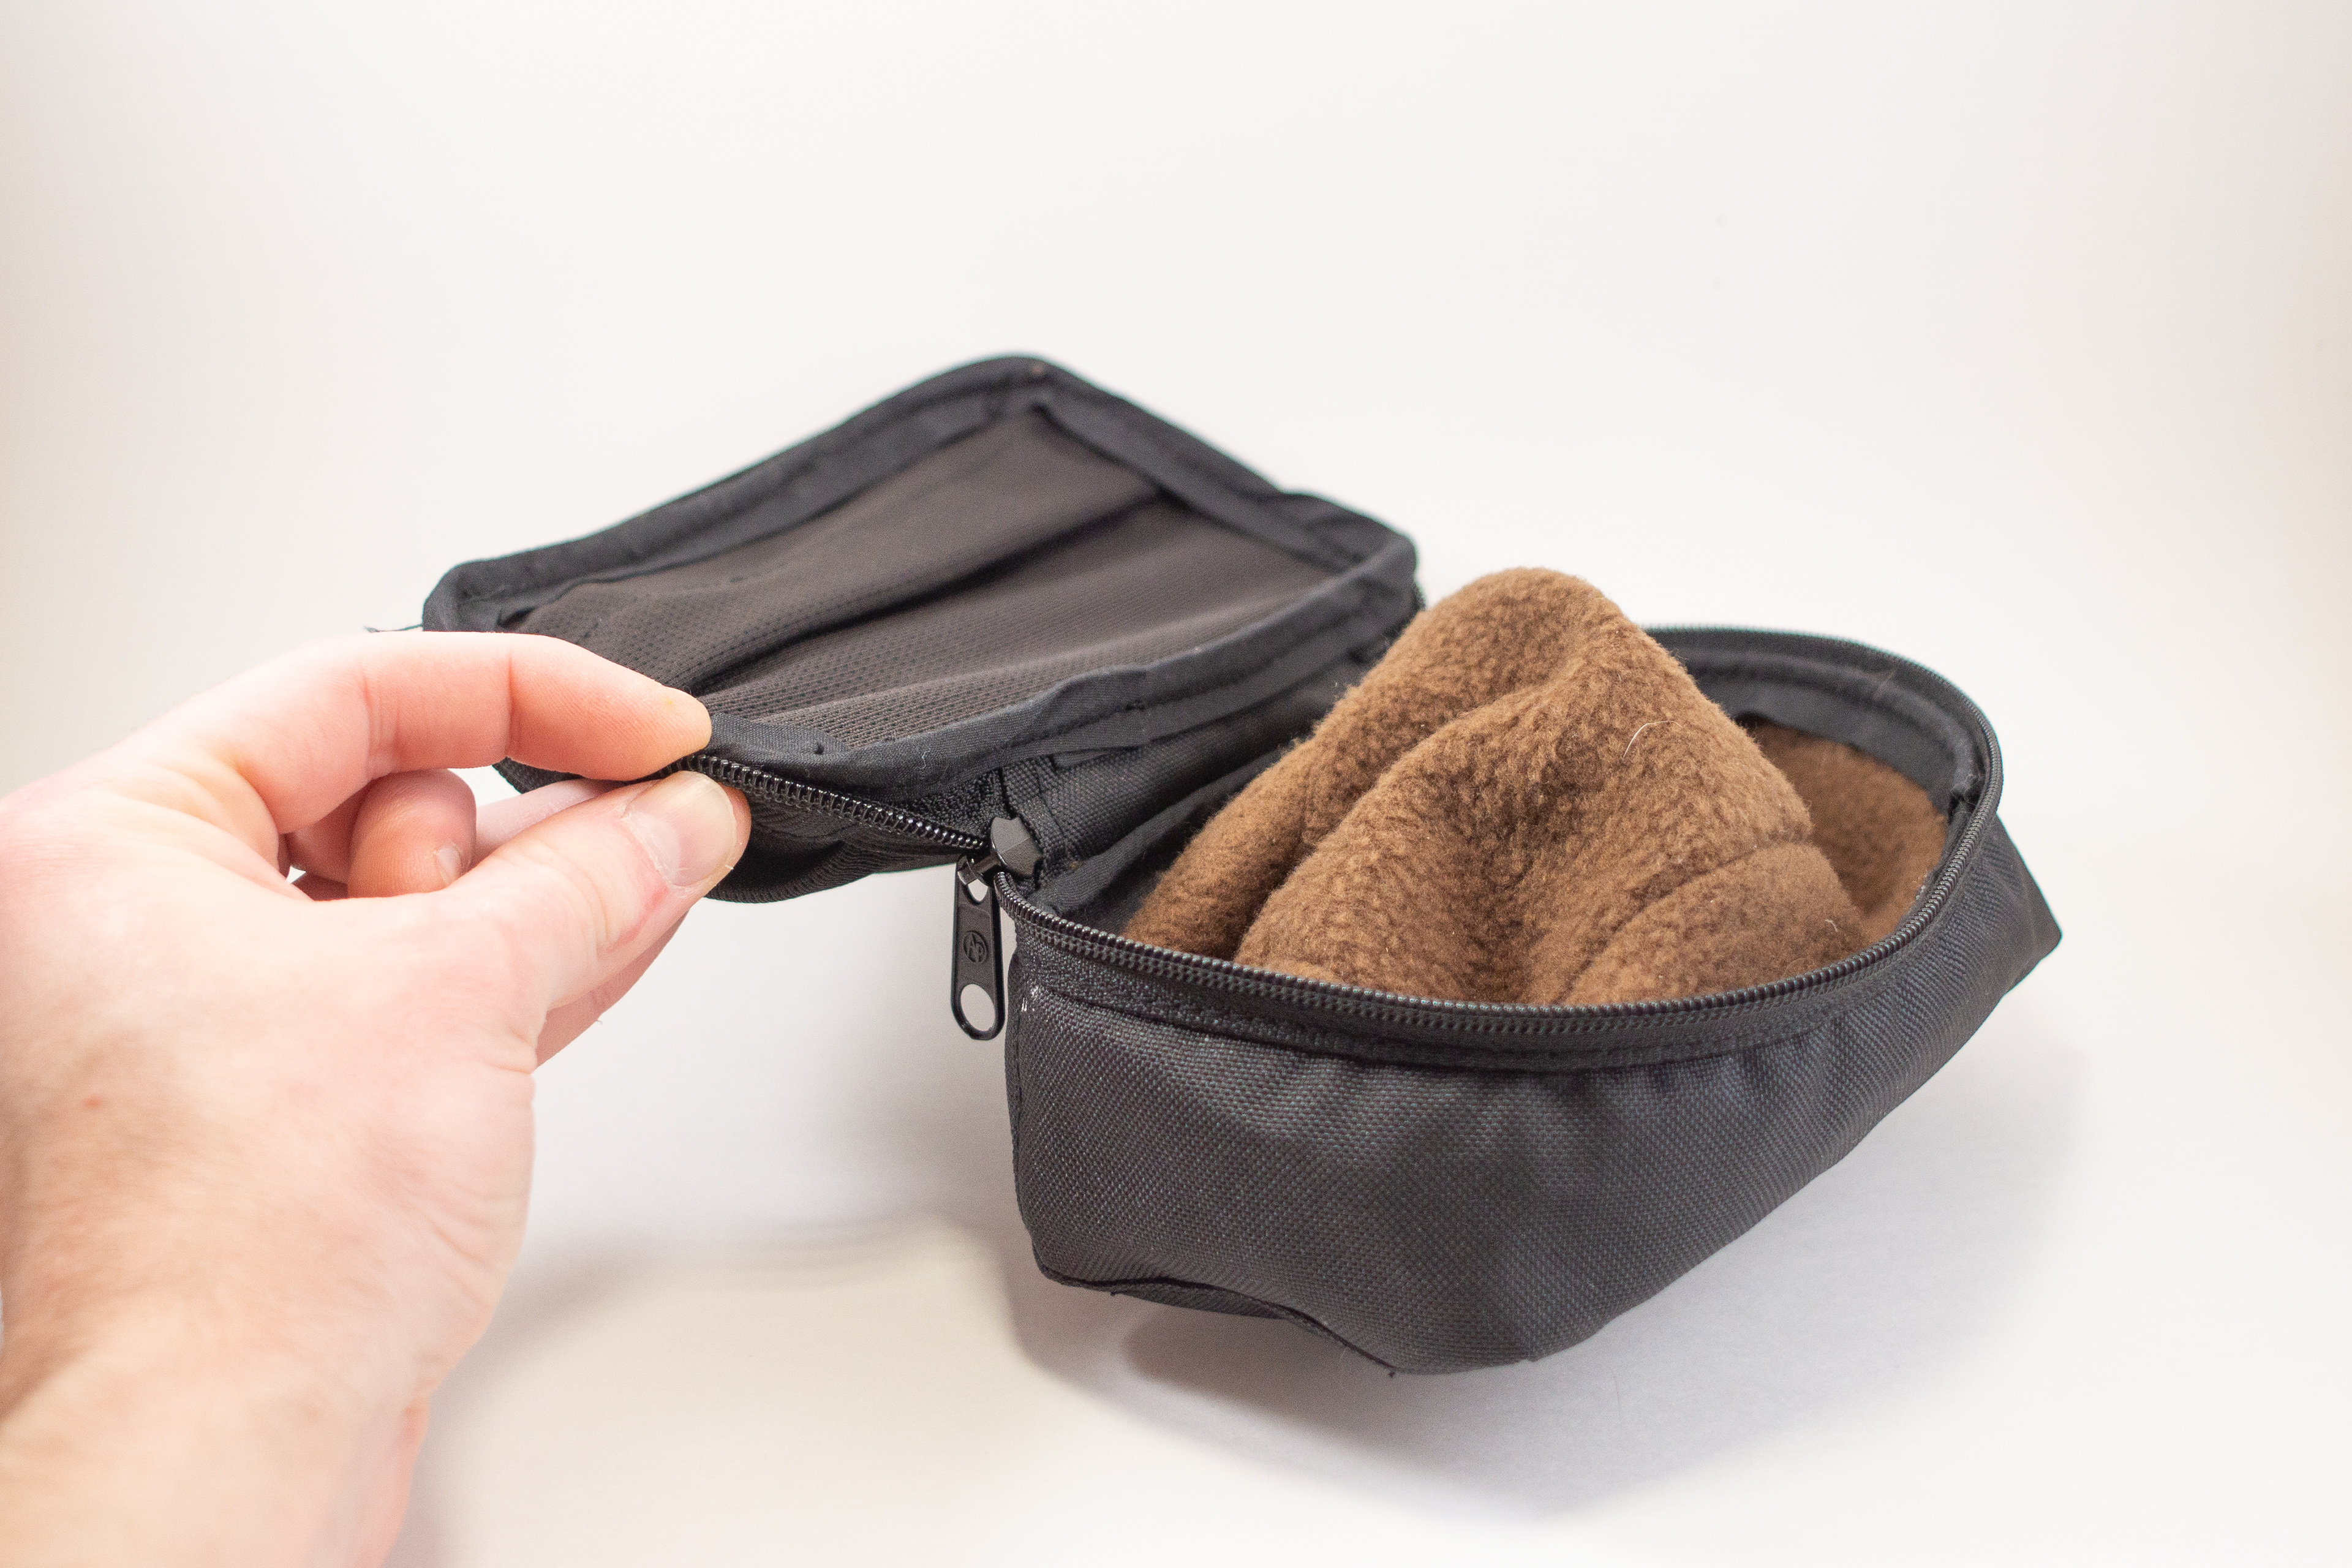
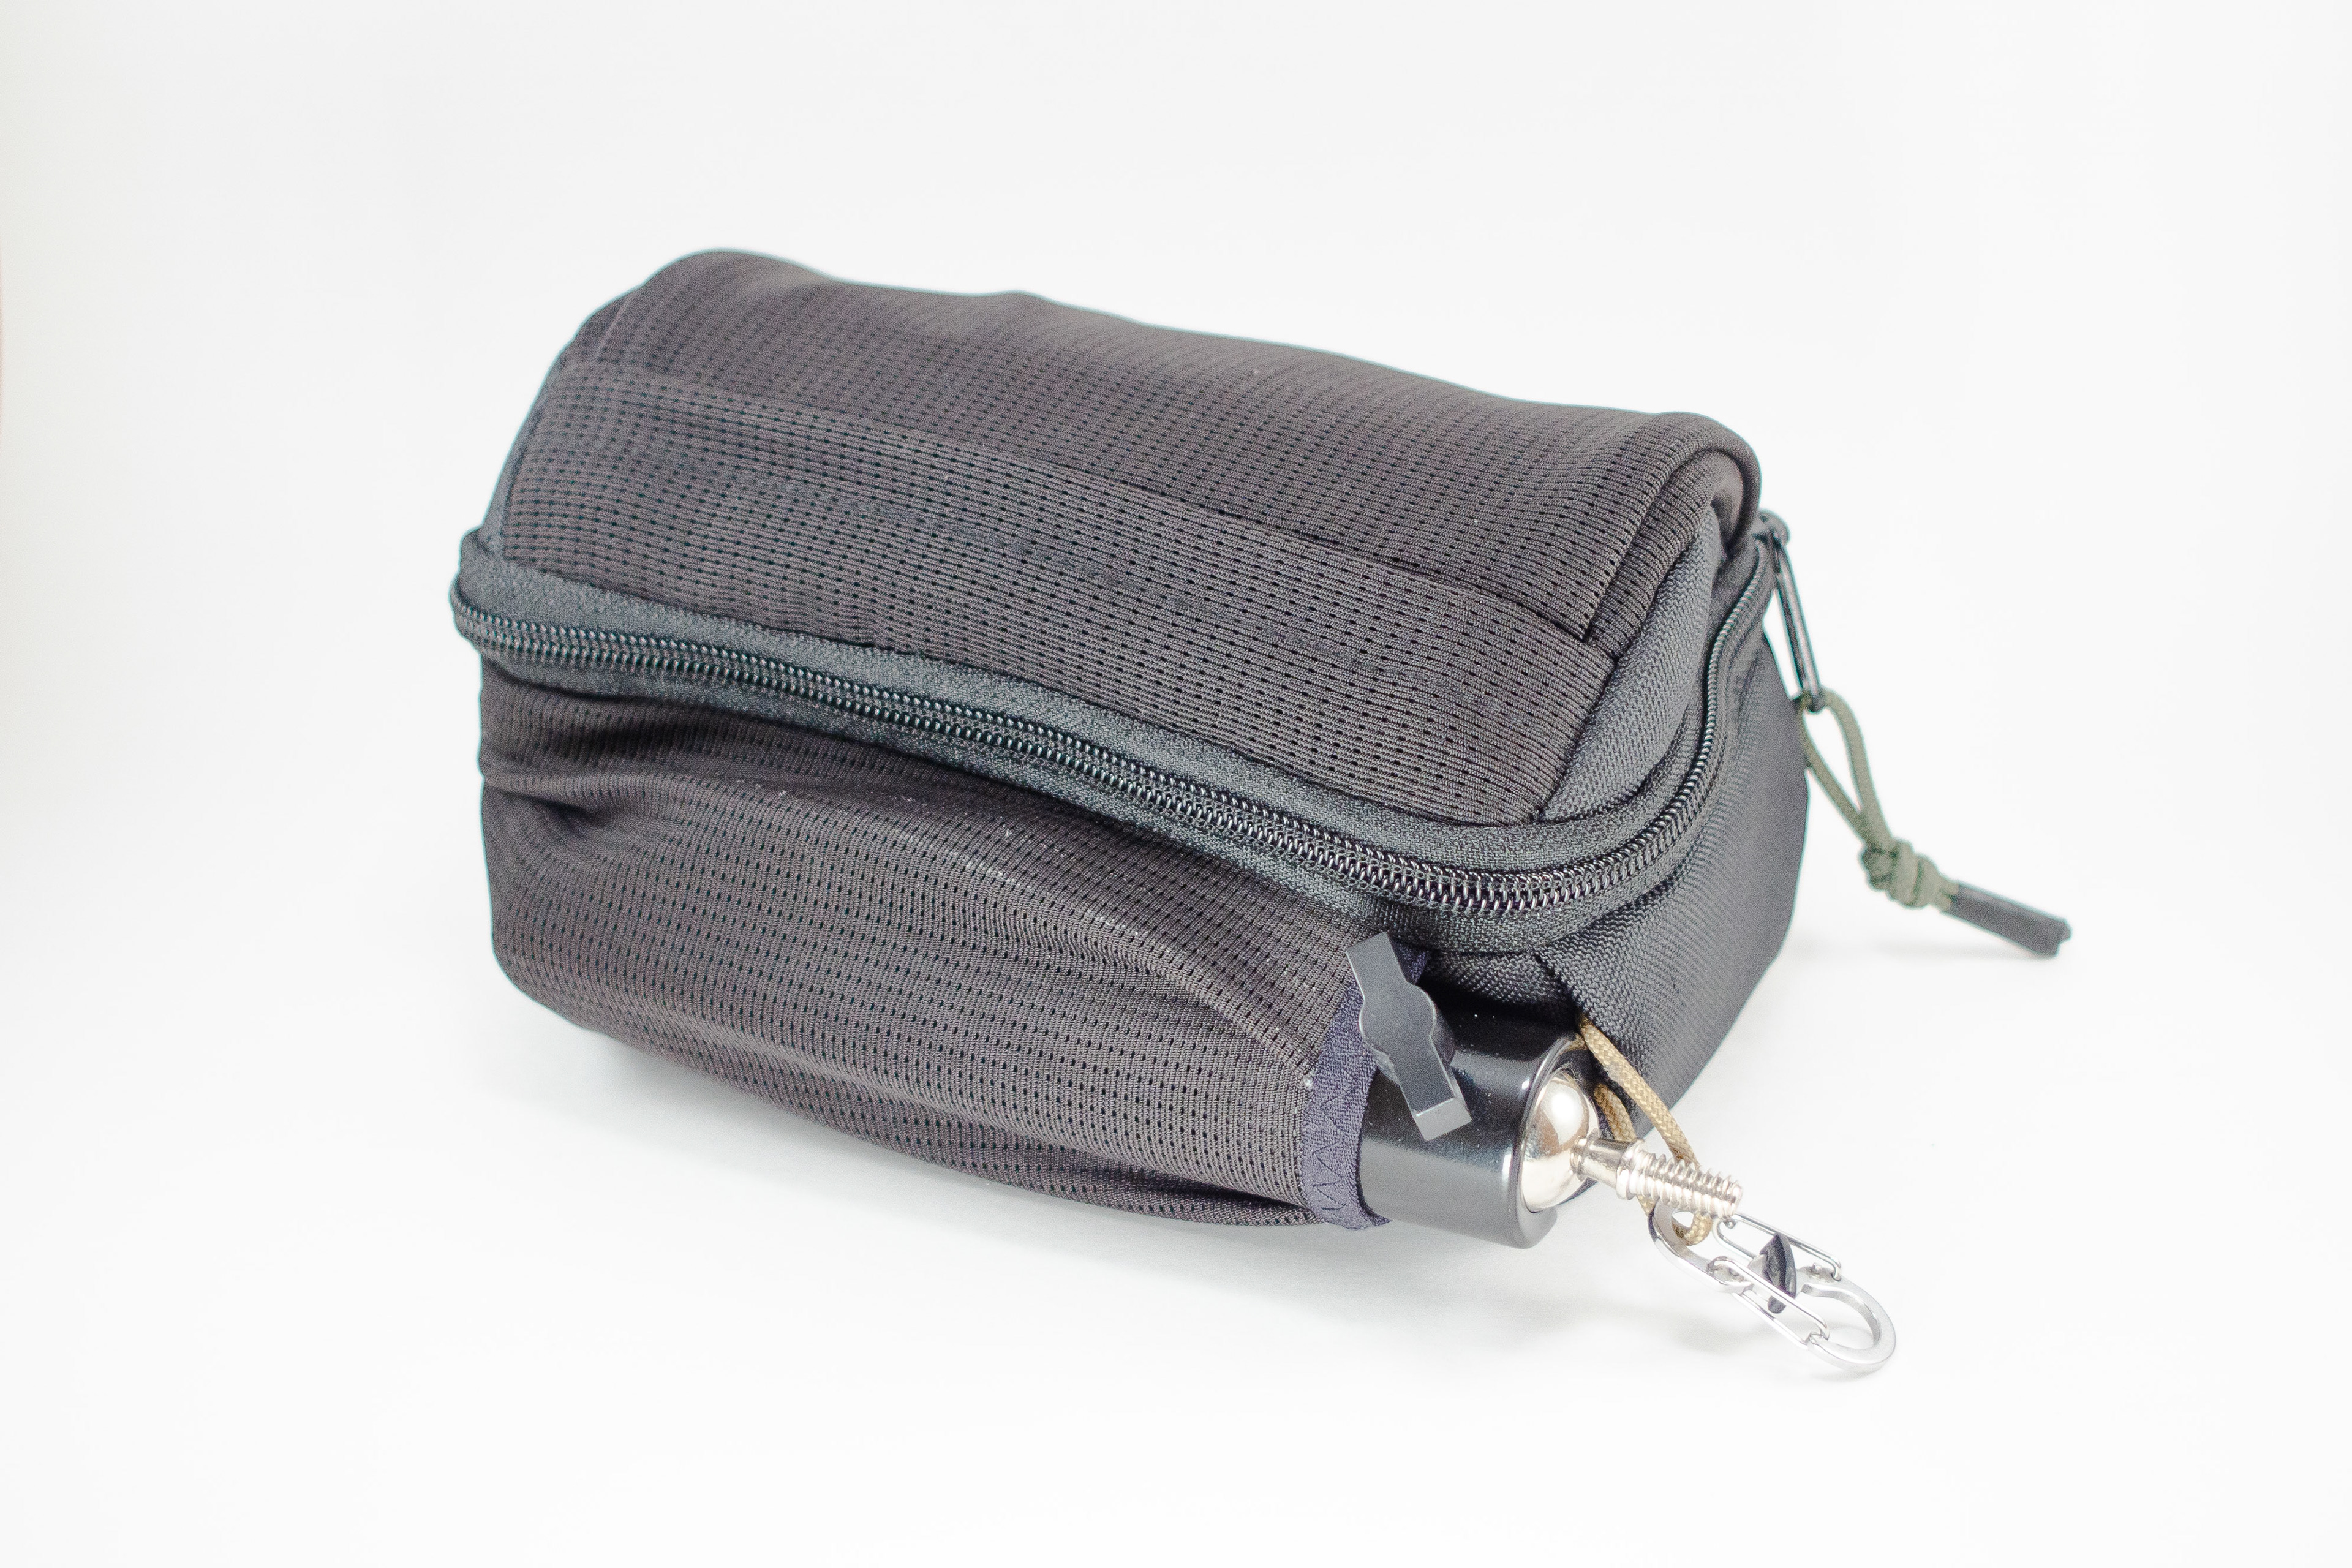
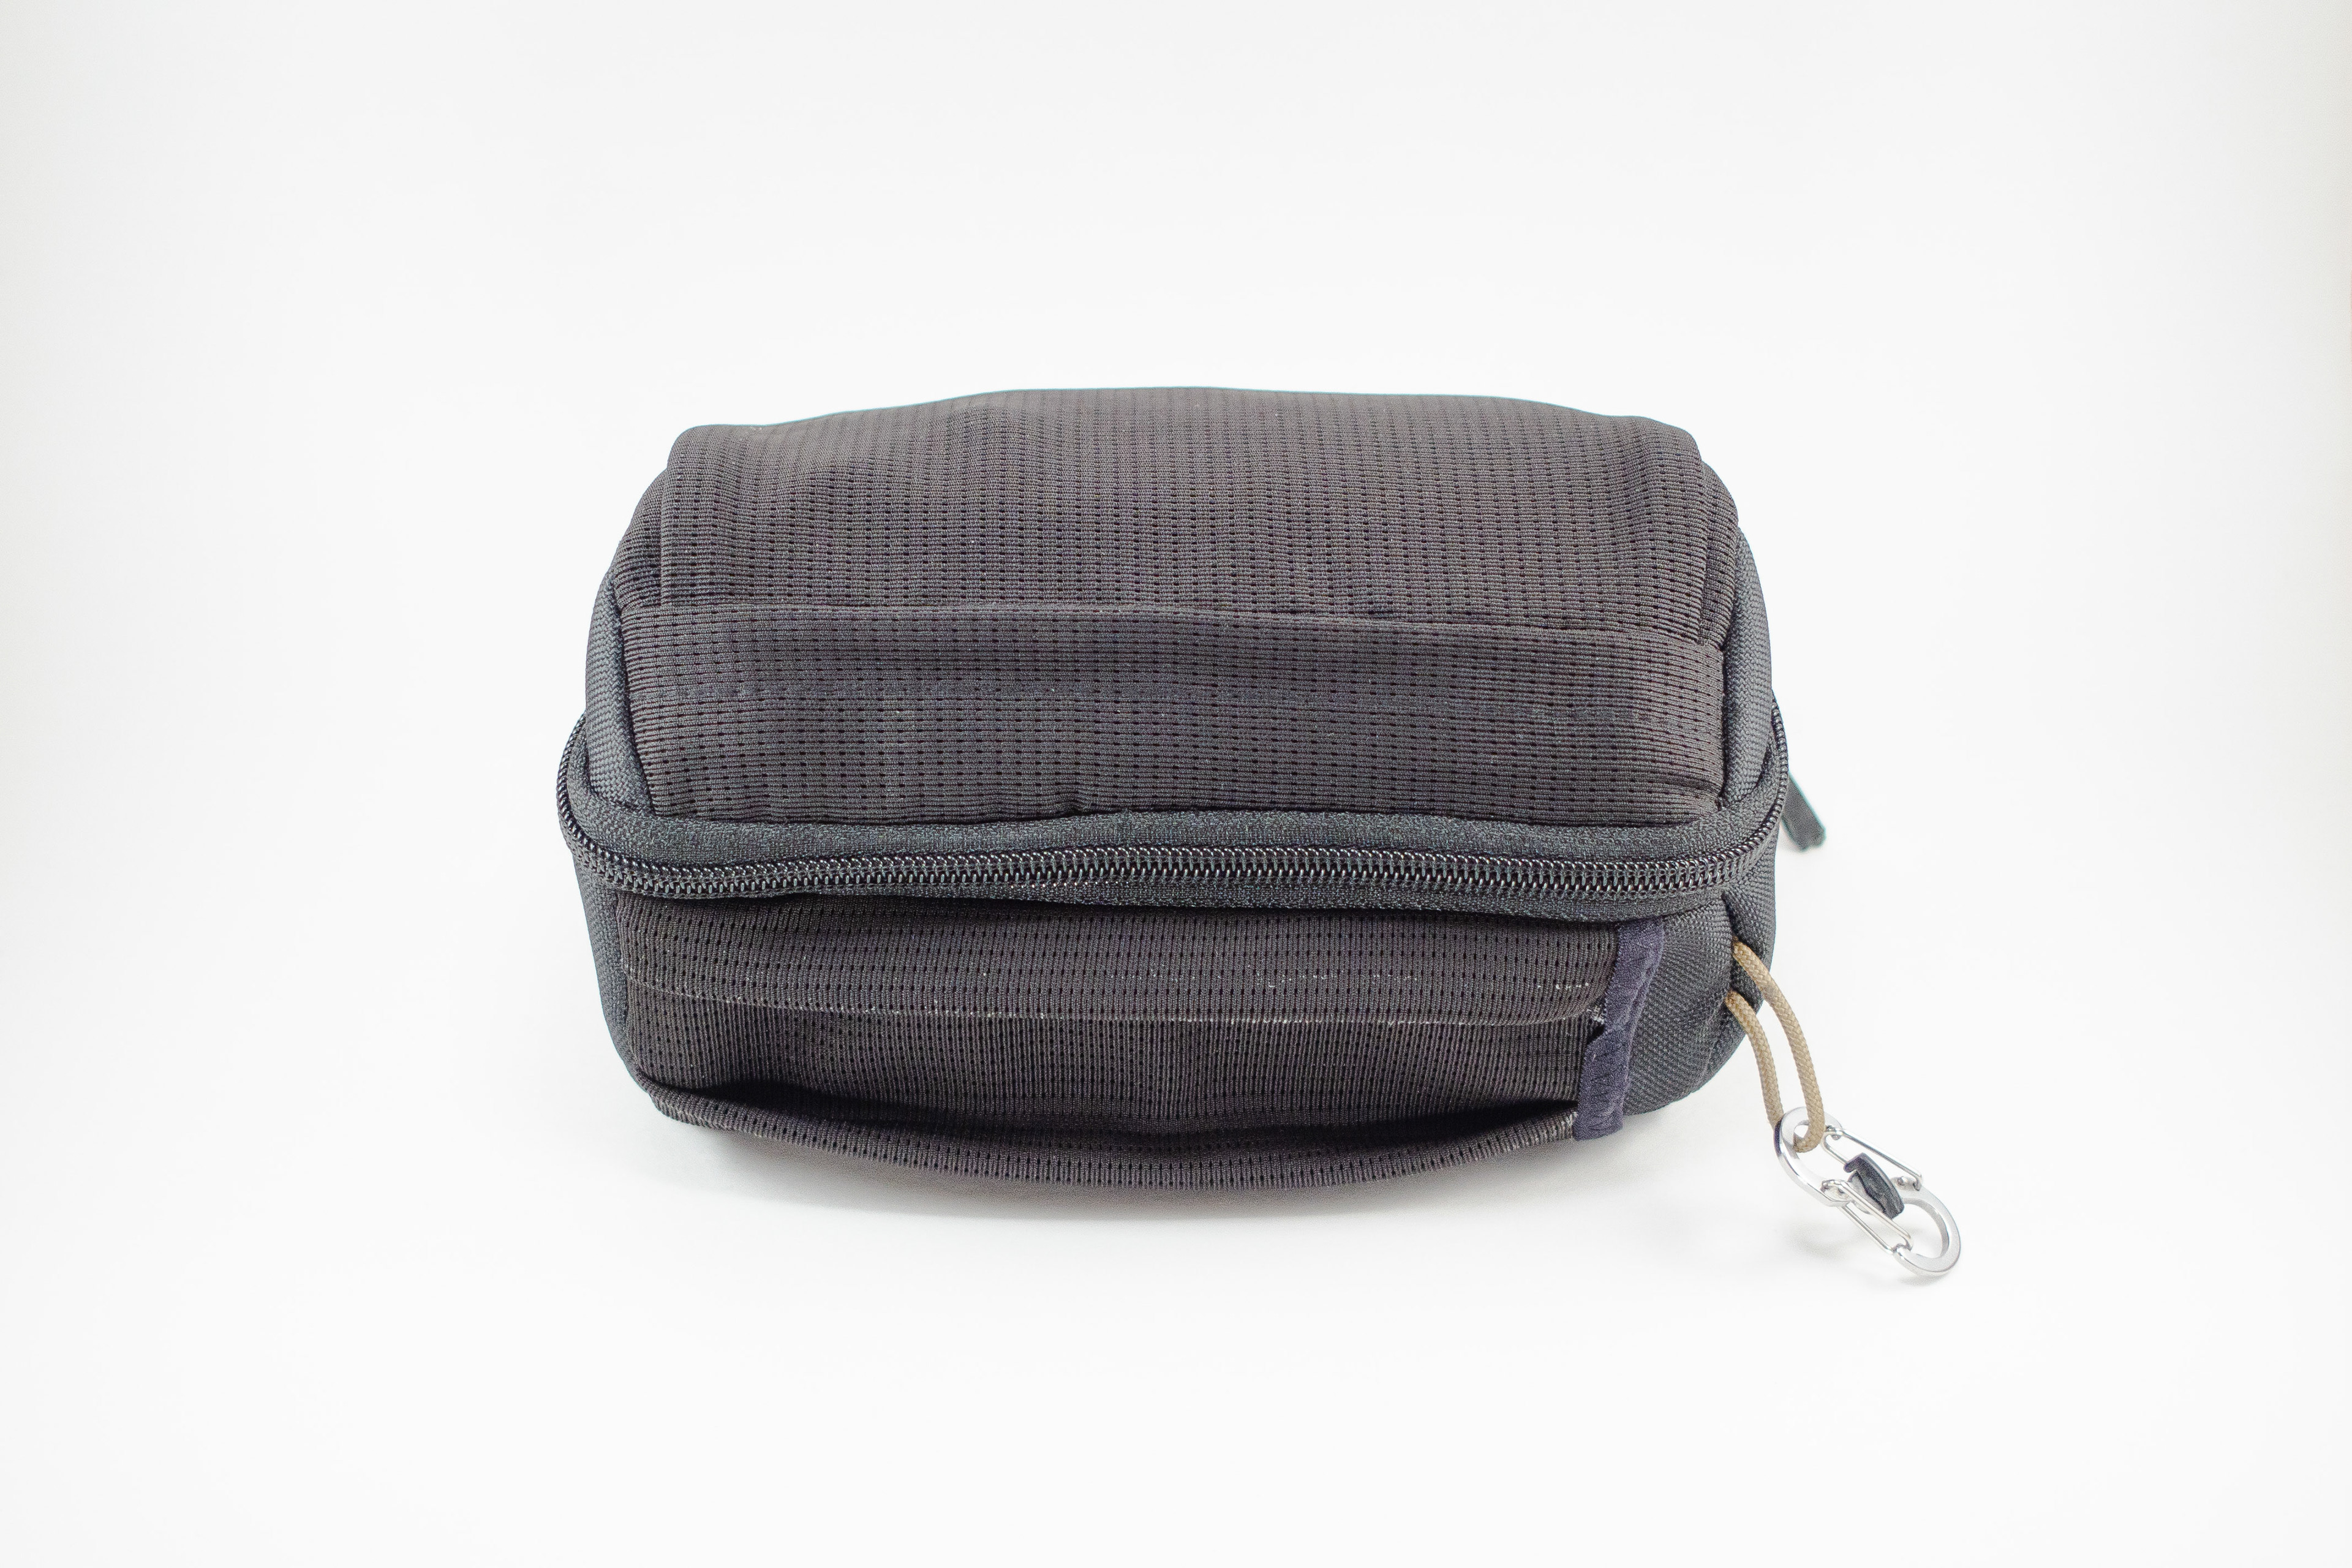
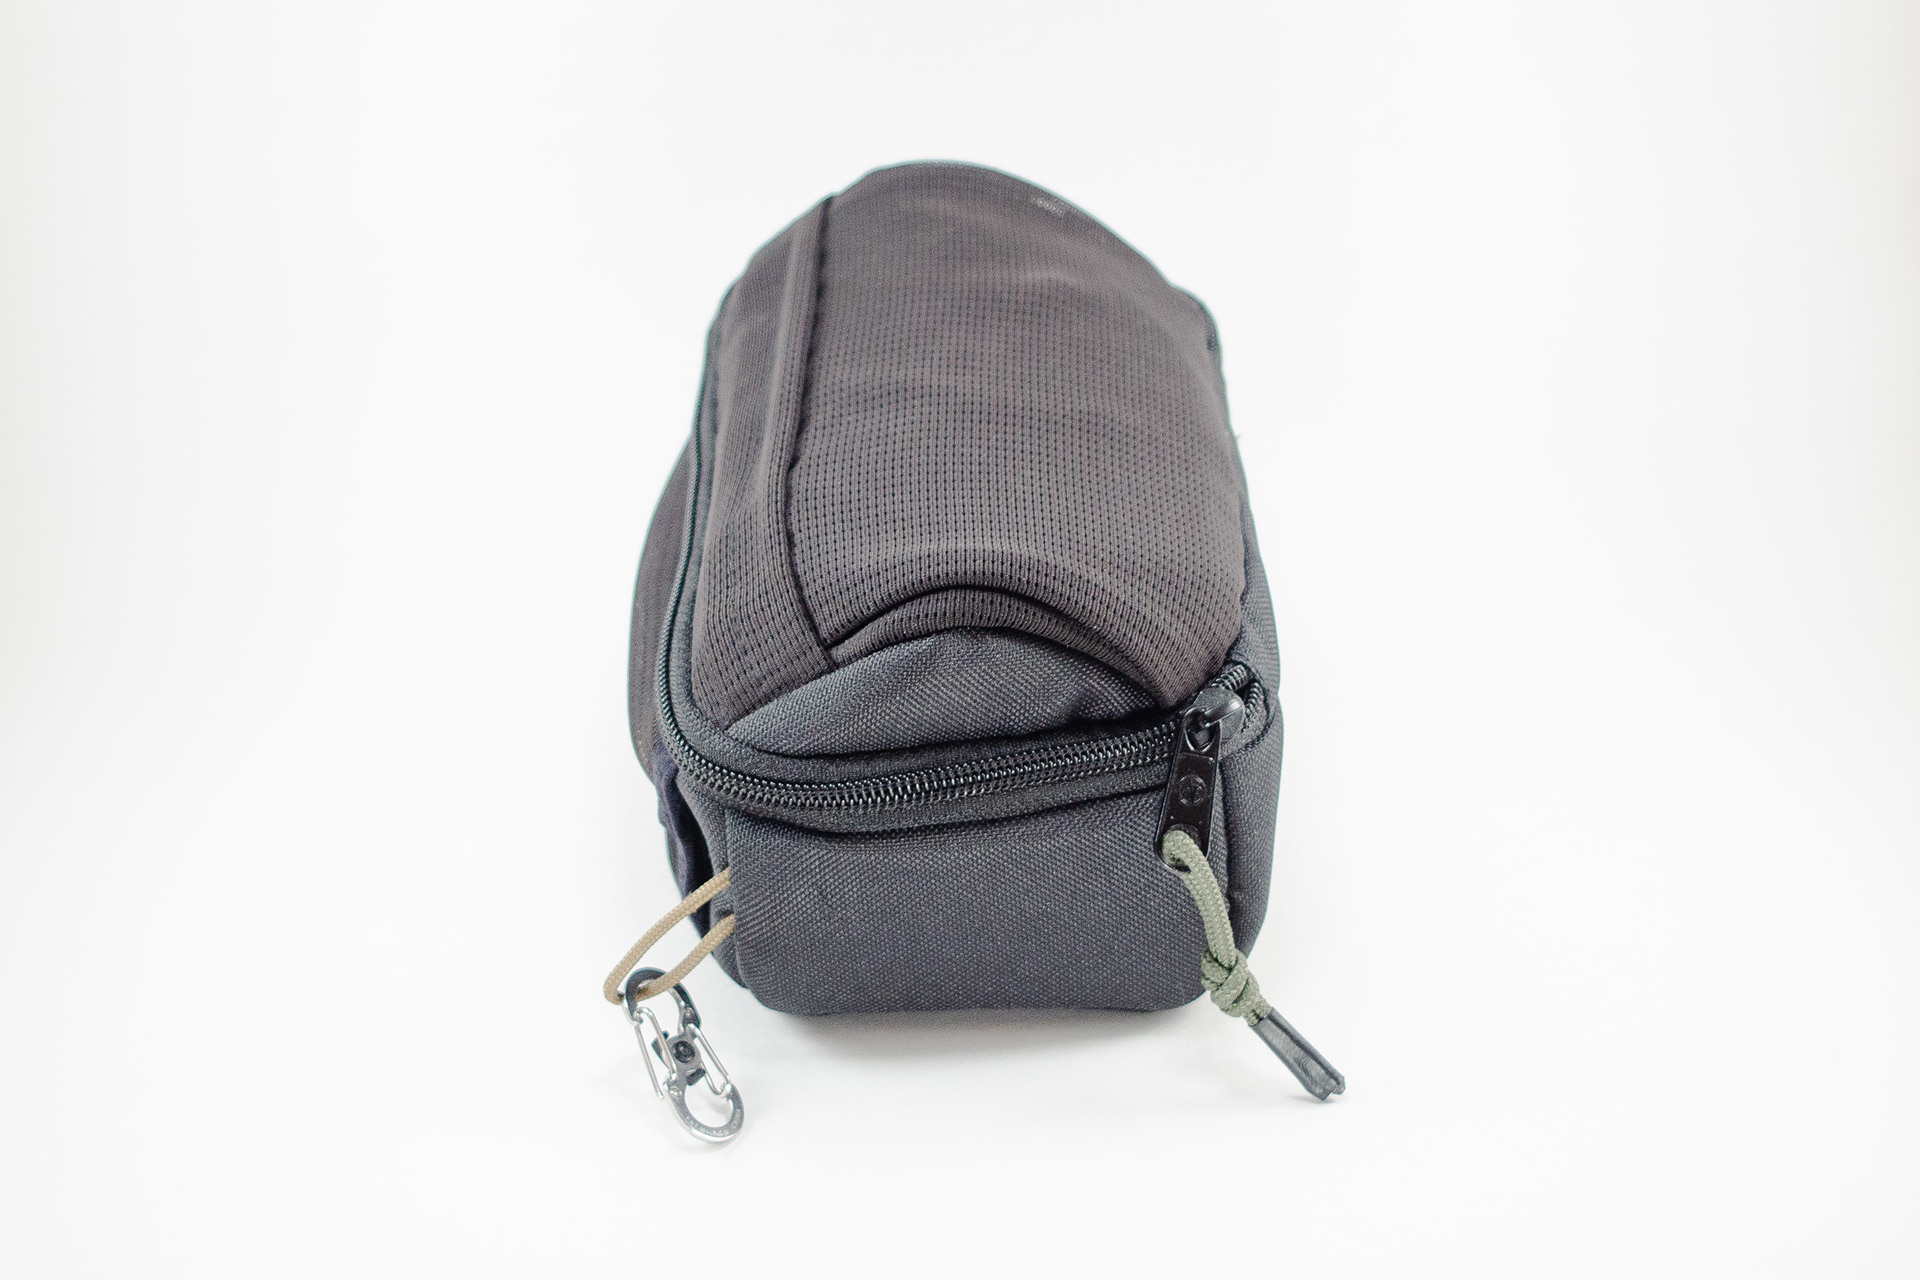
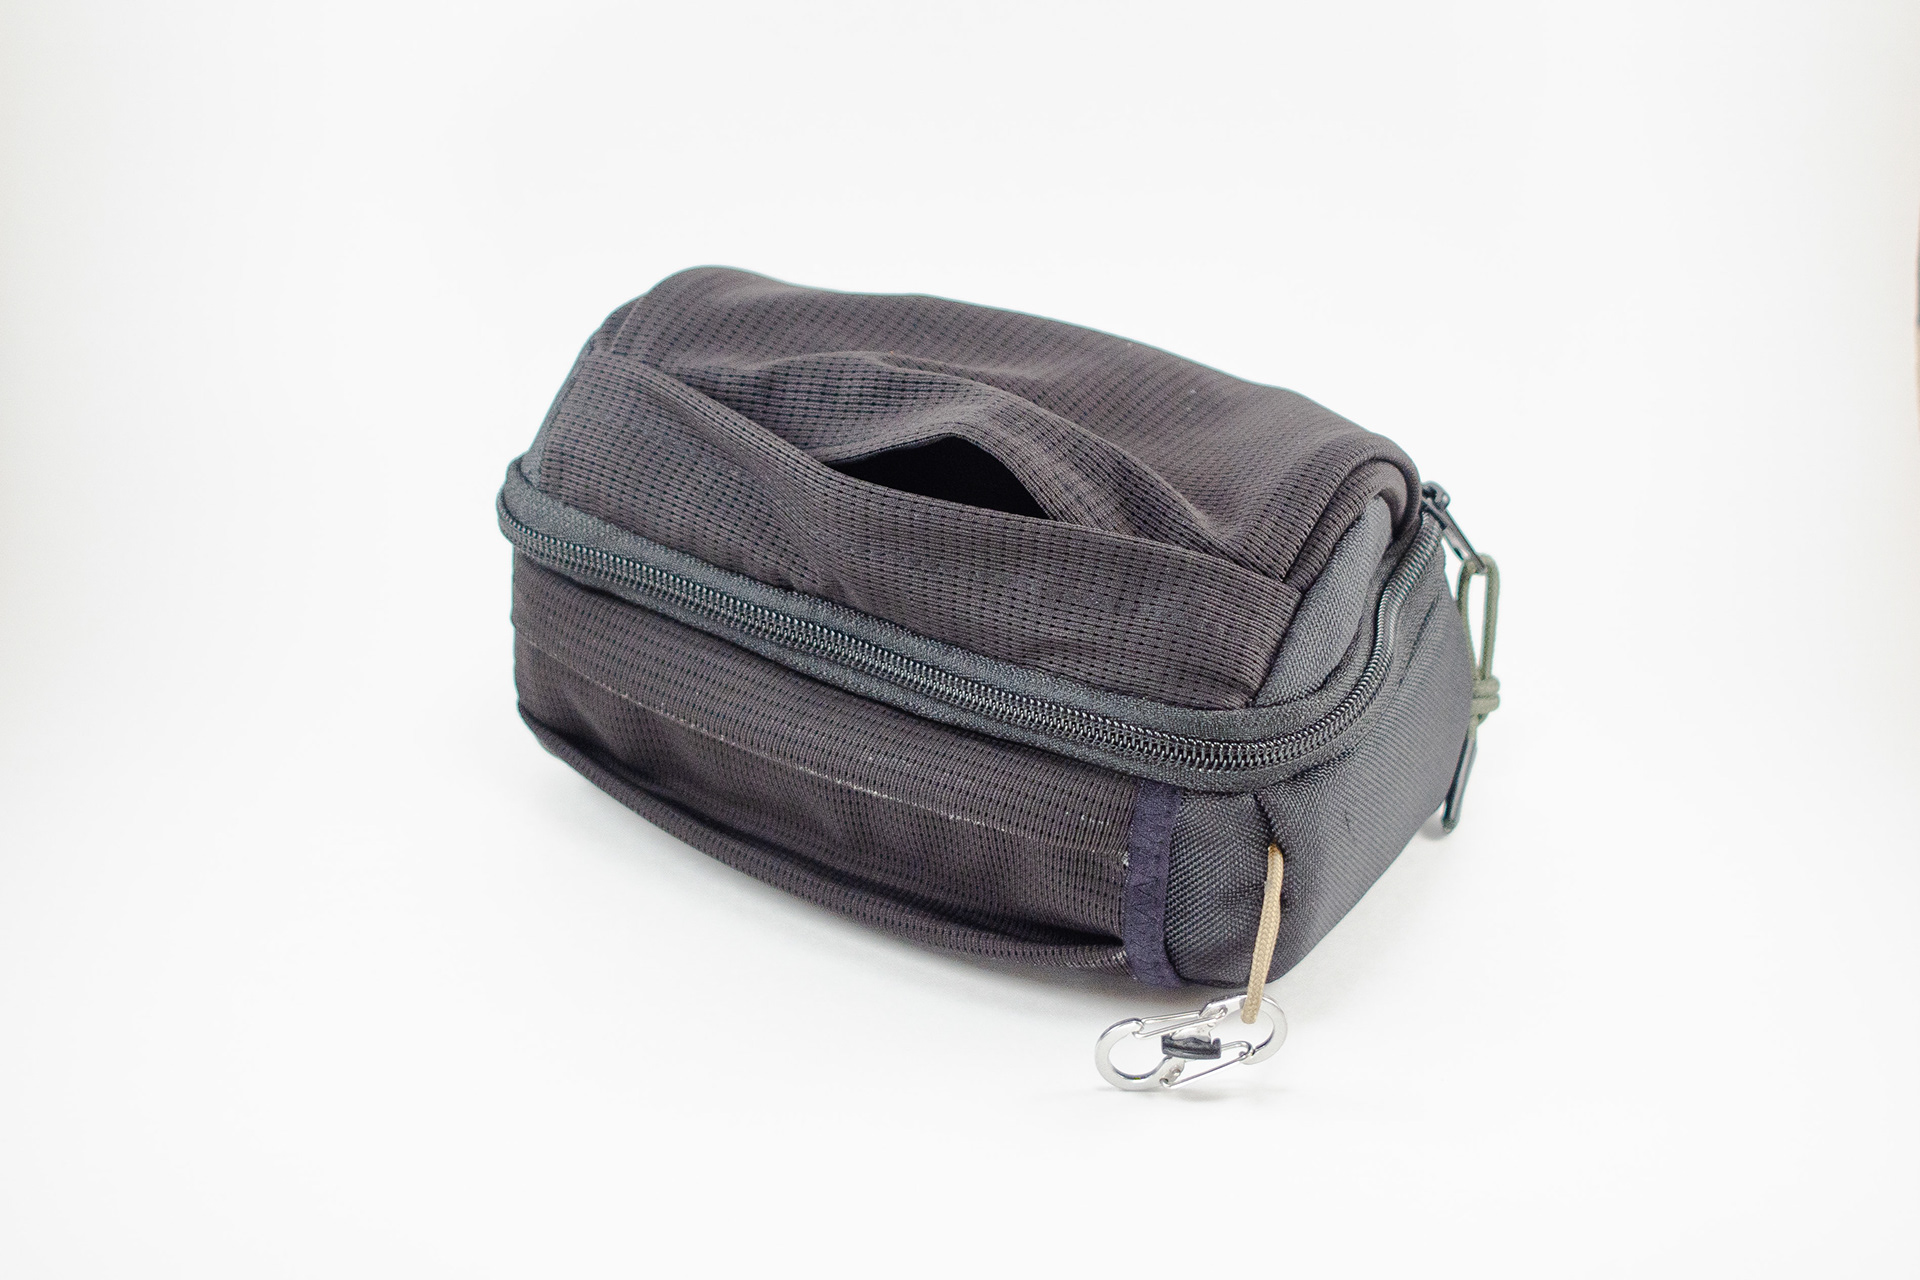
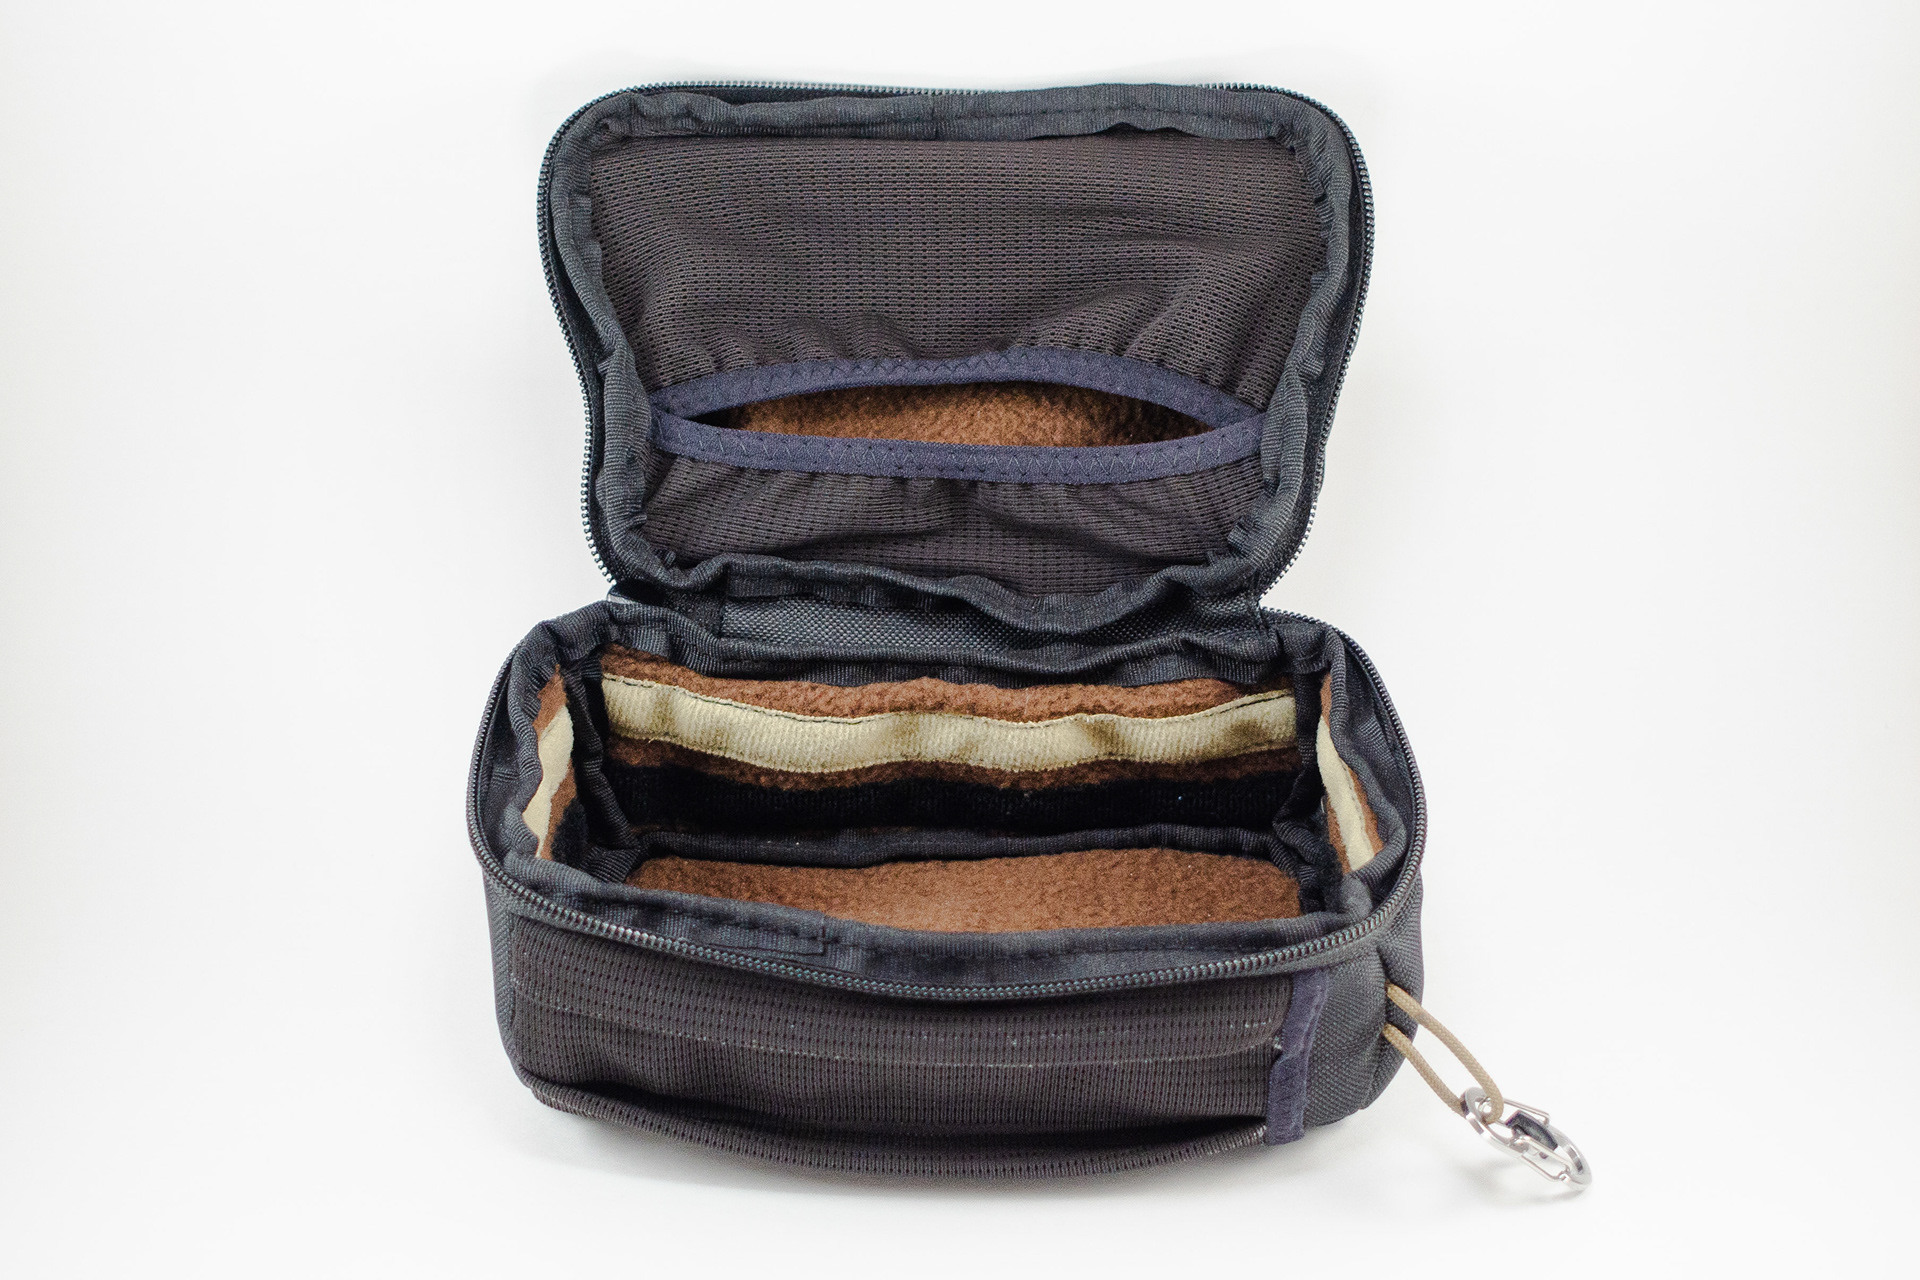
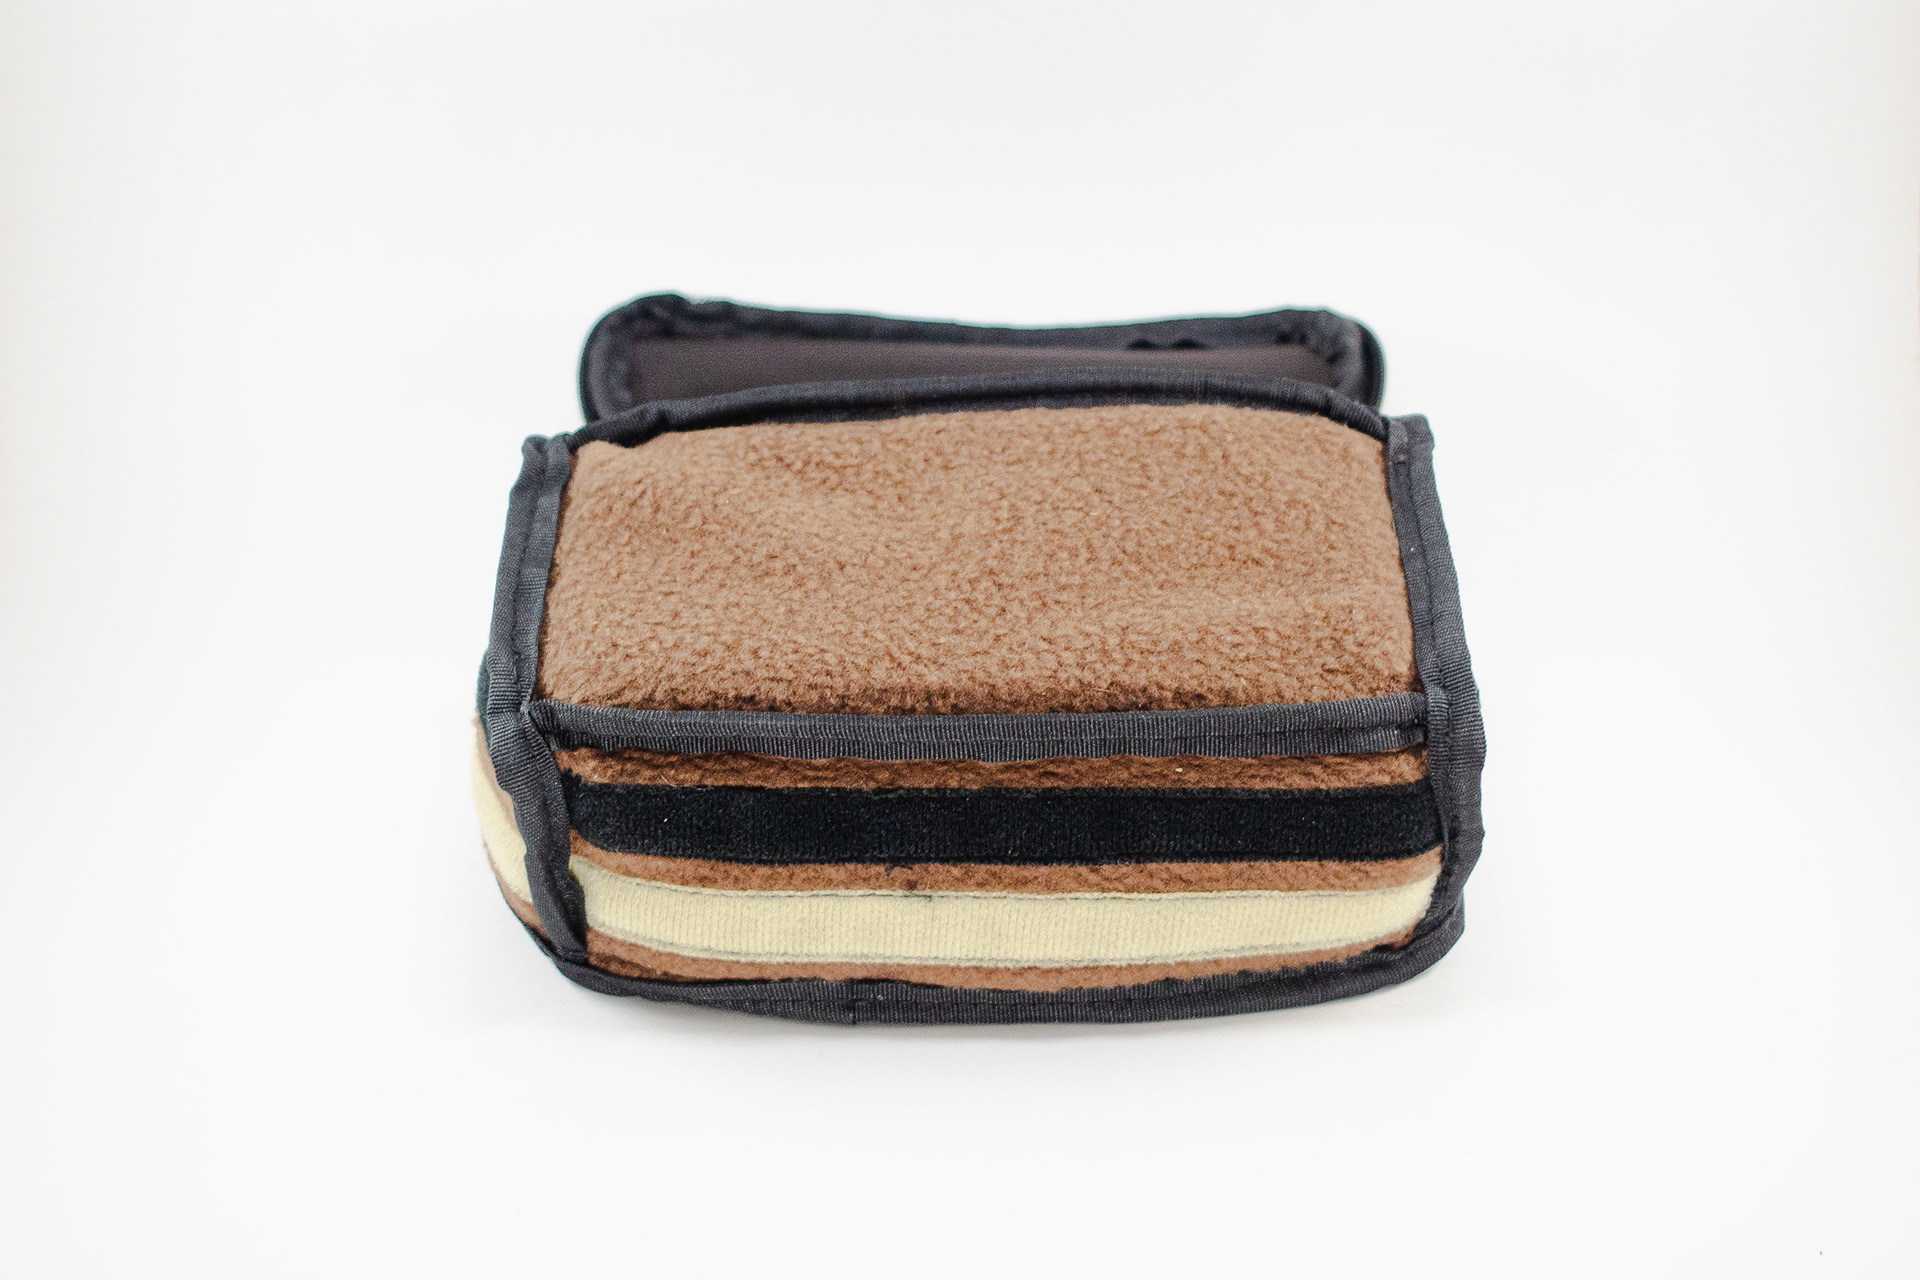
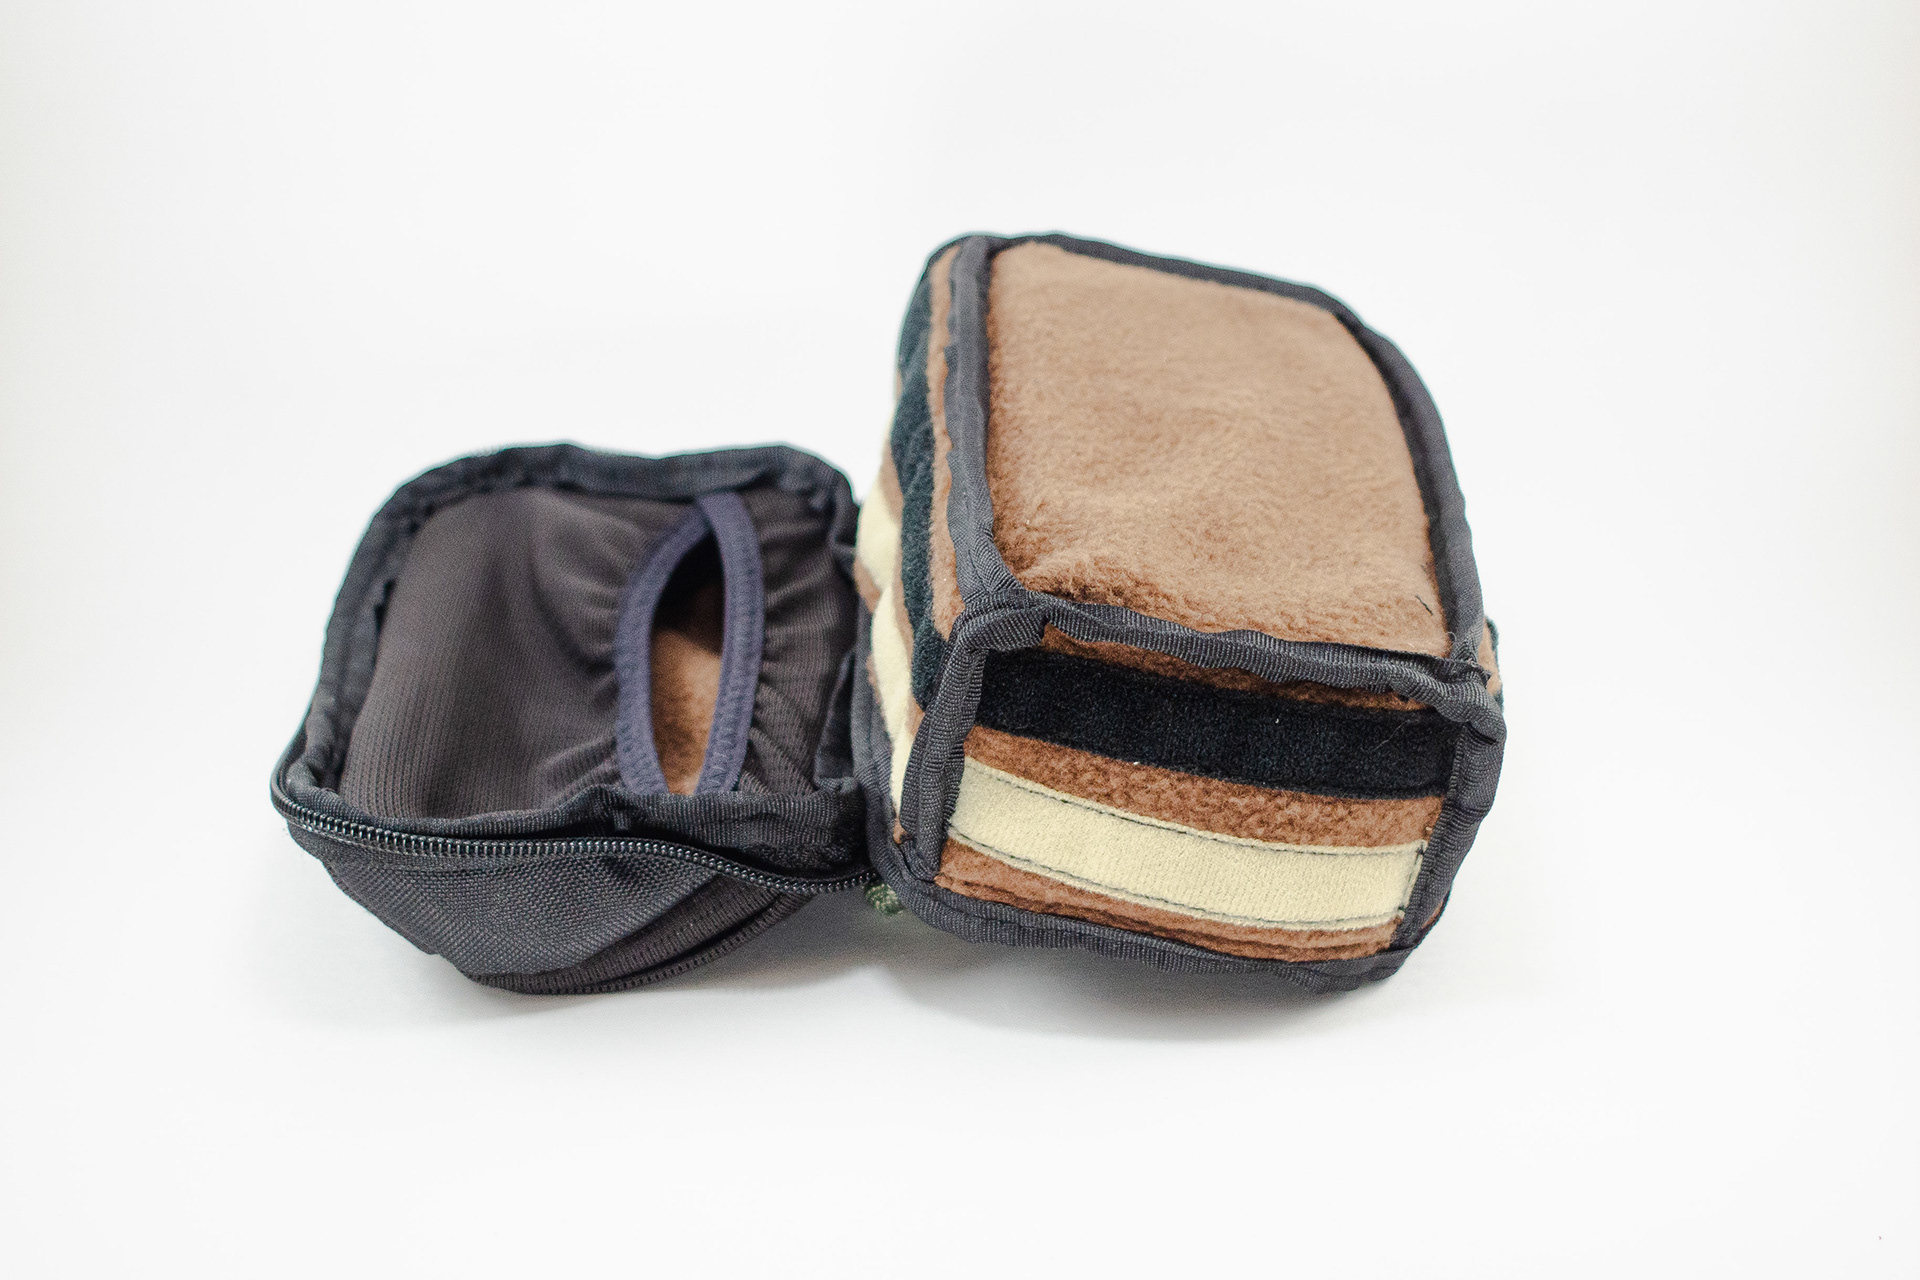
The final product:
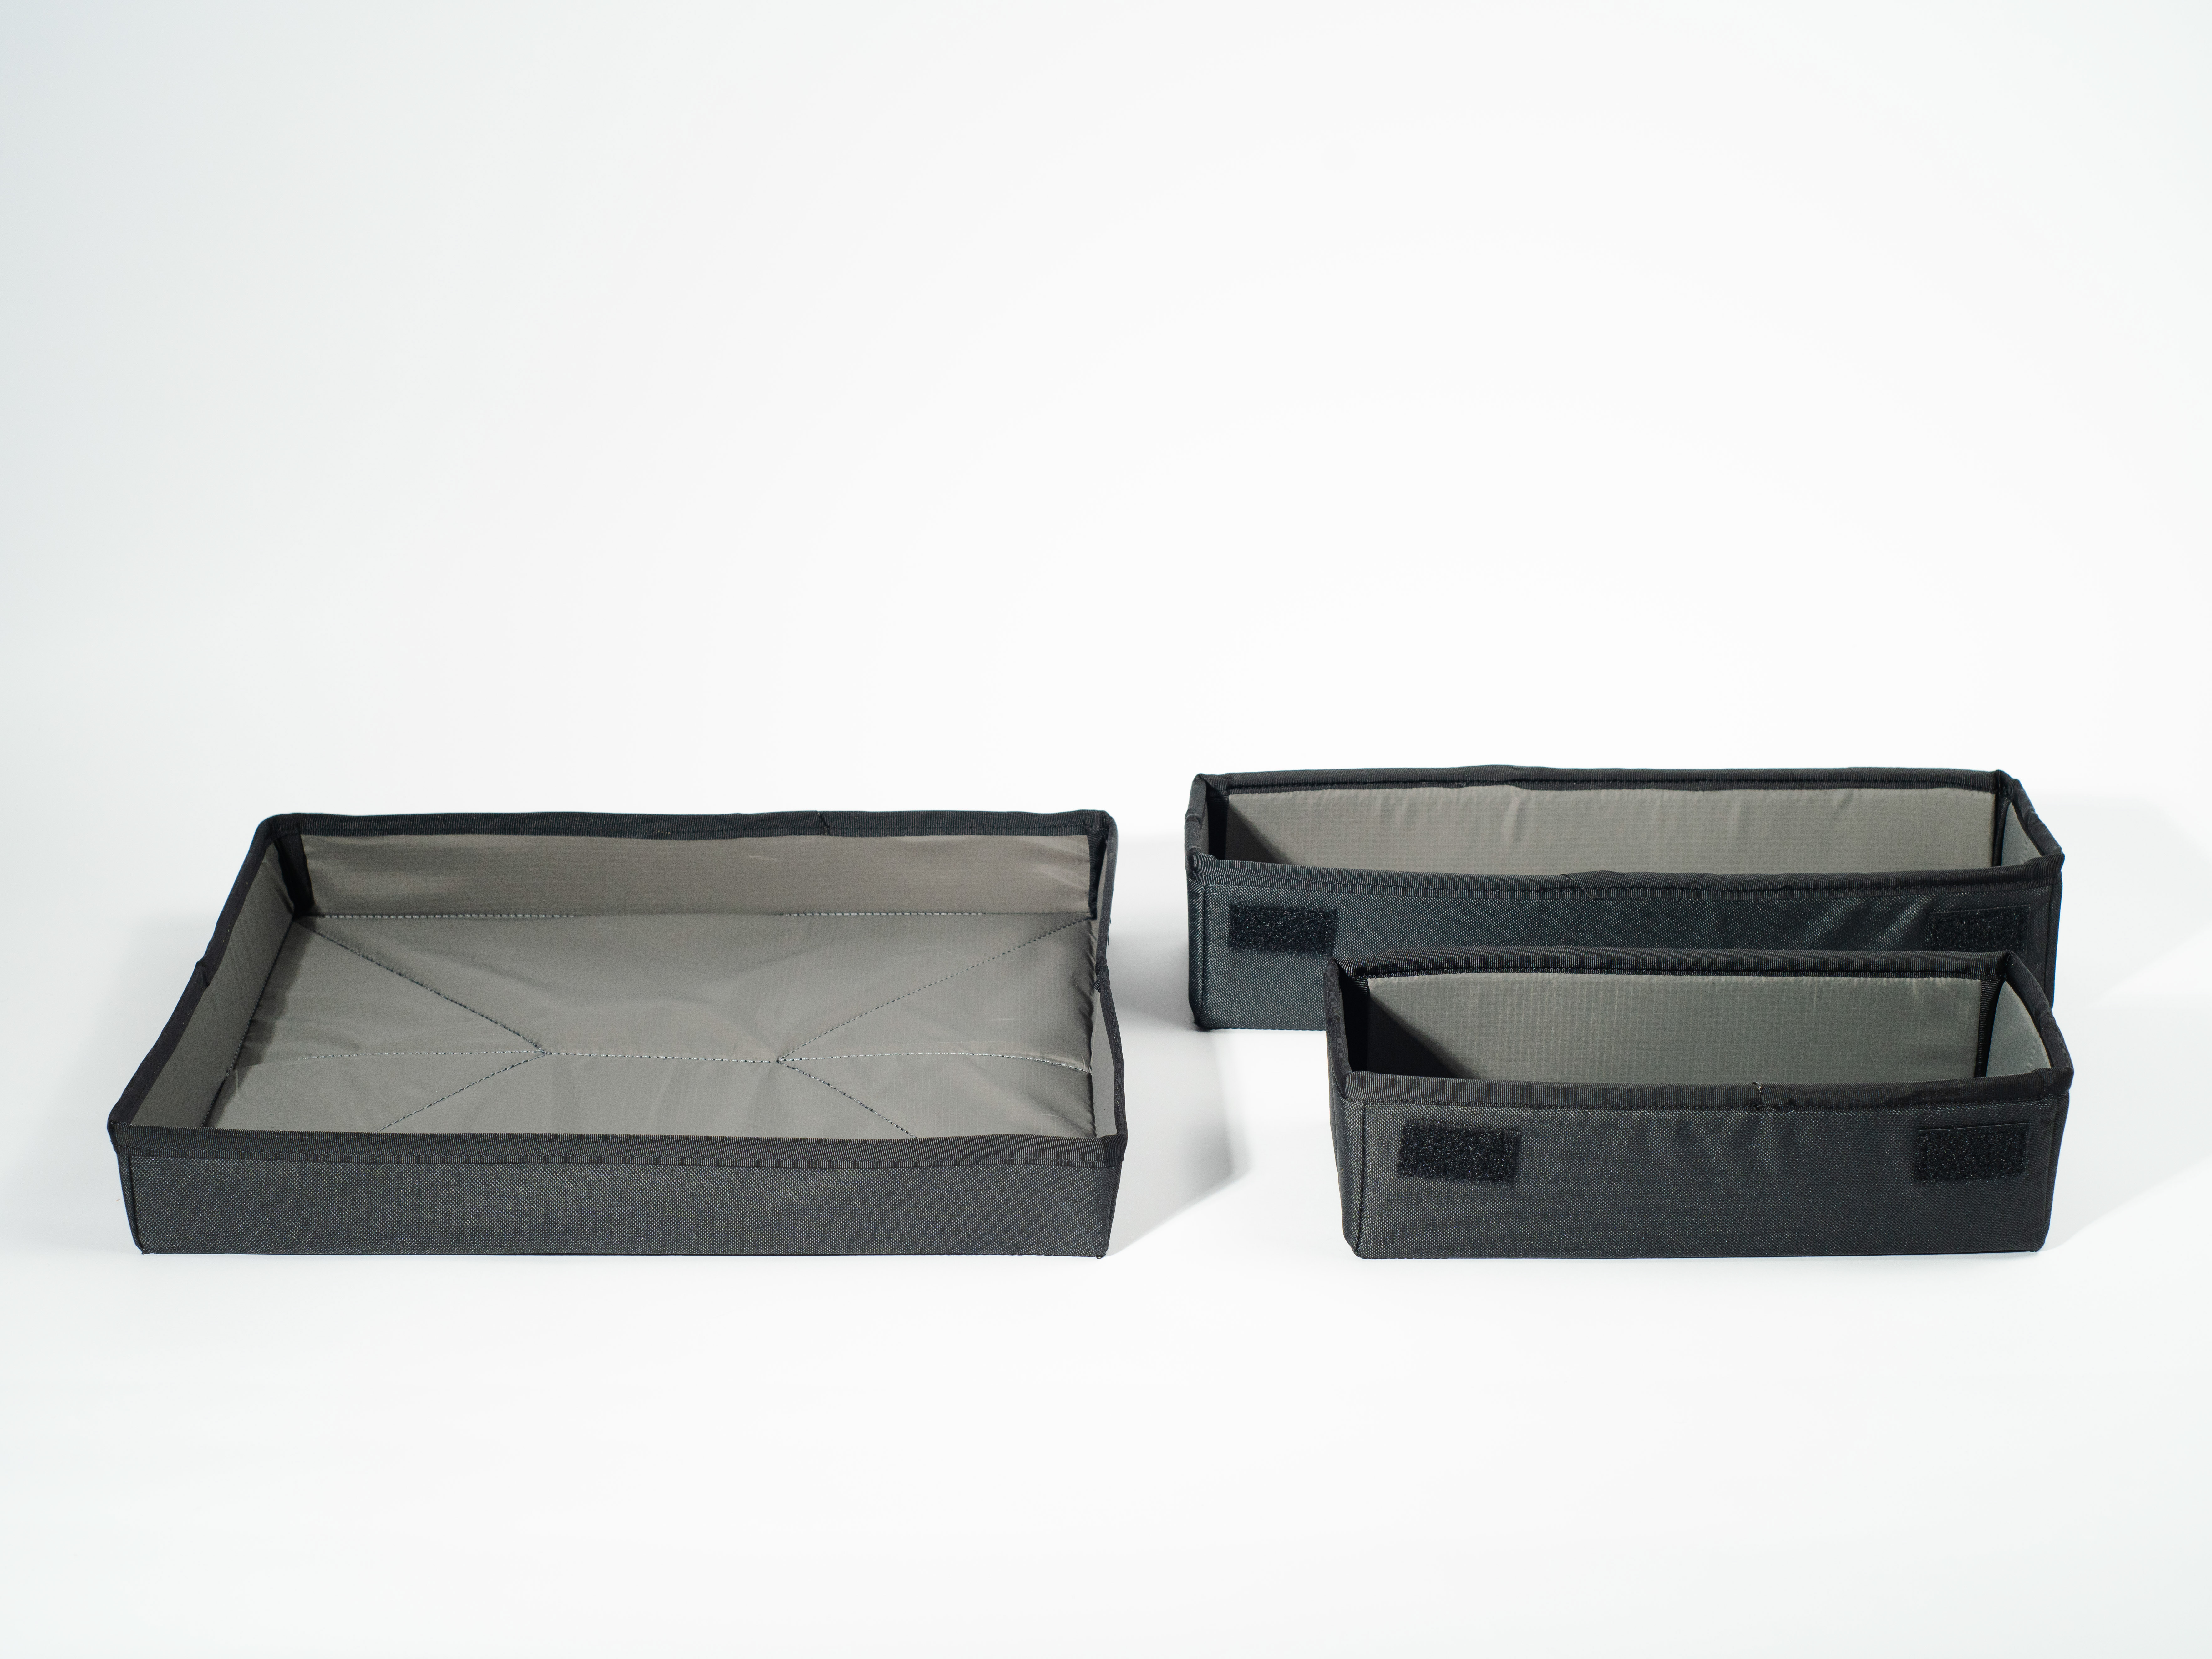
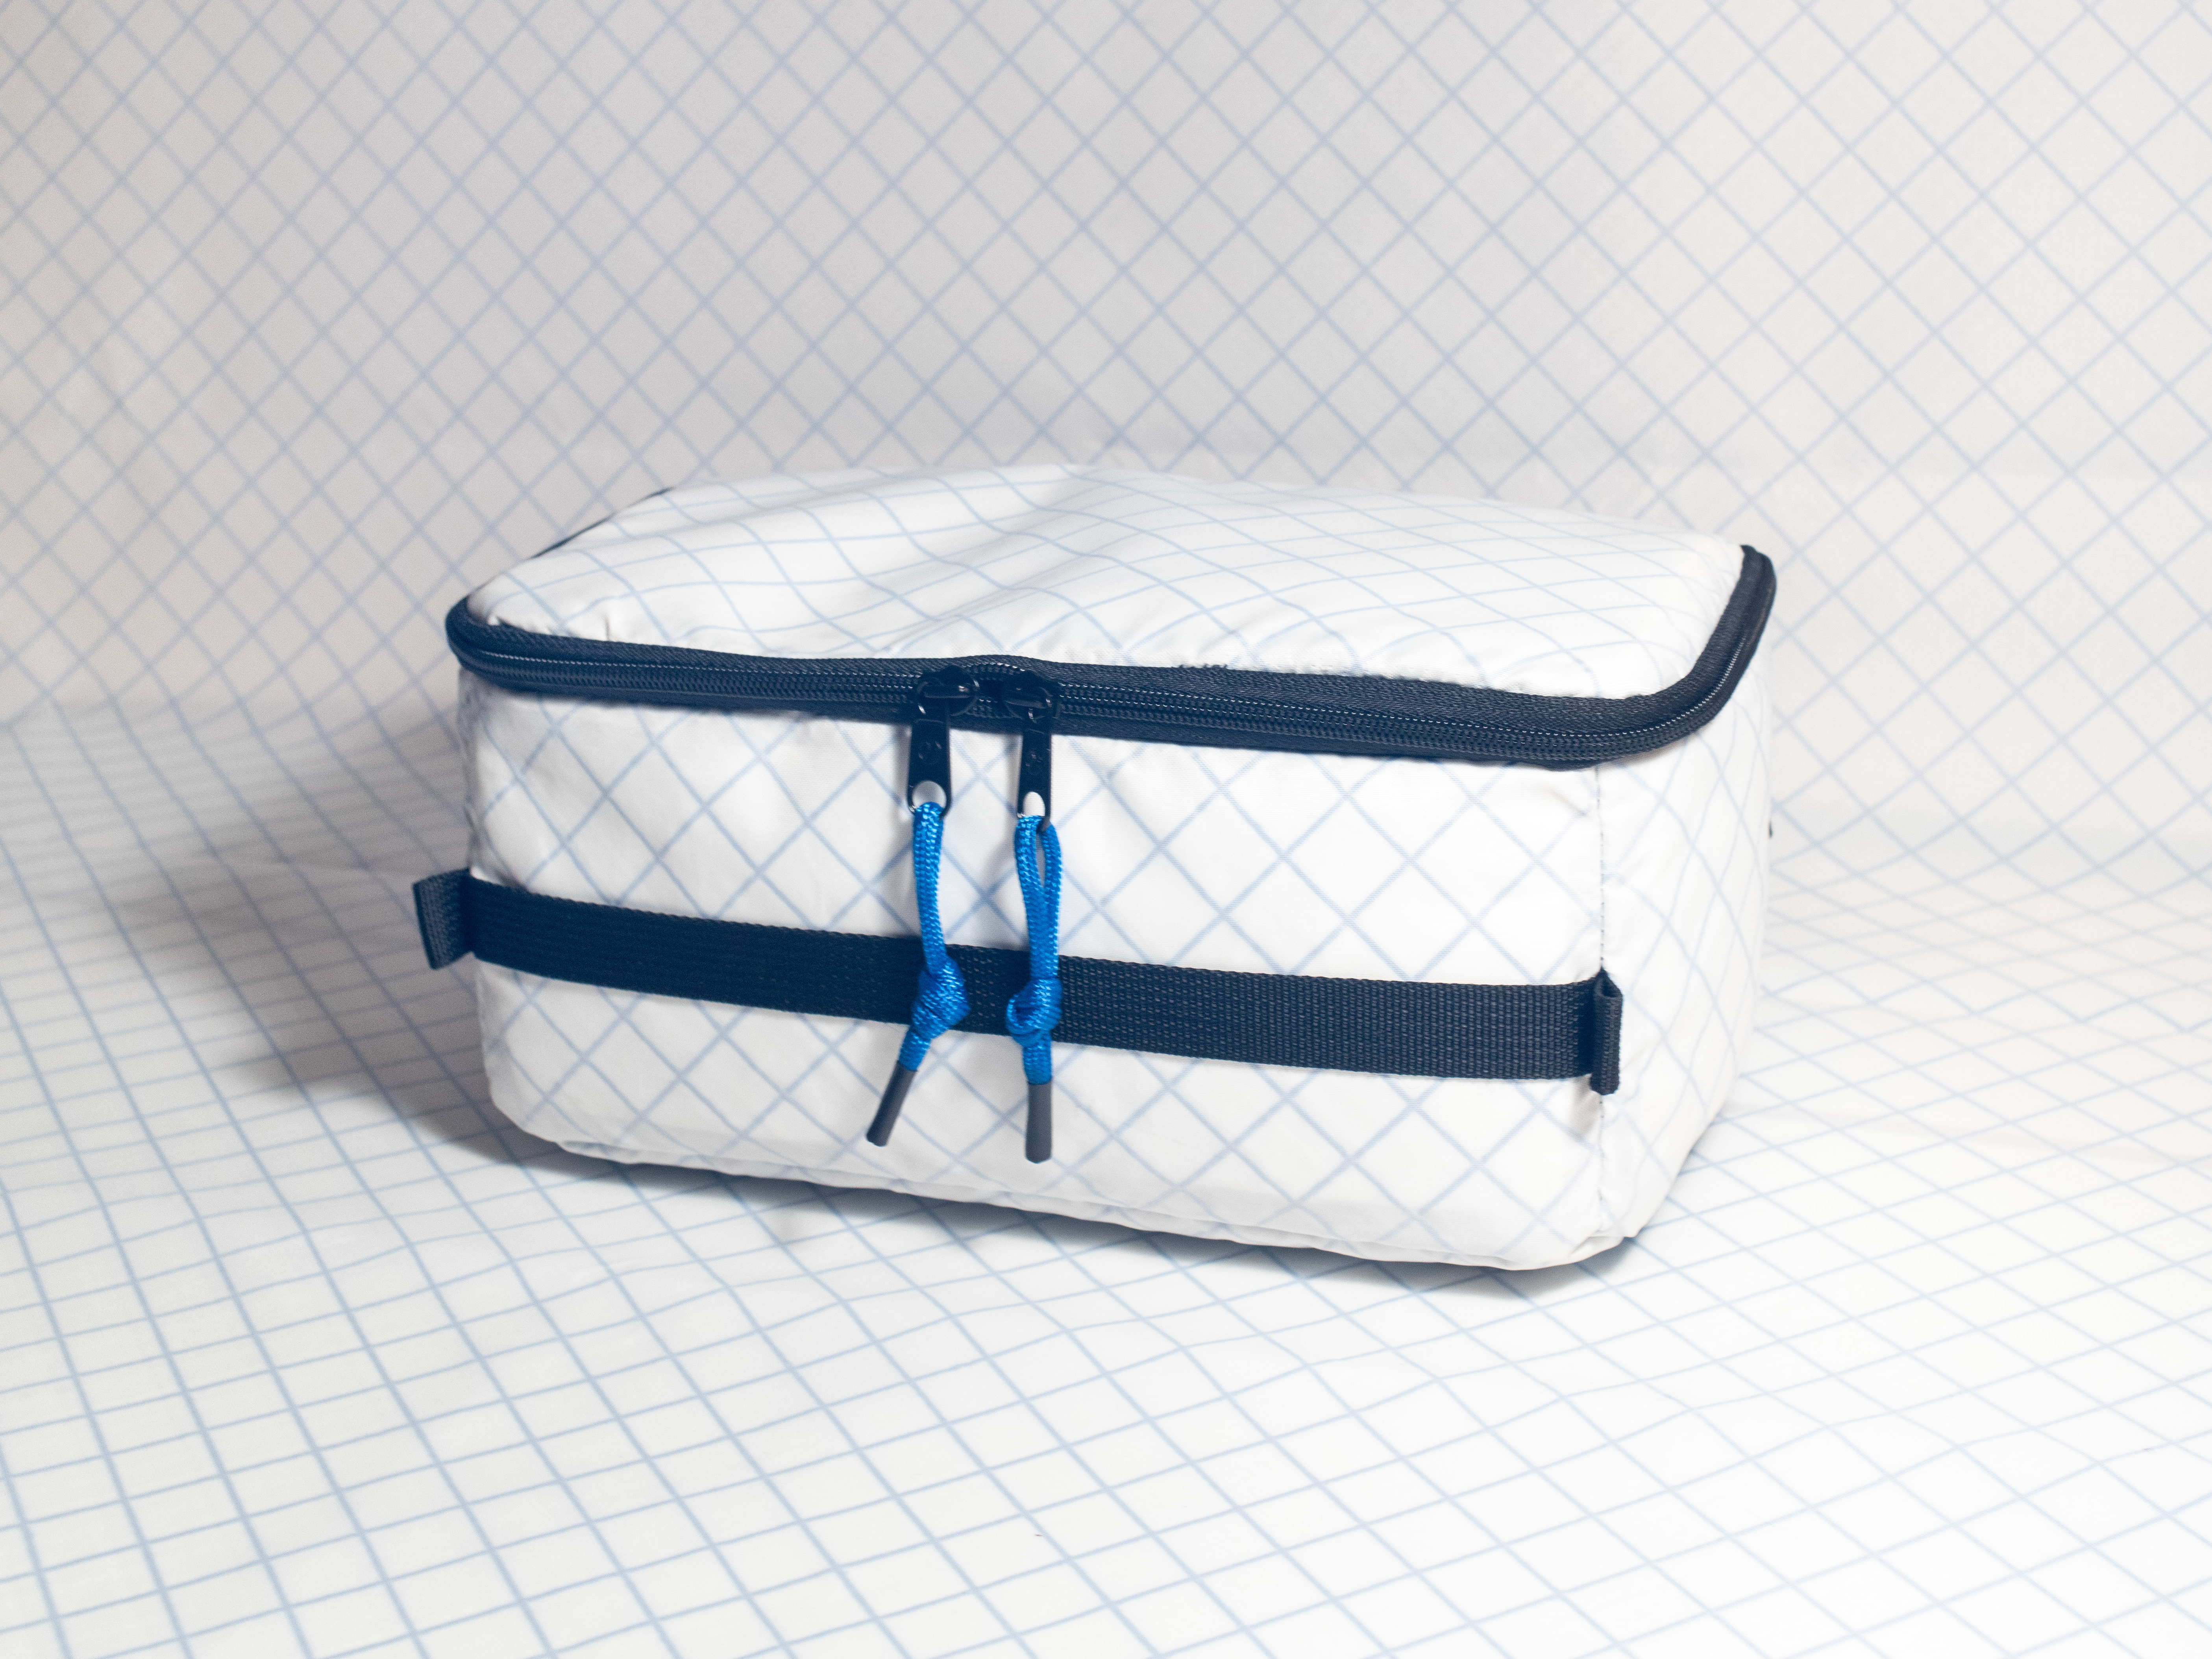
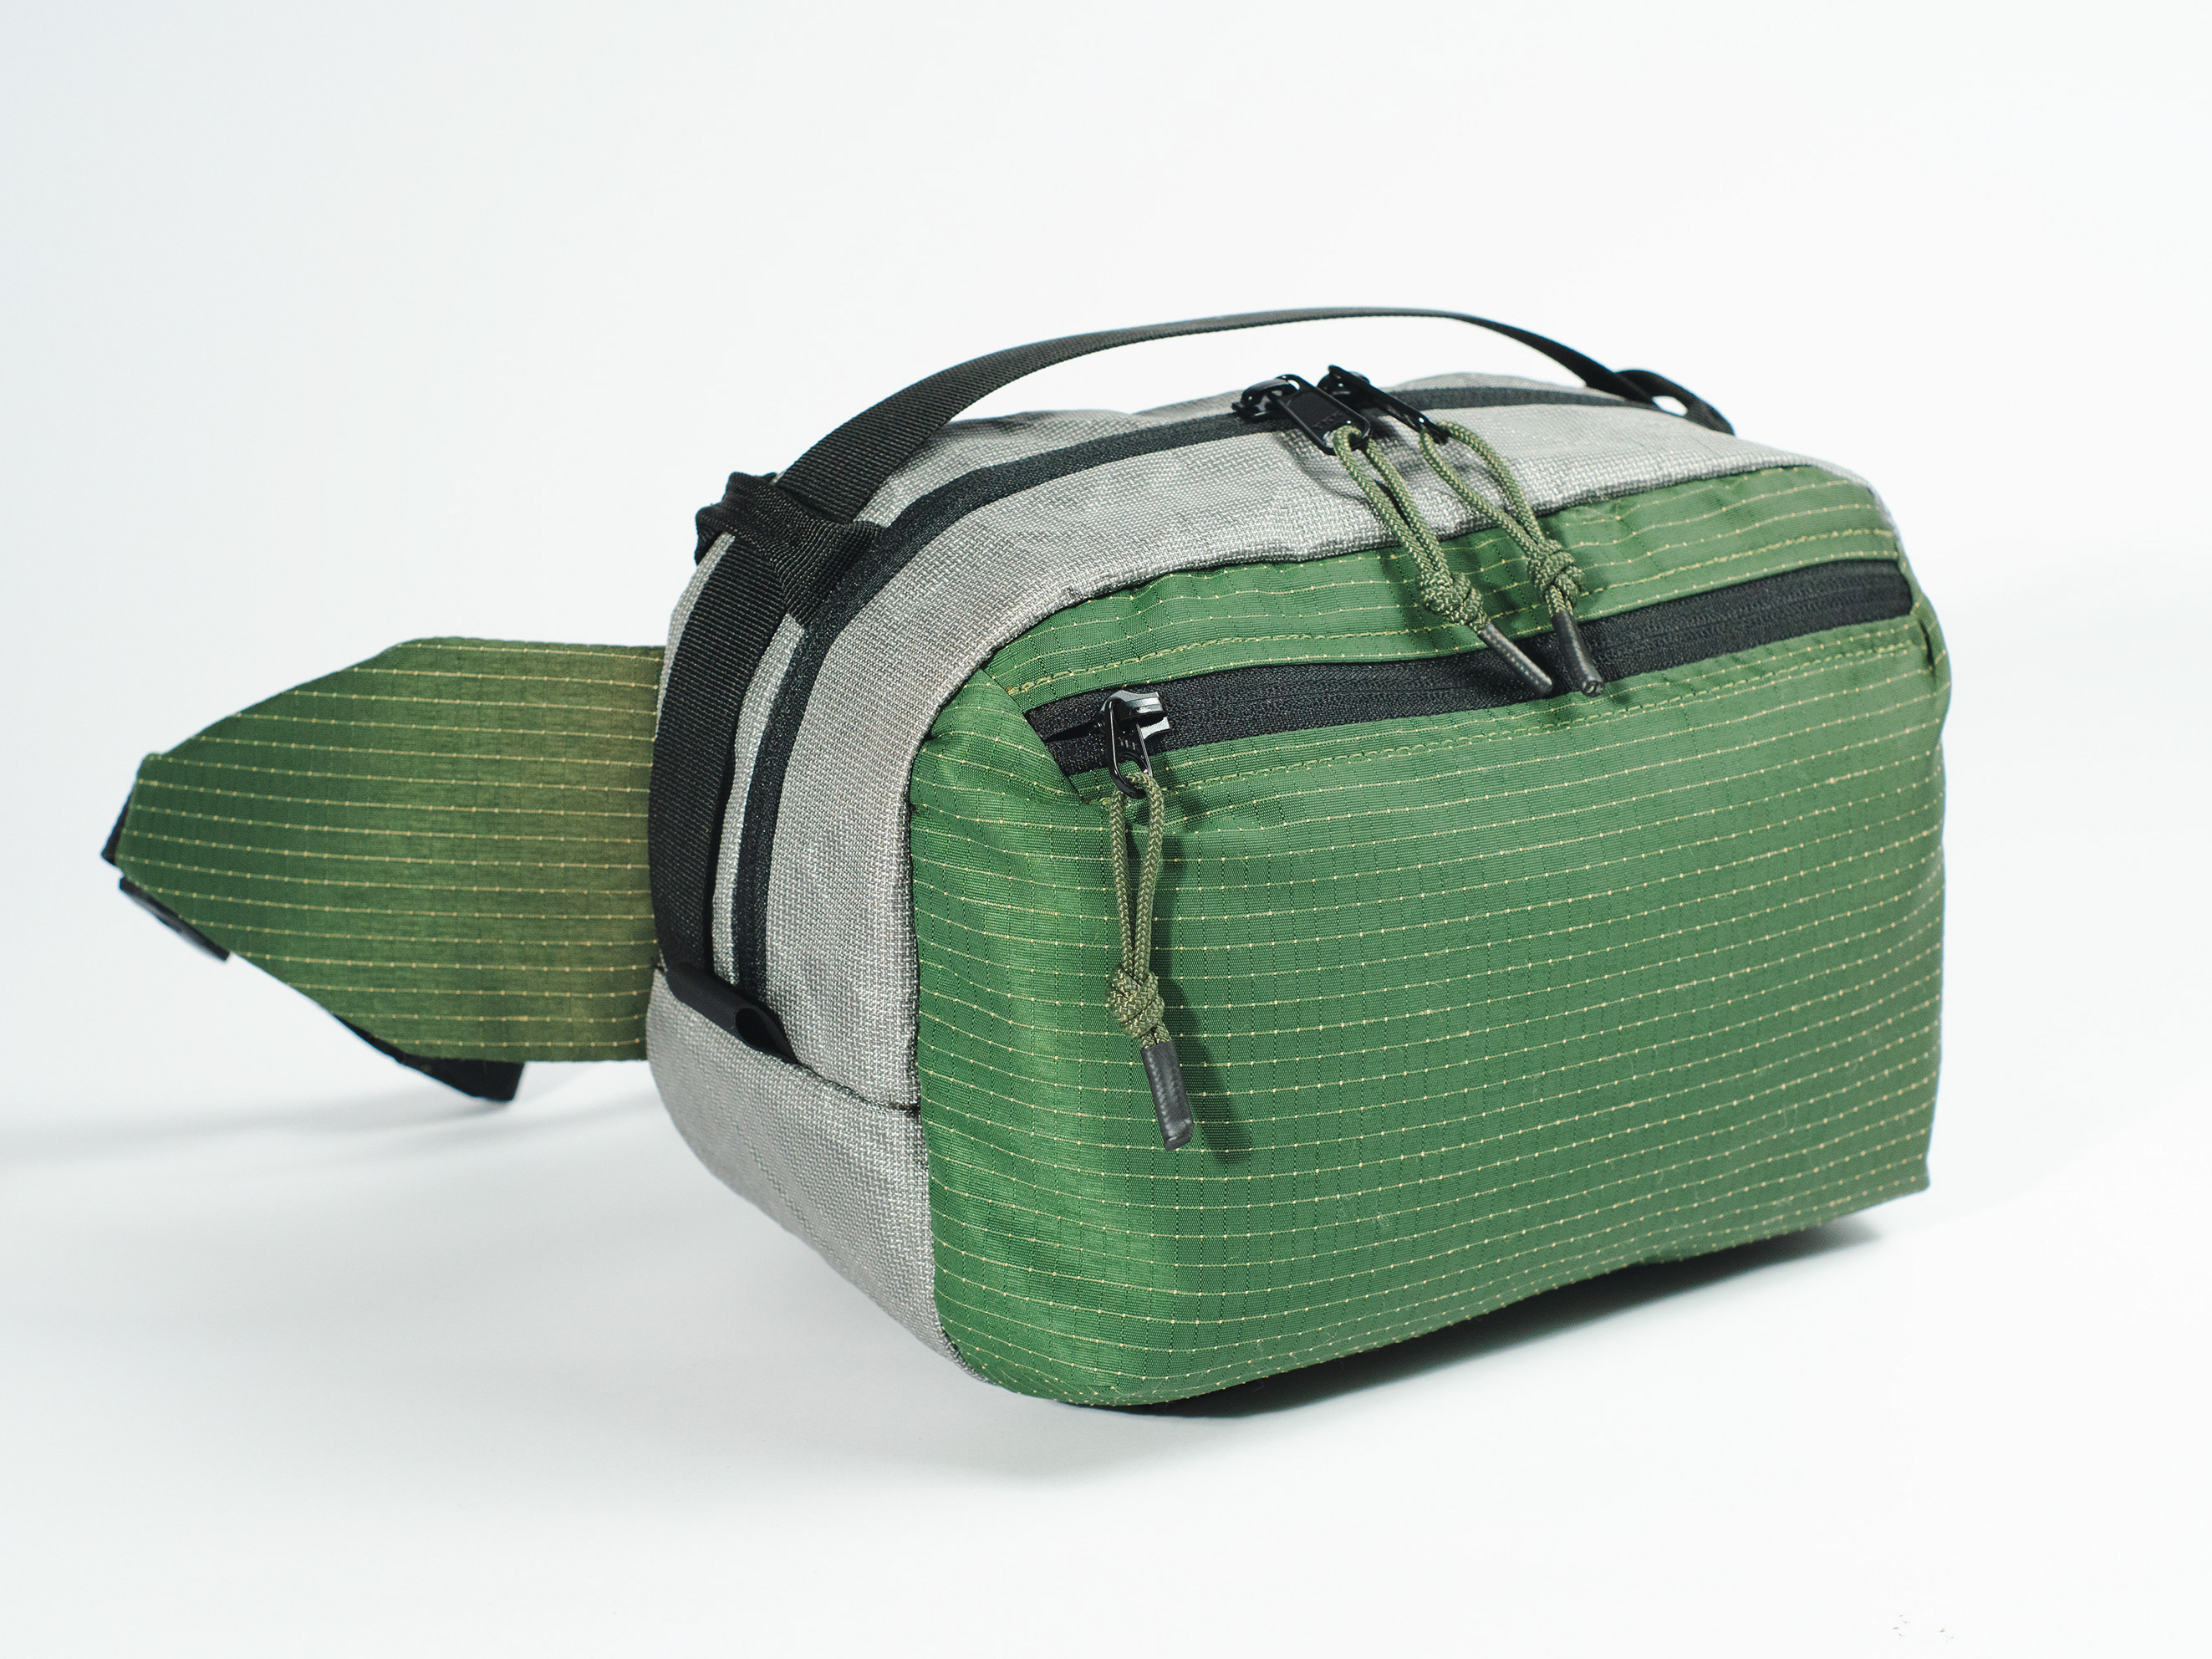
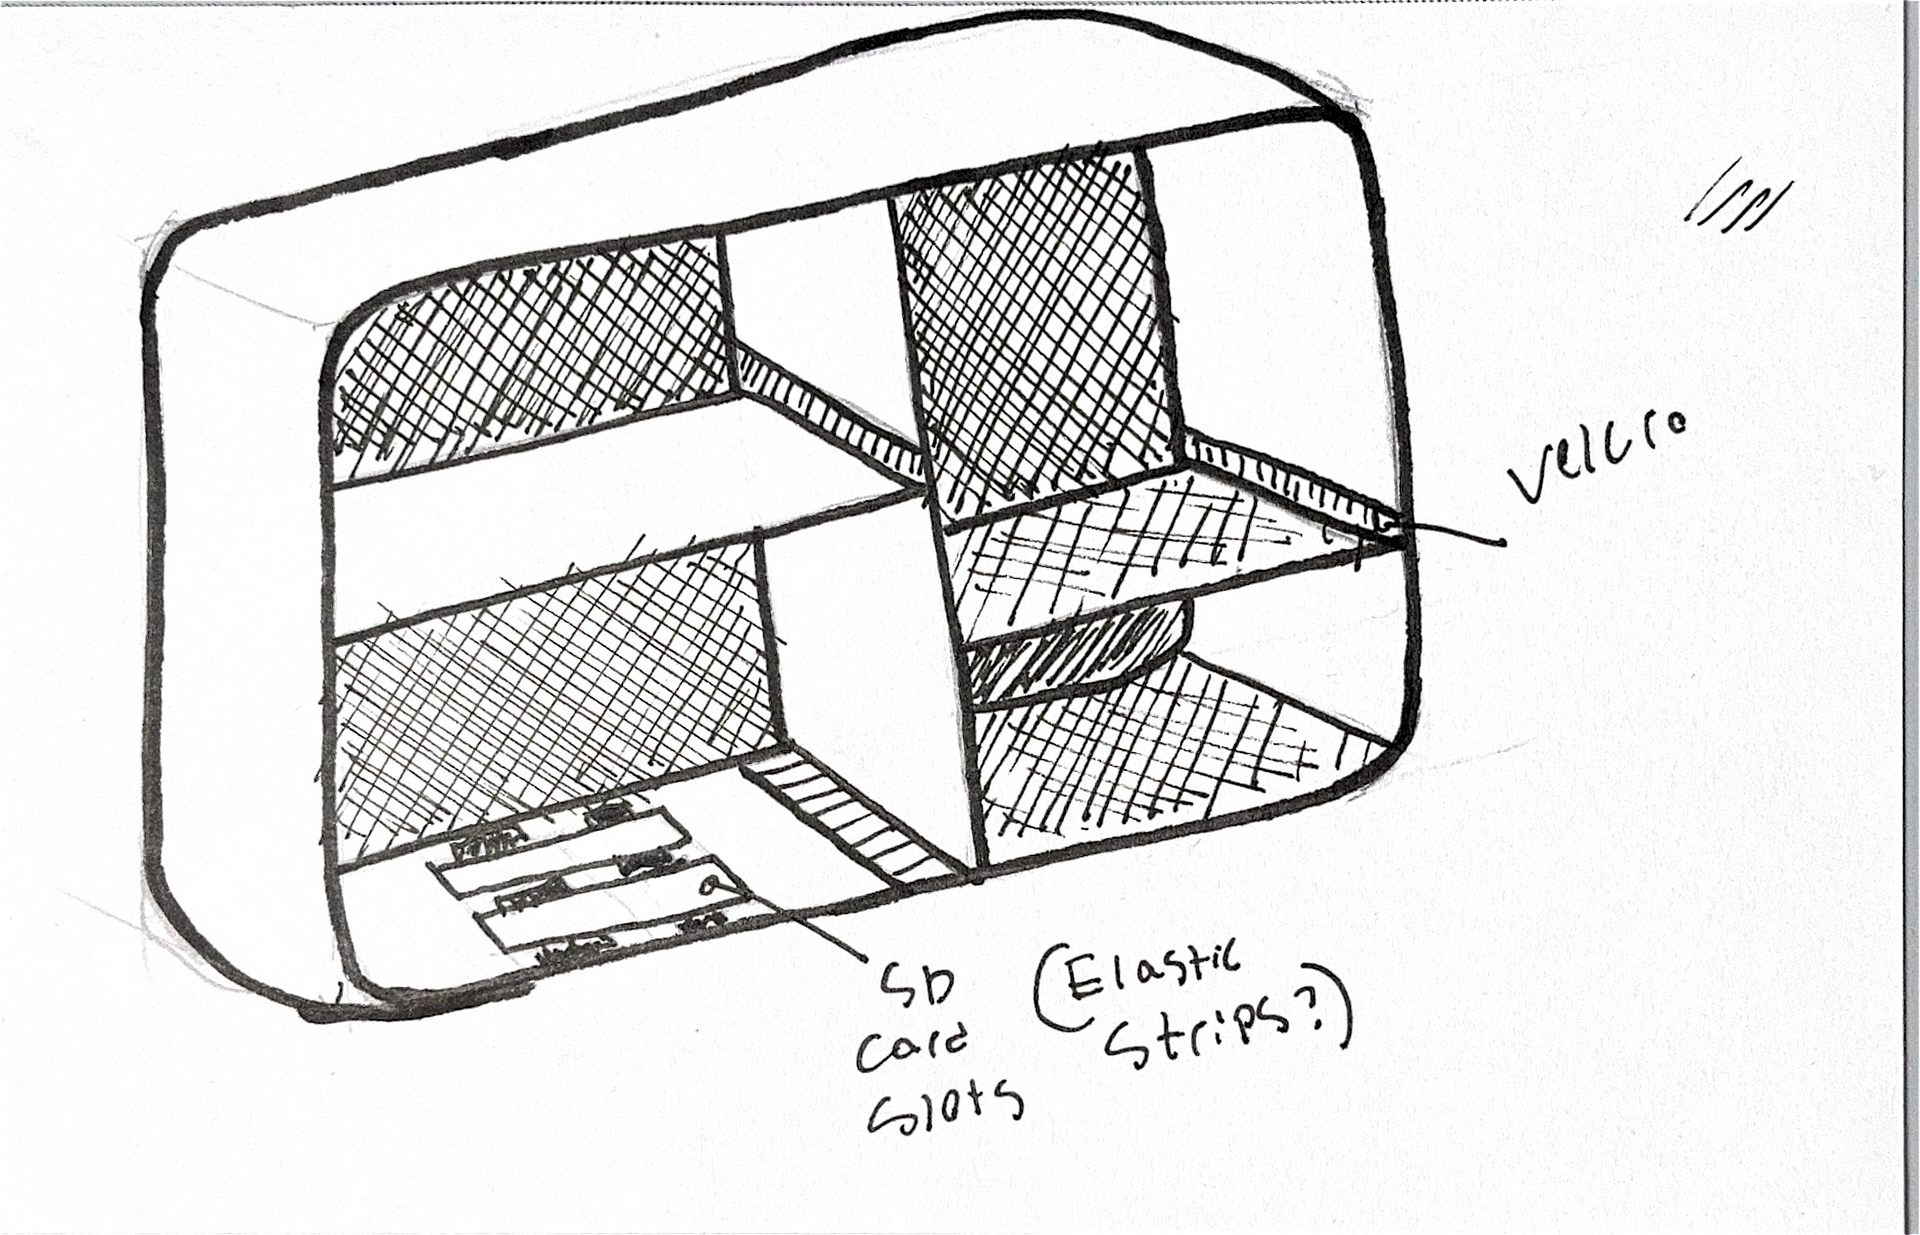
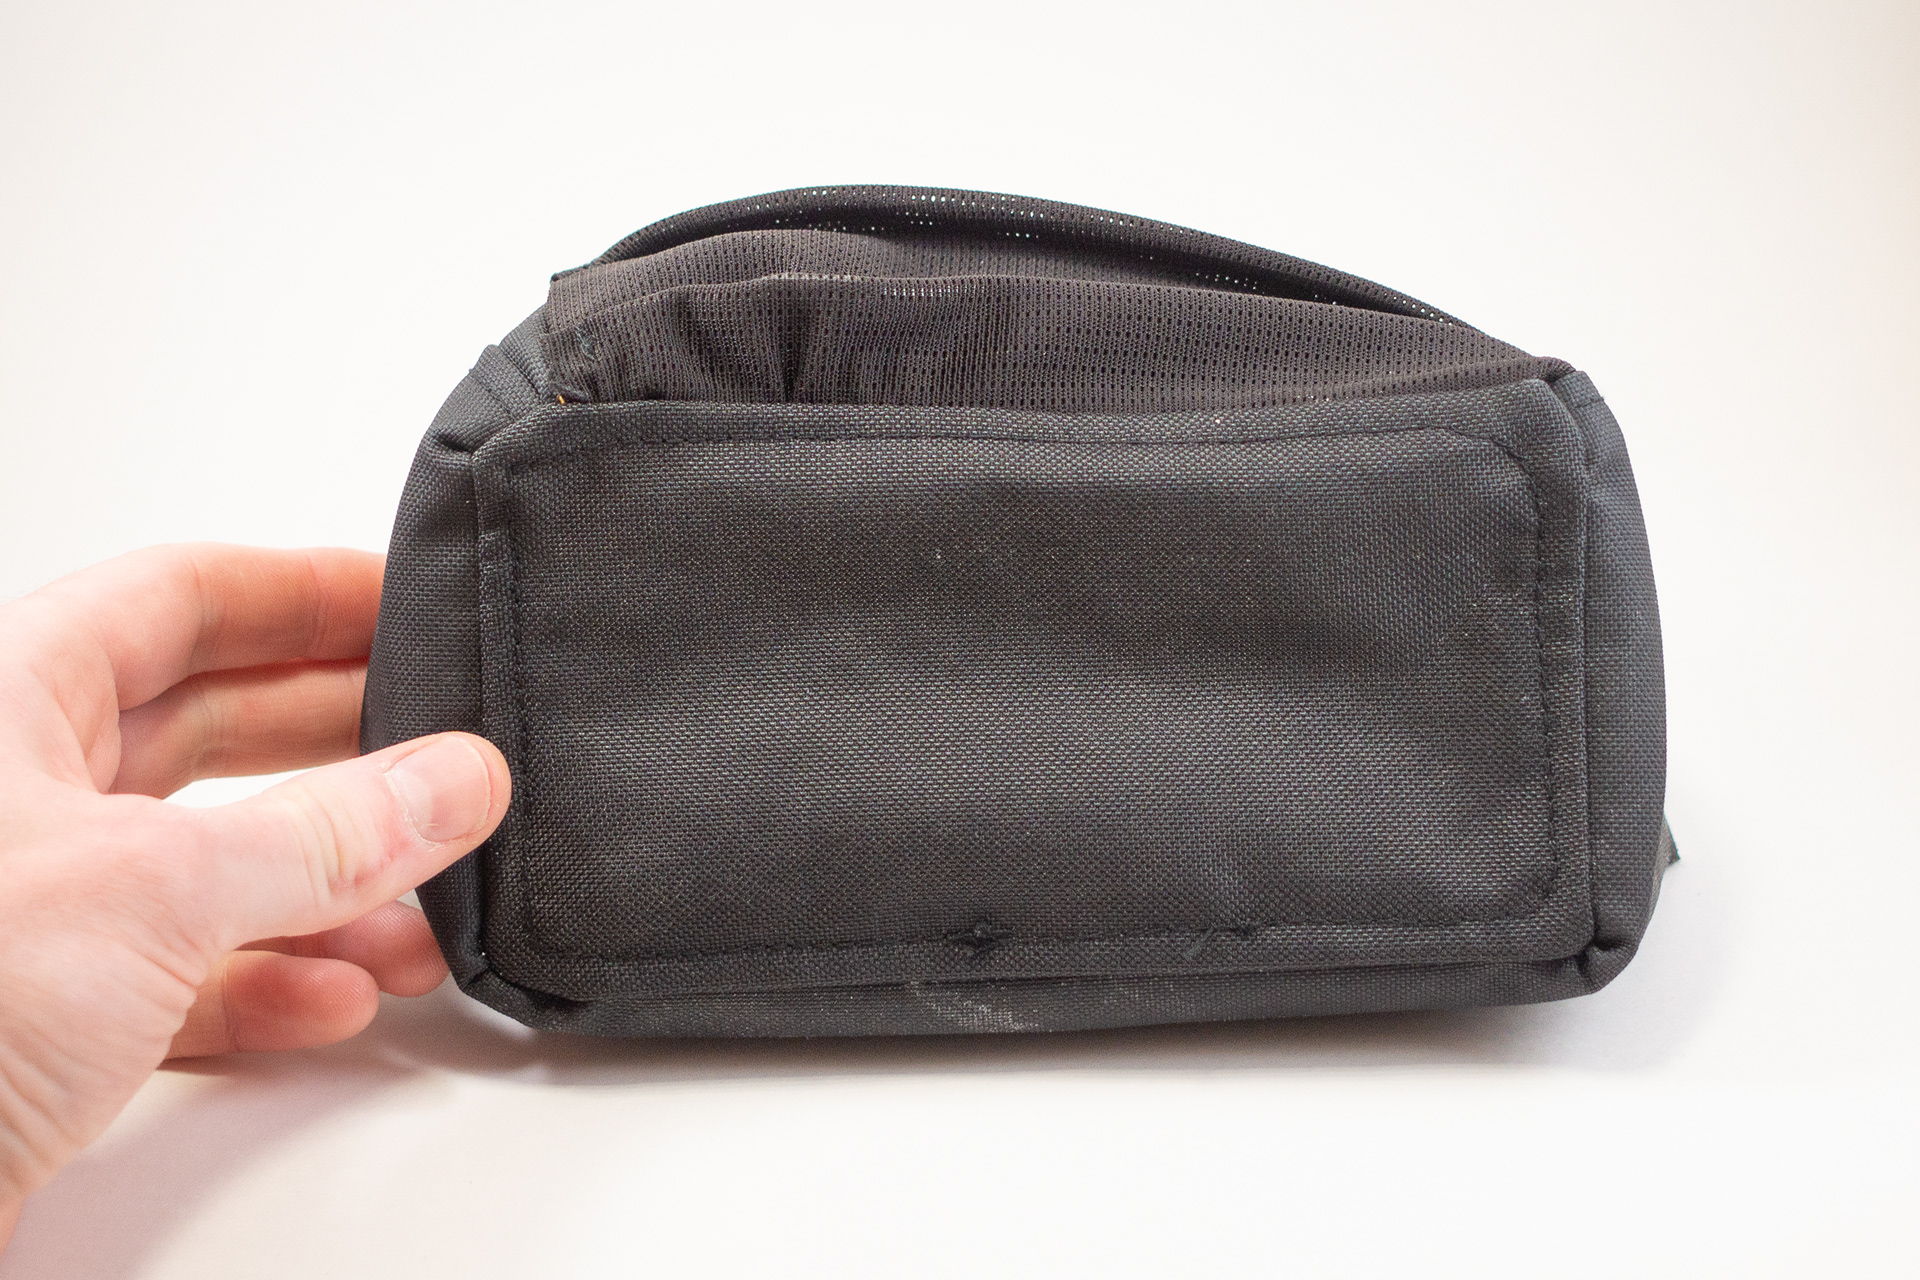
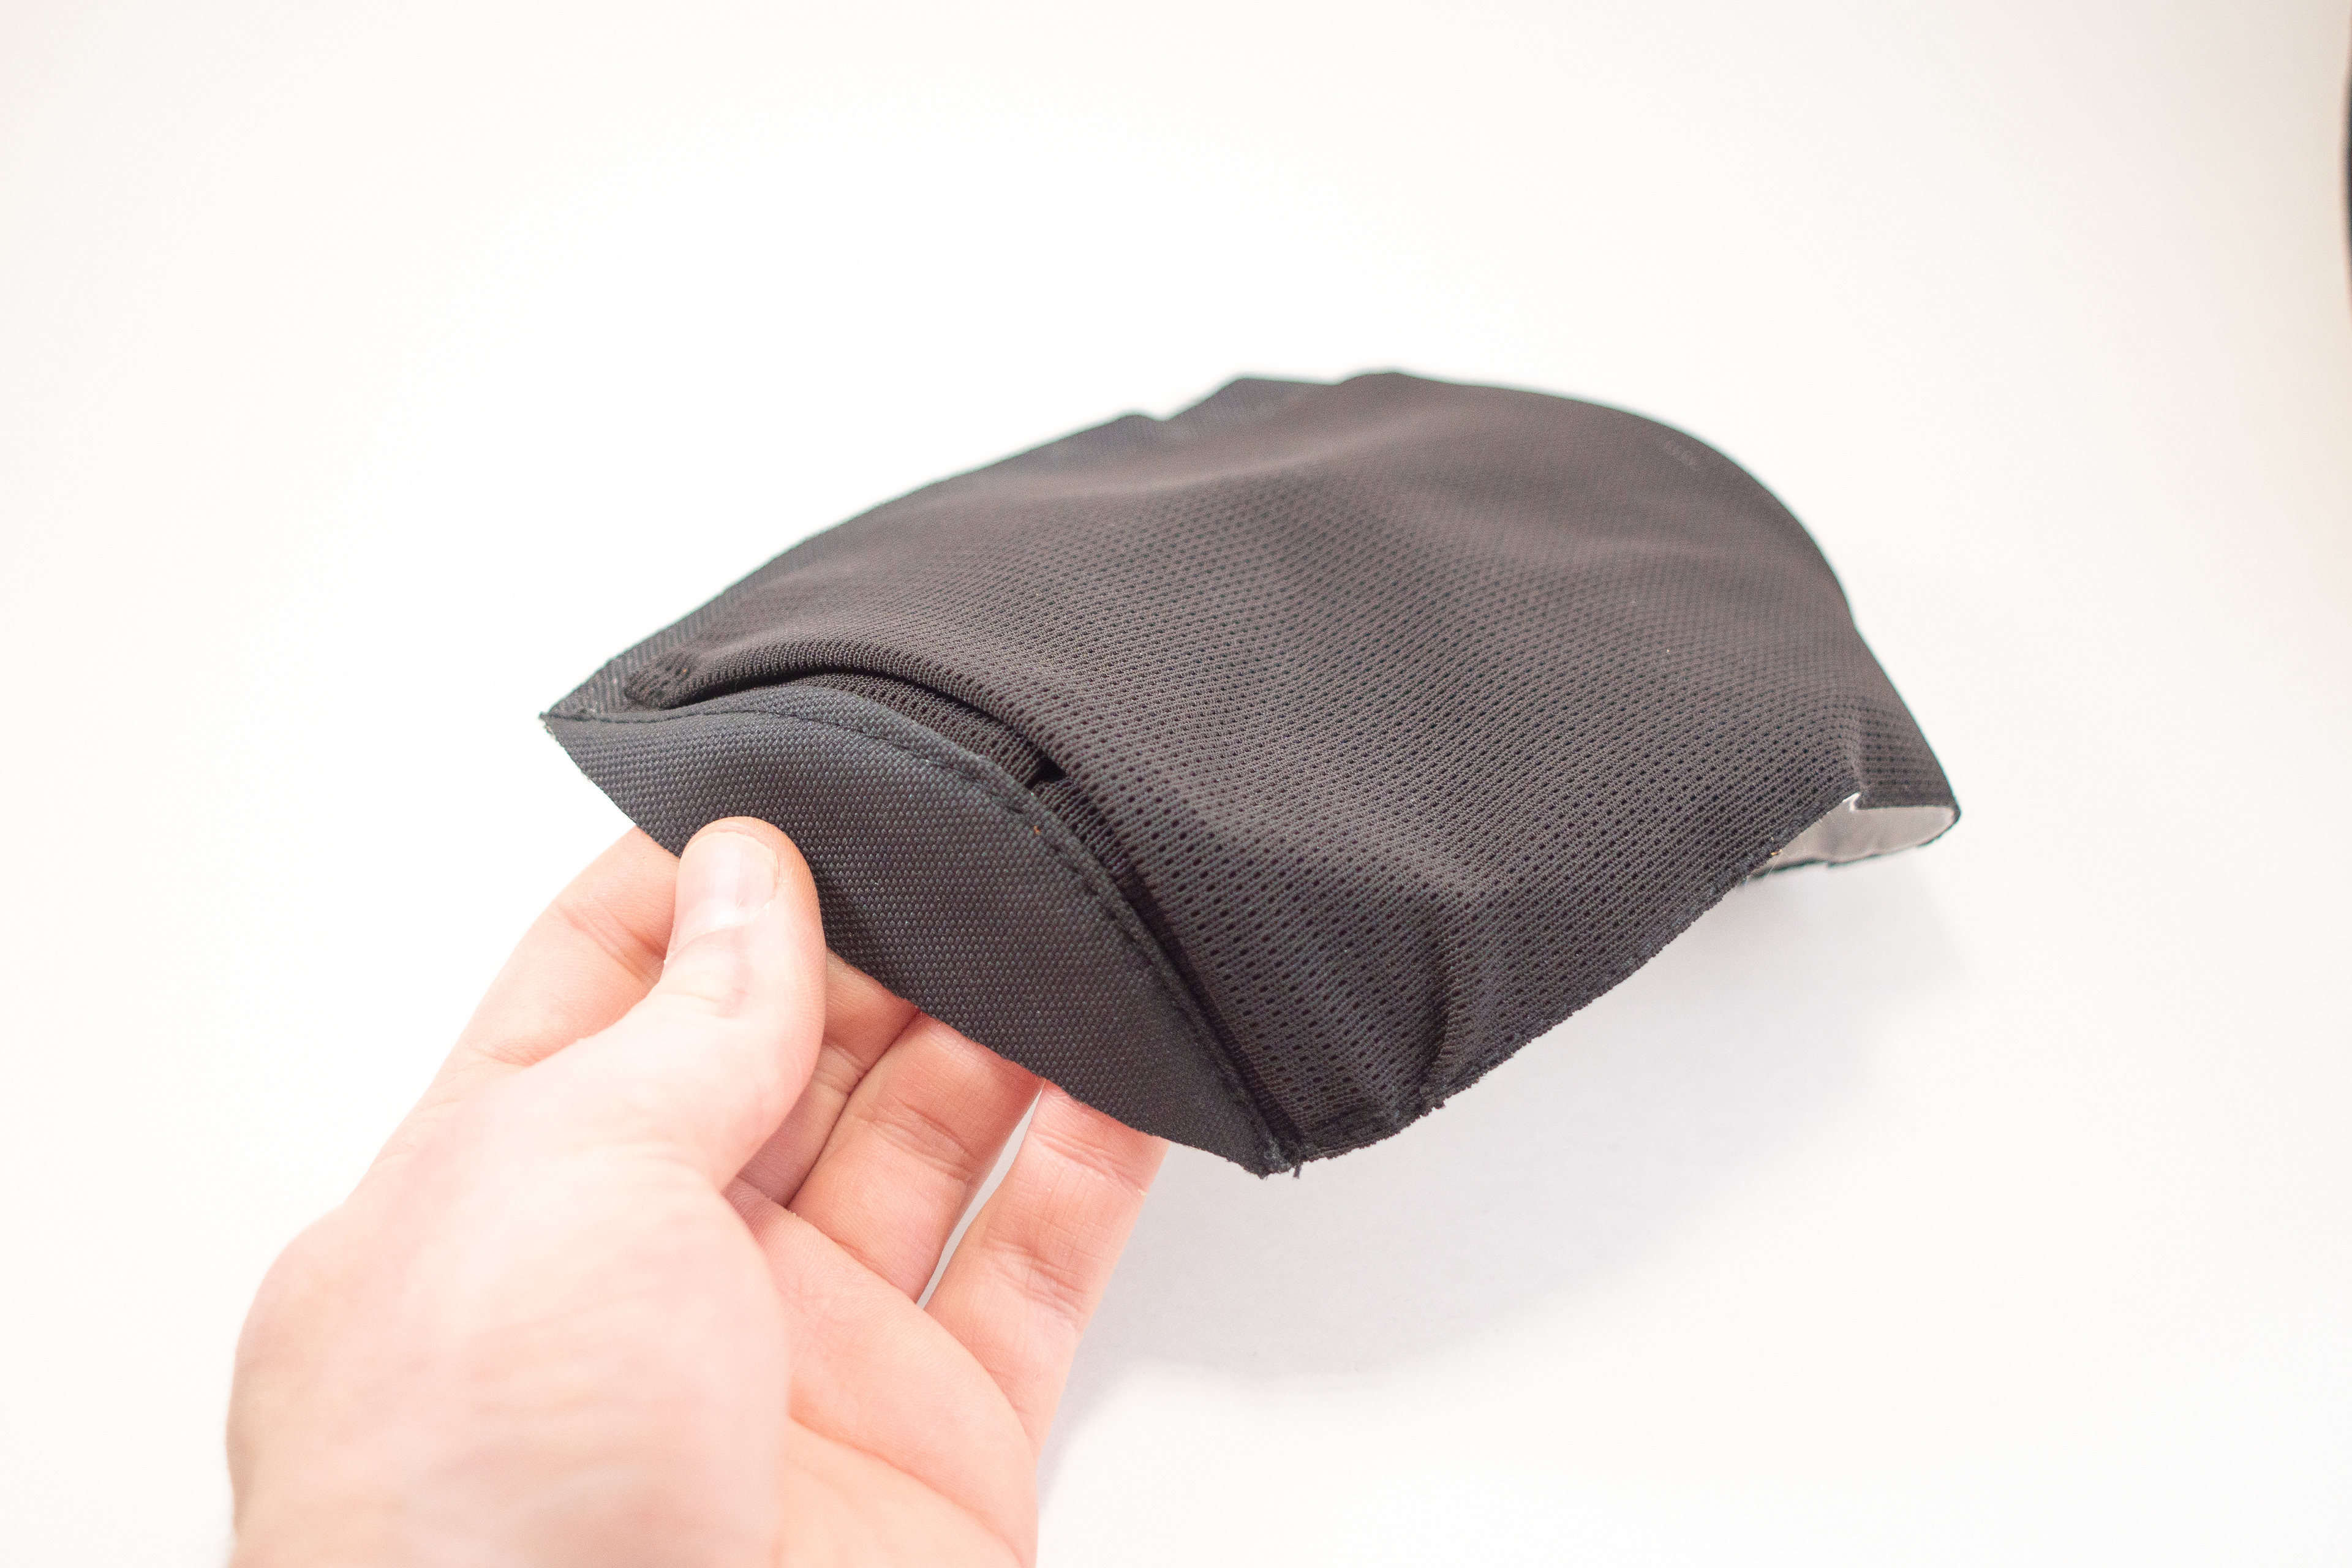
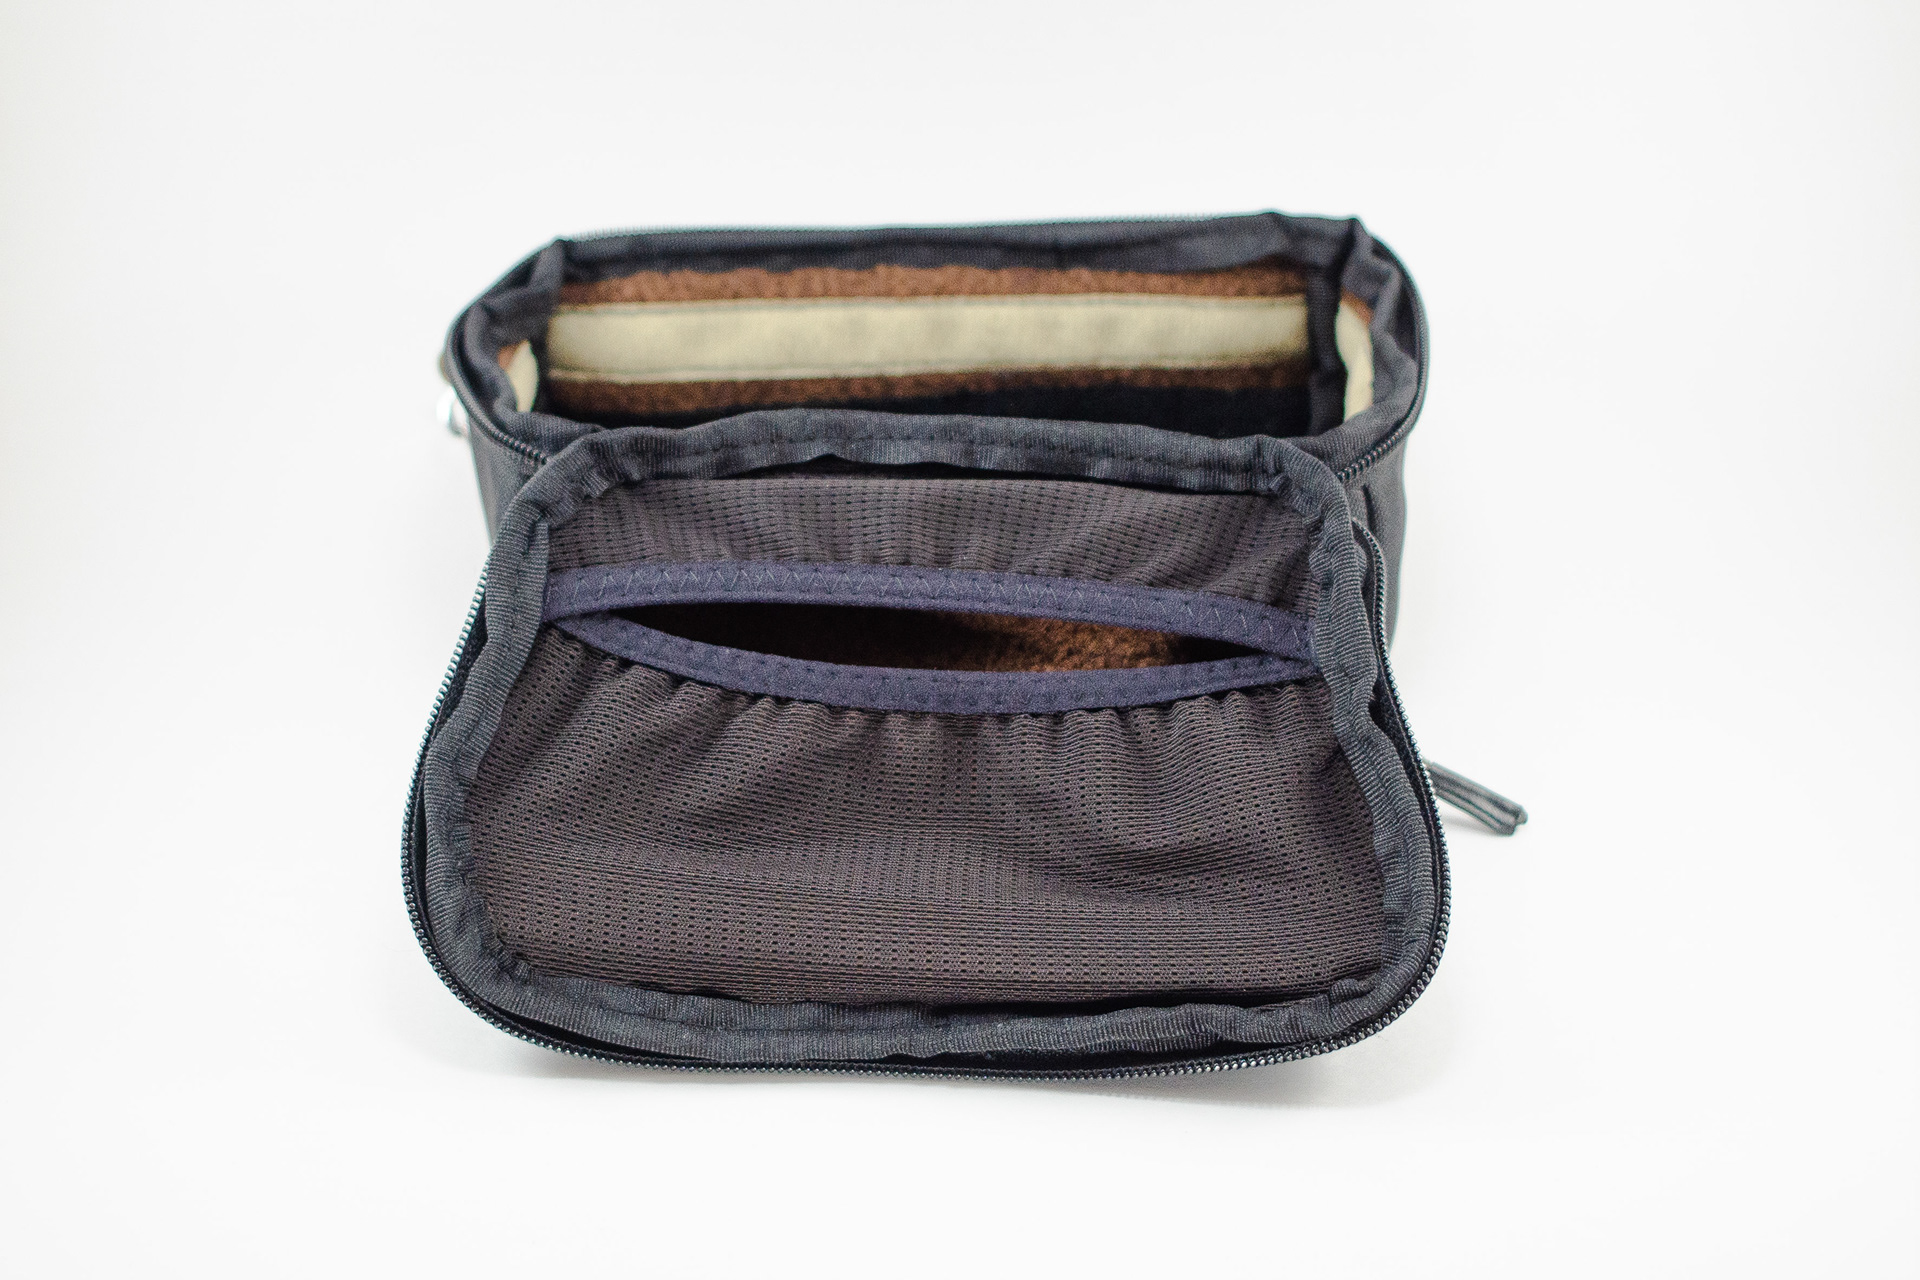
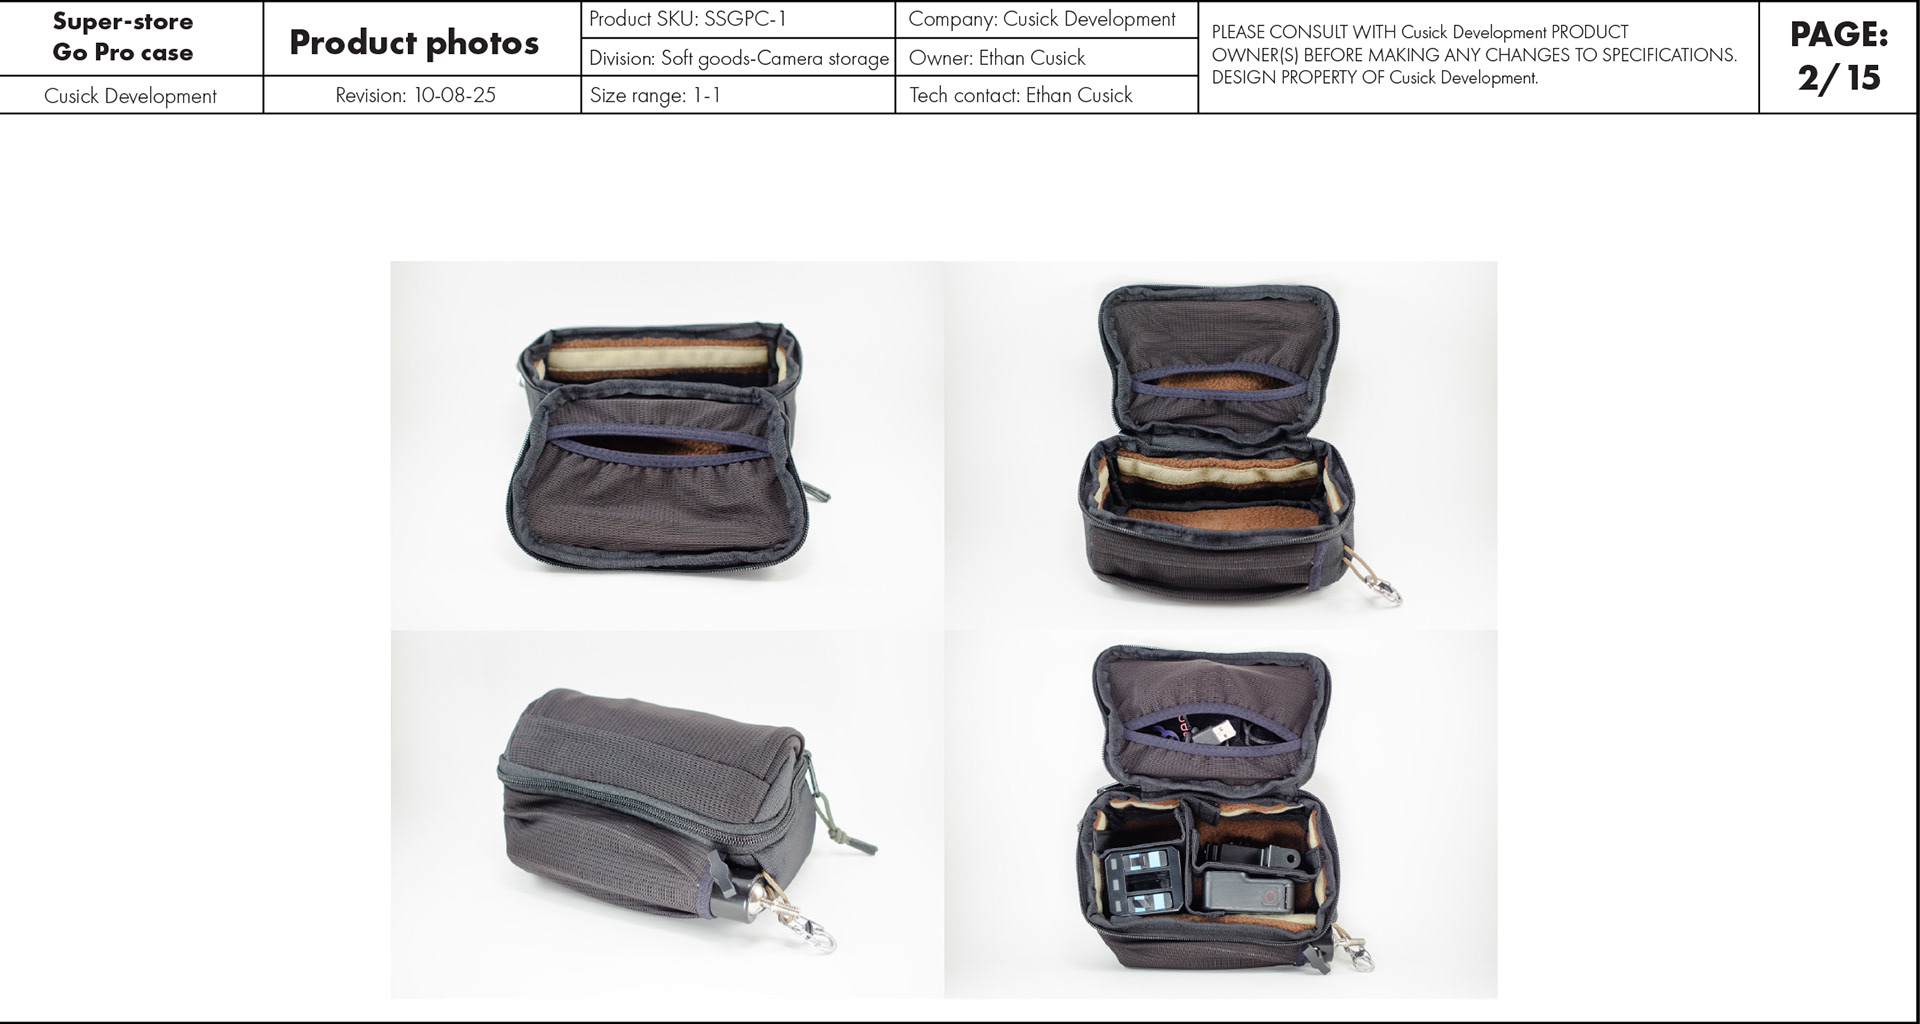
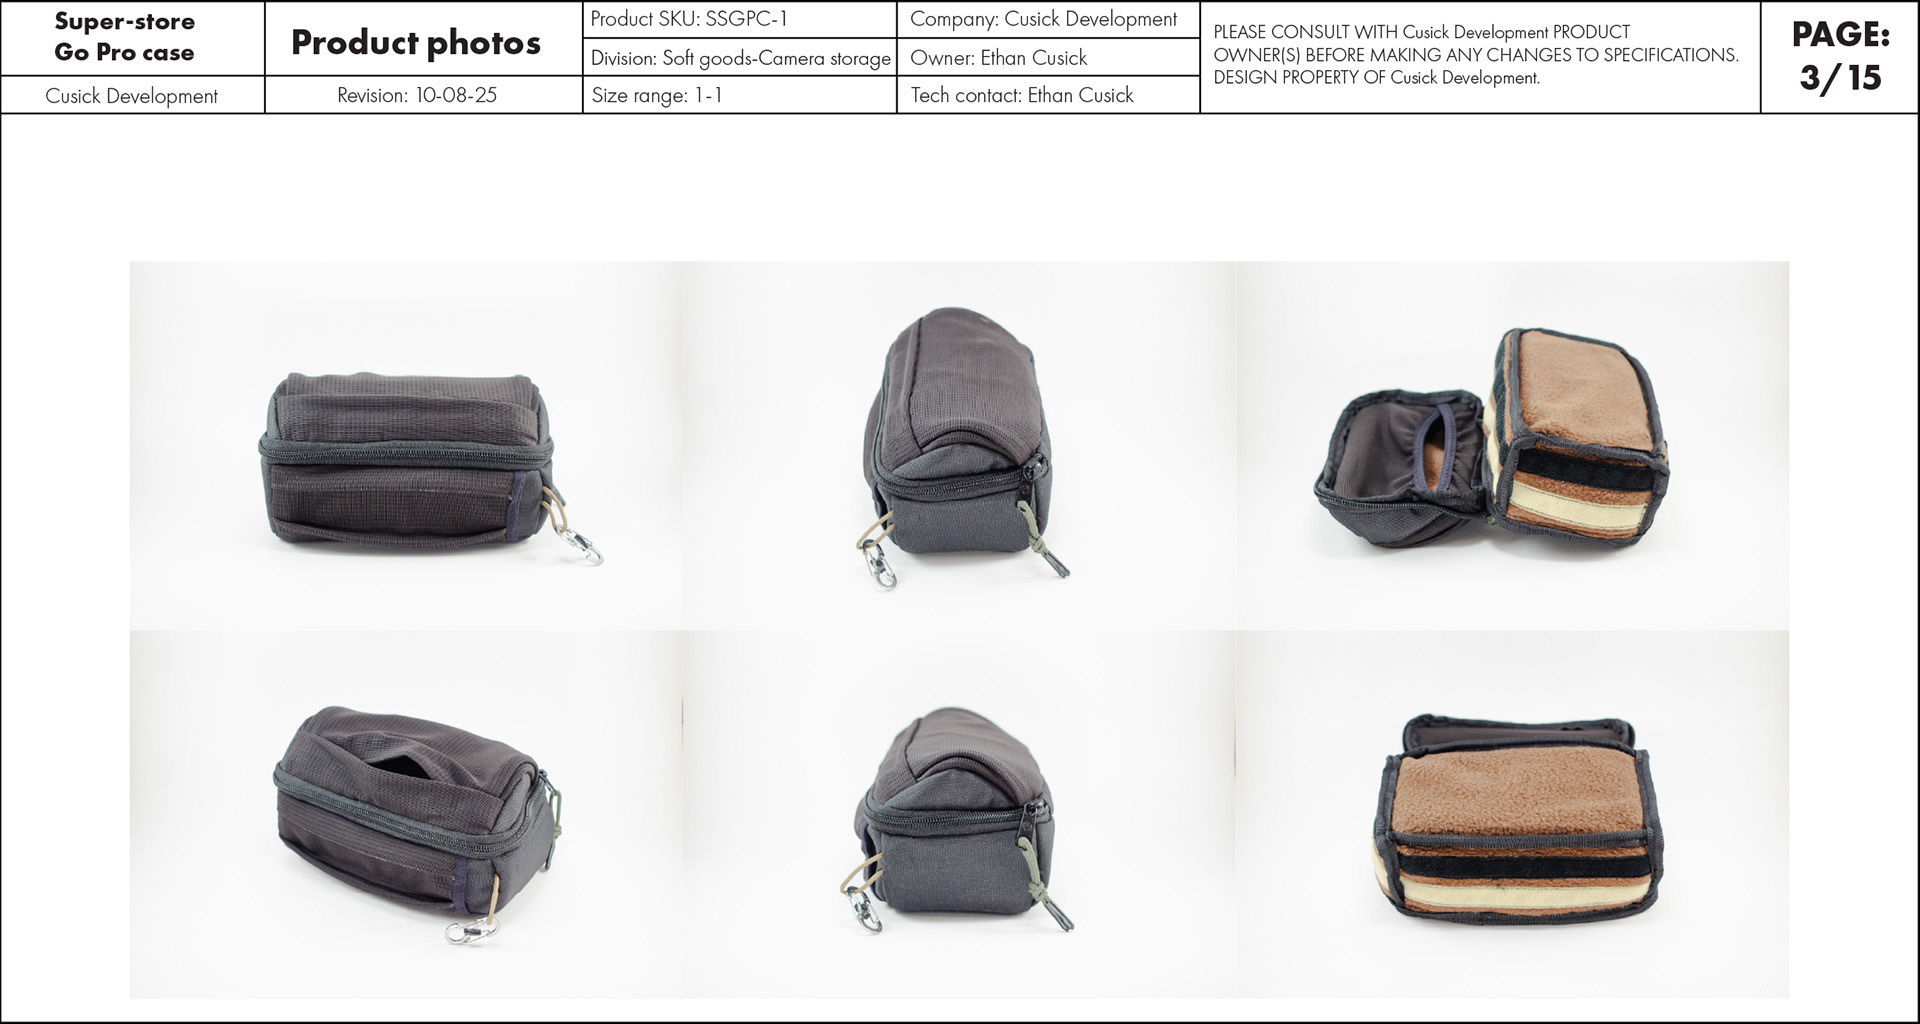
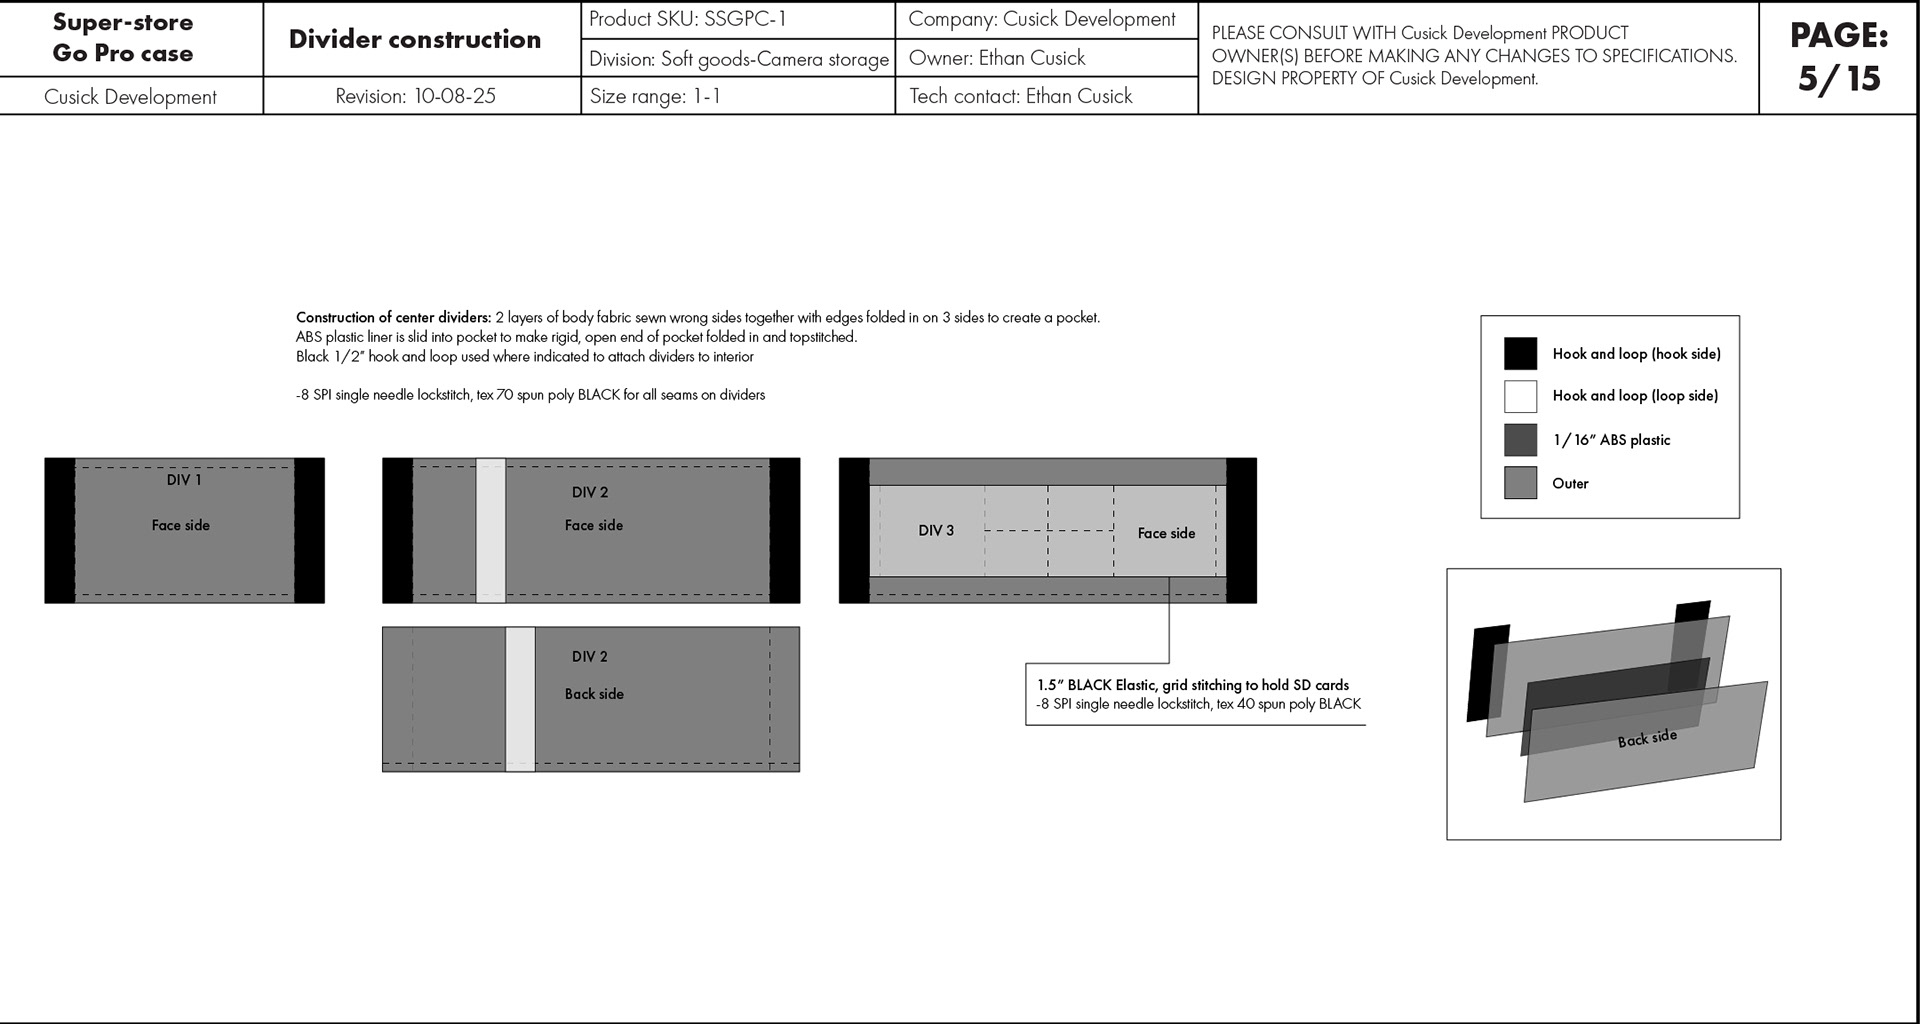
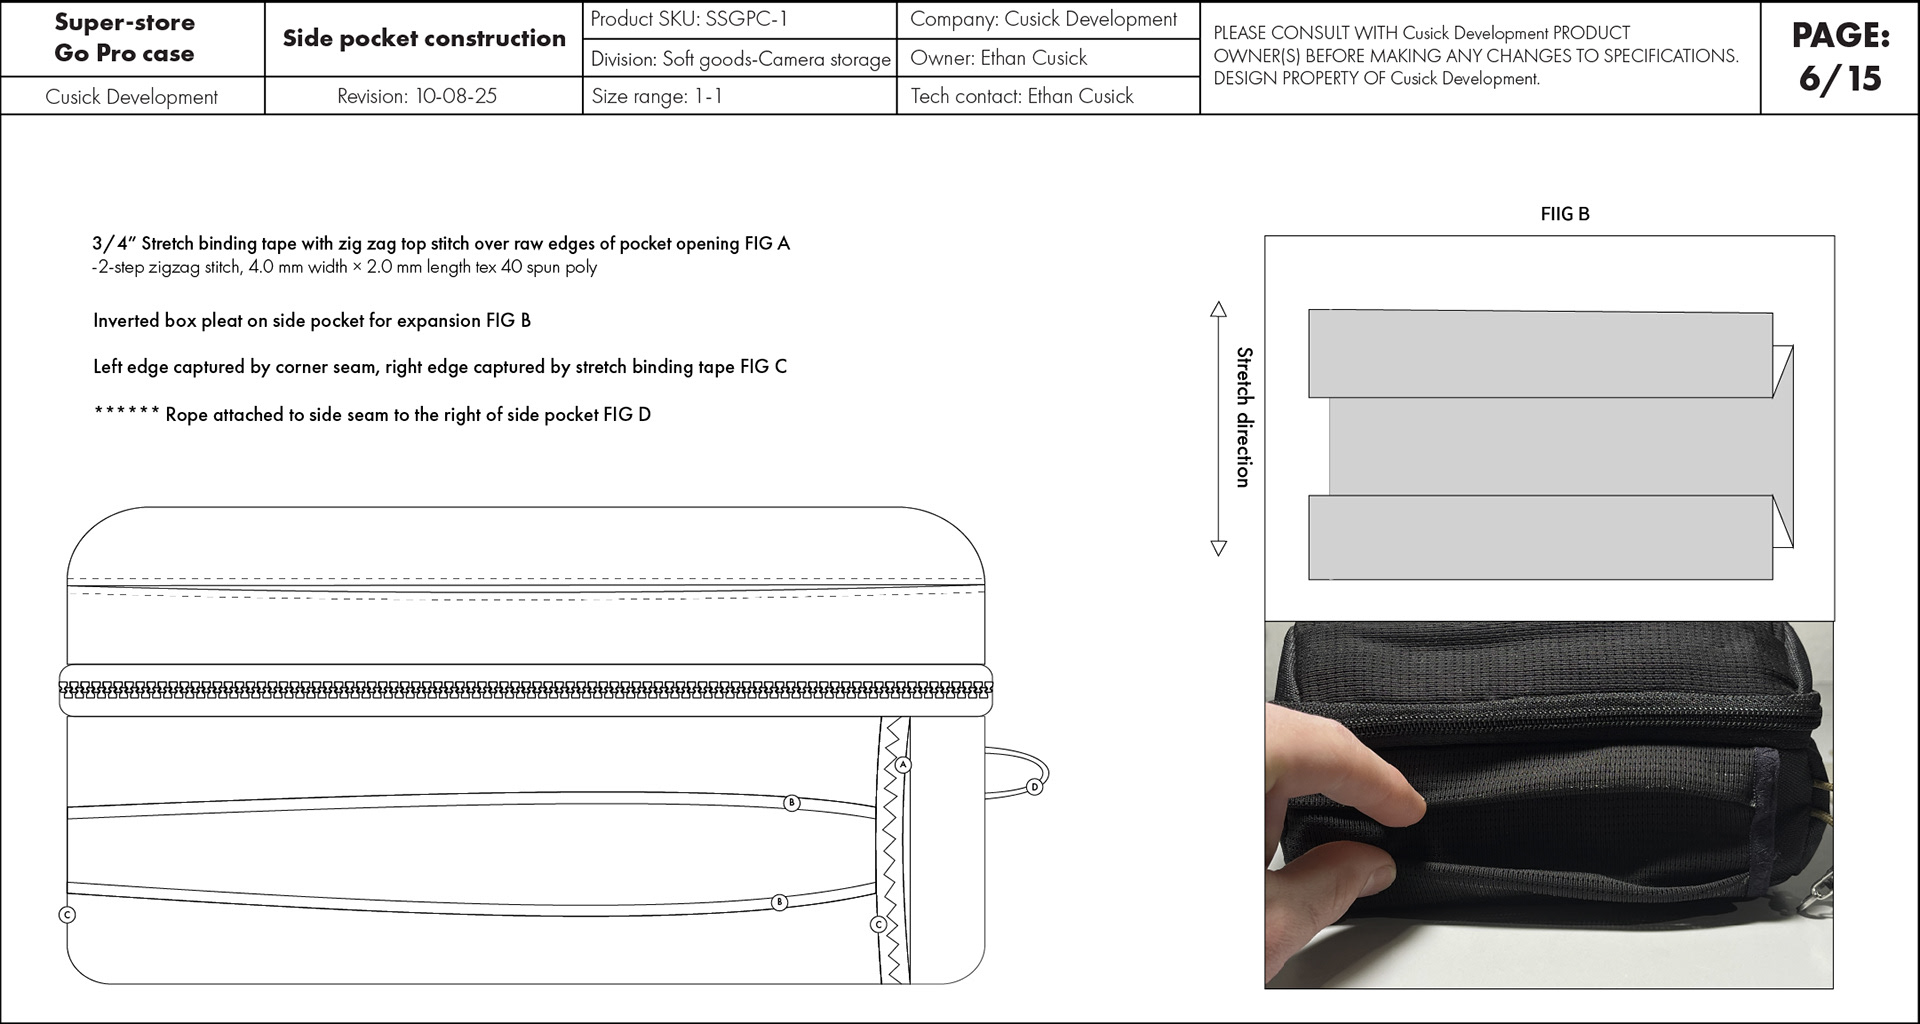
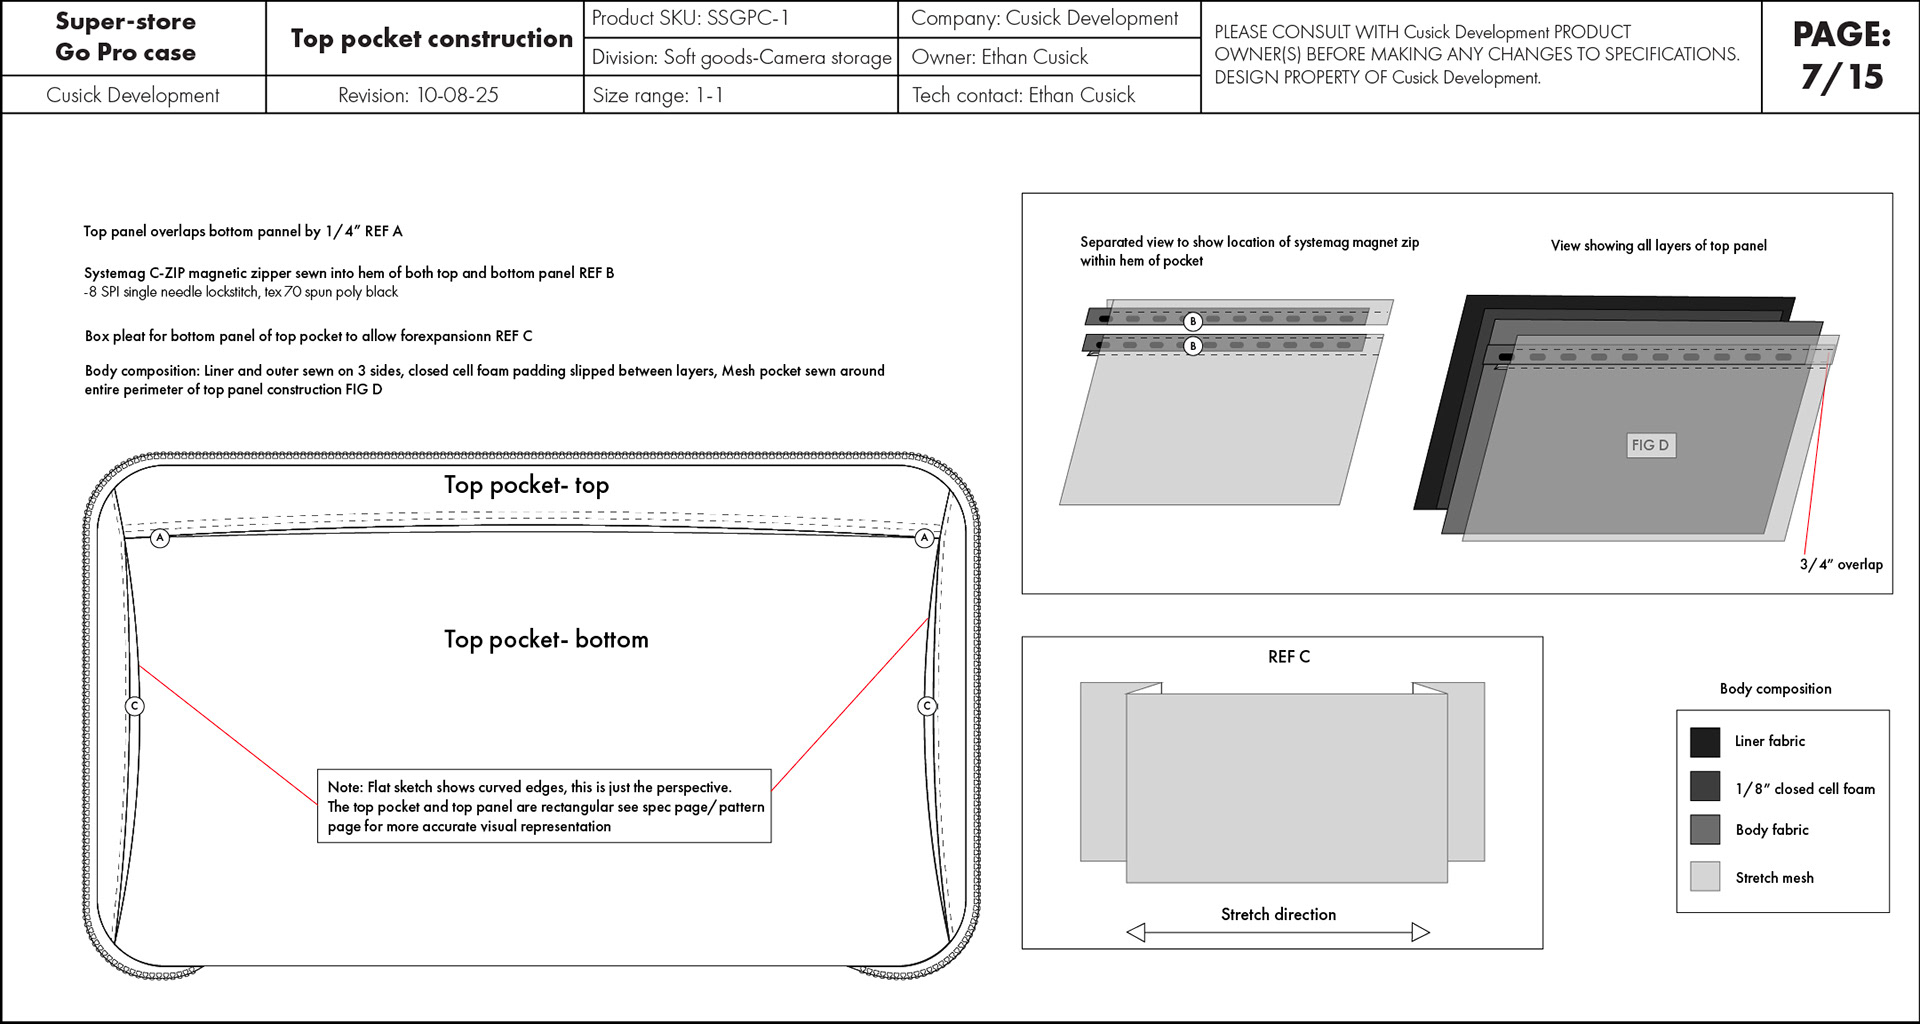
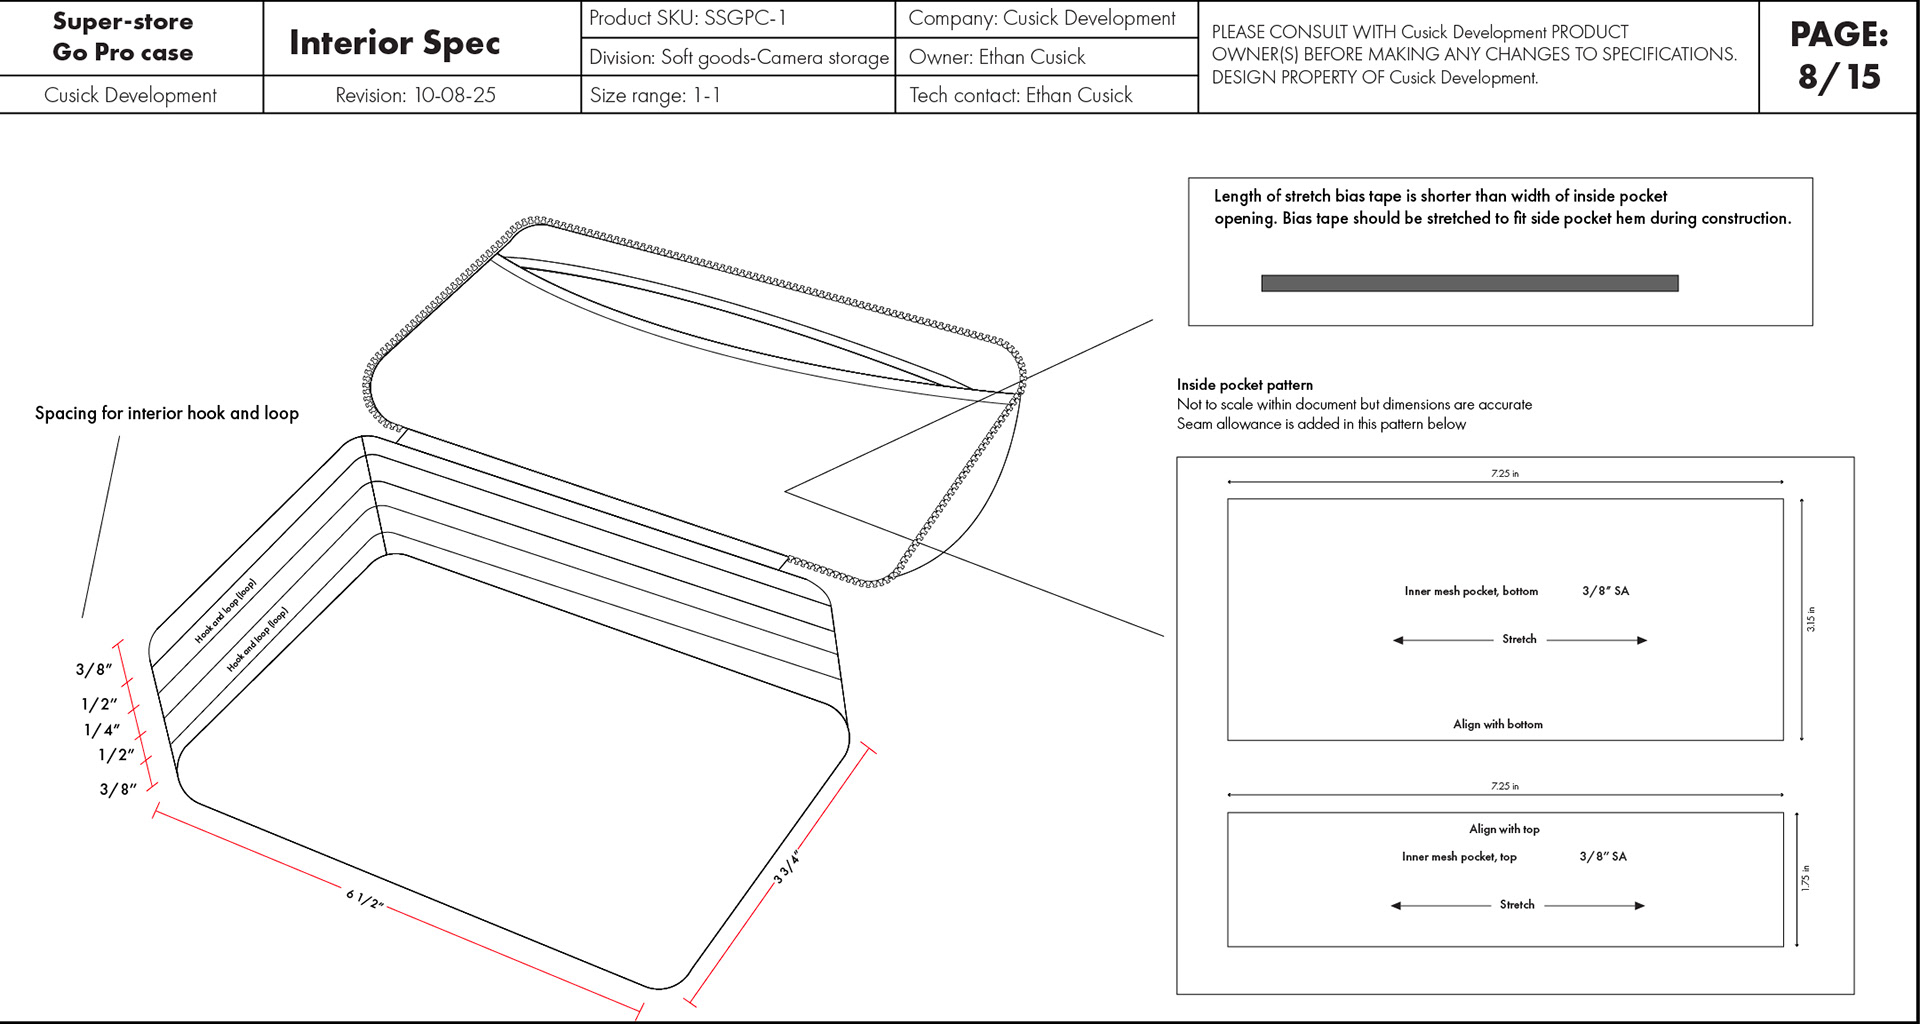
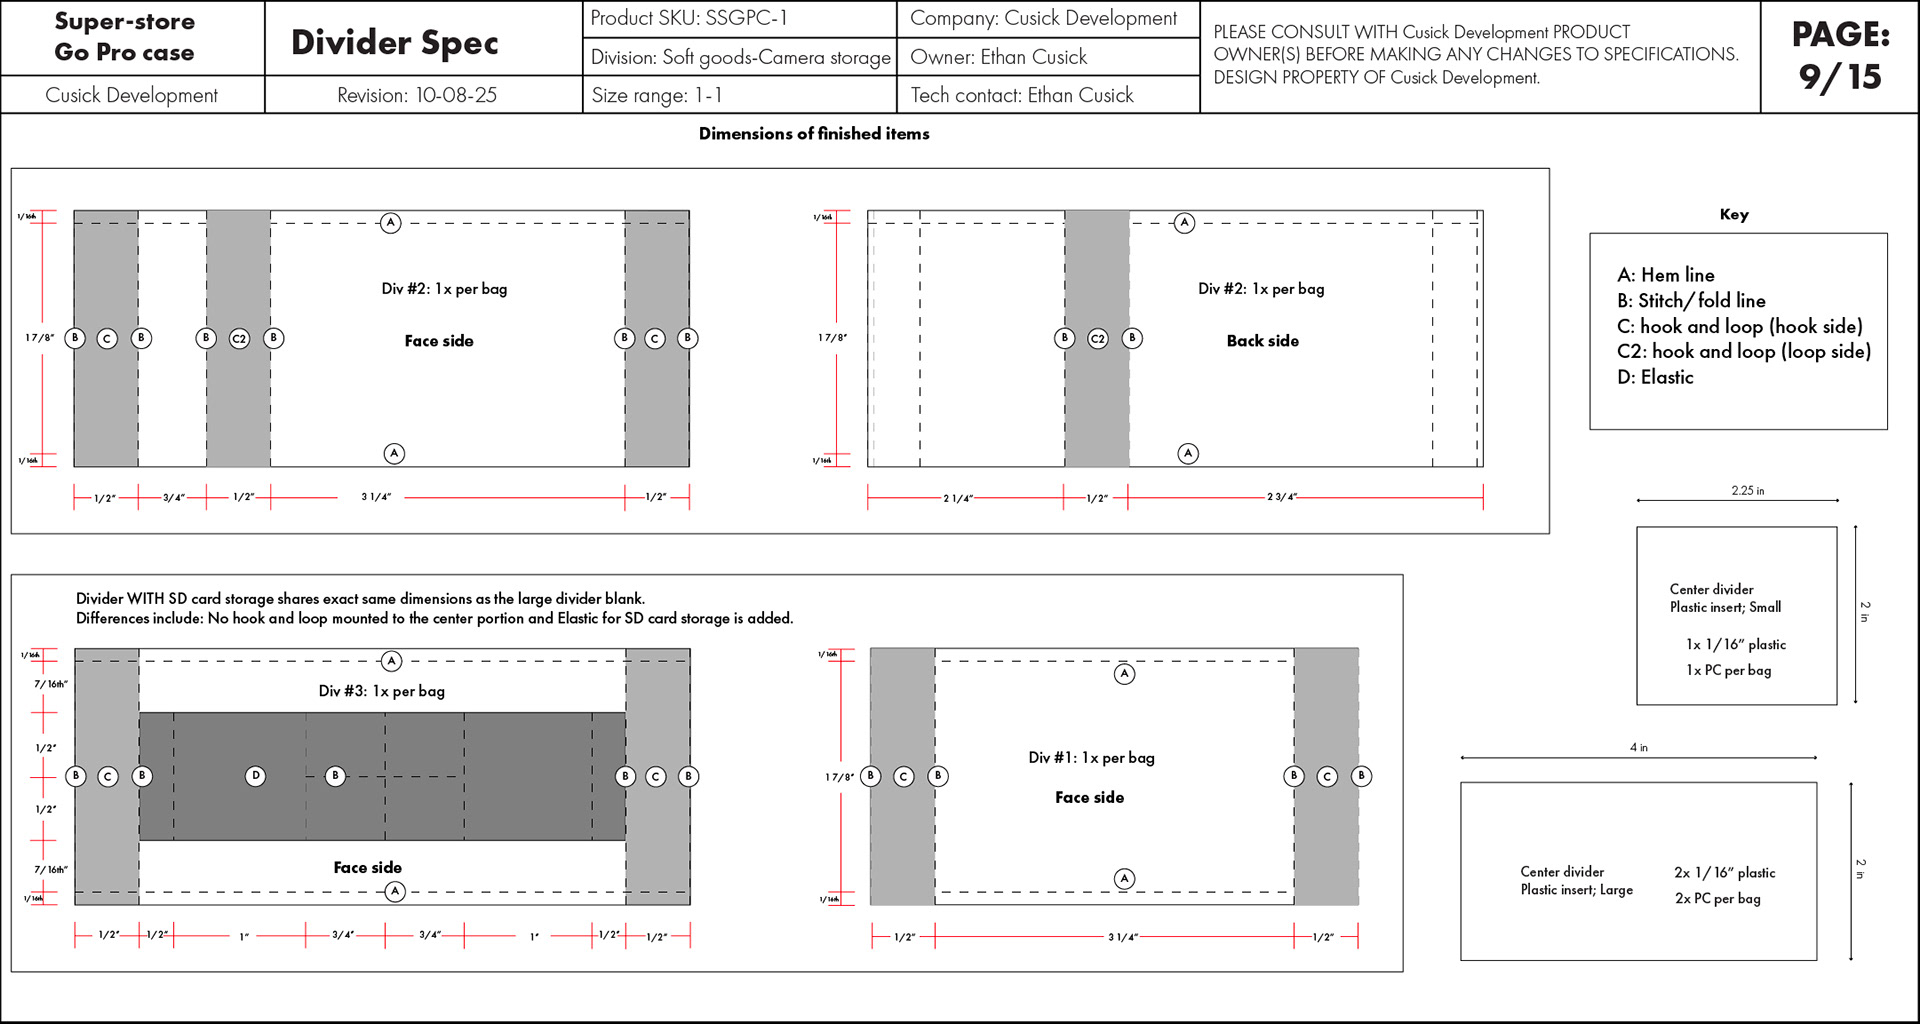
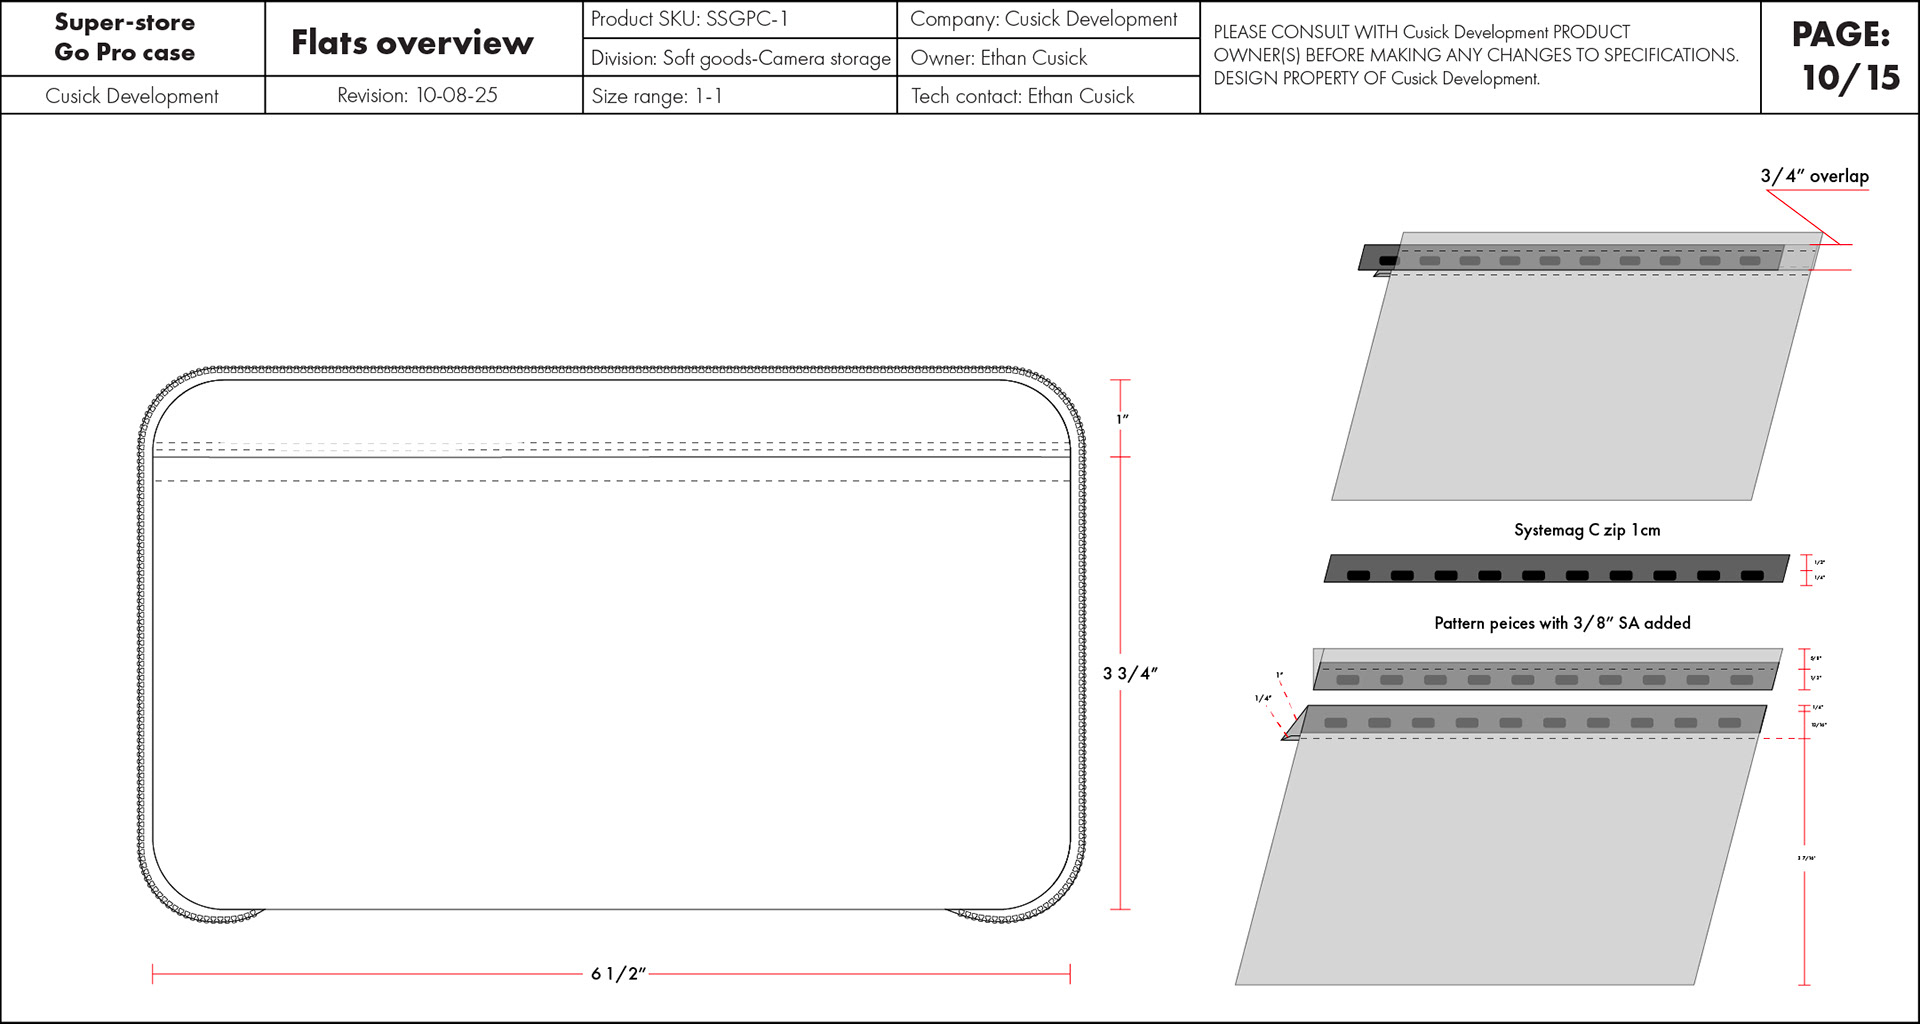
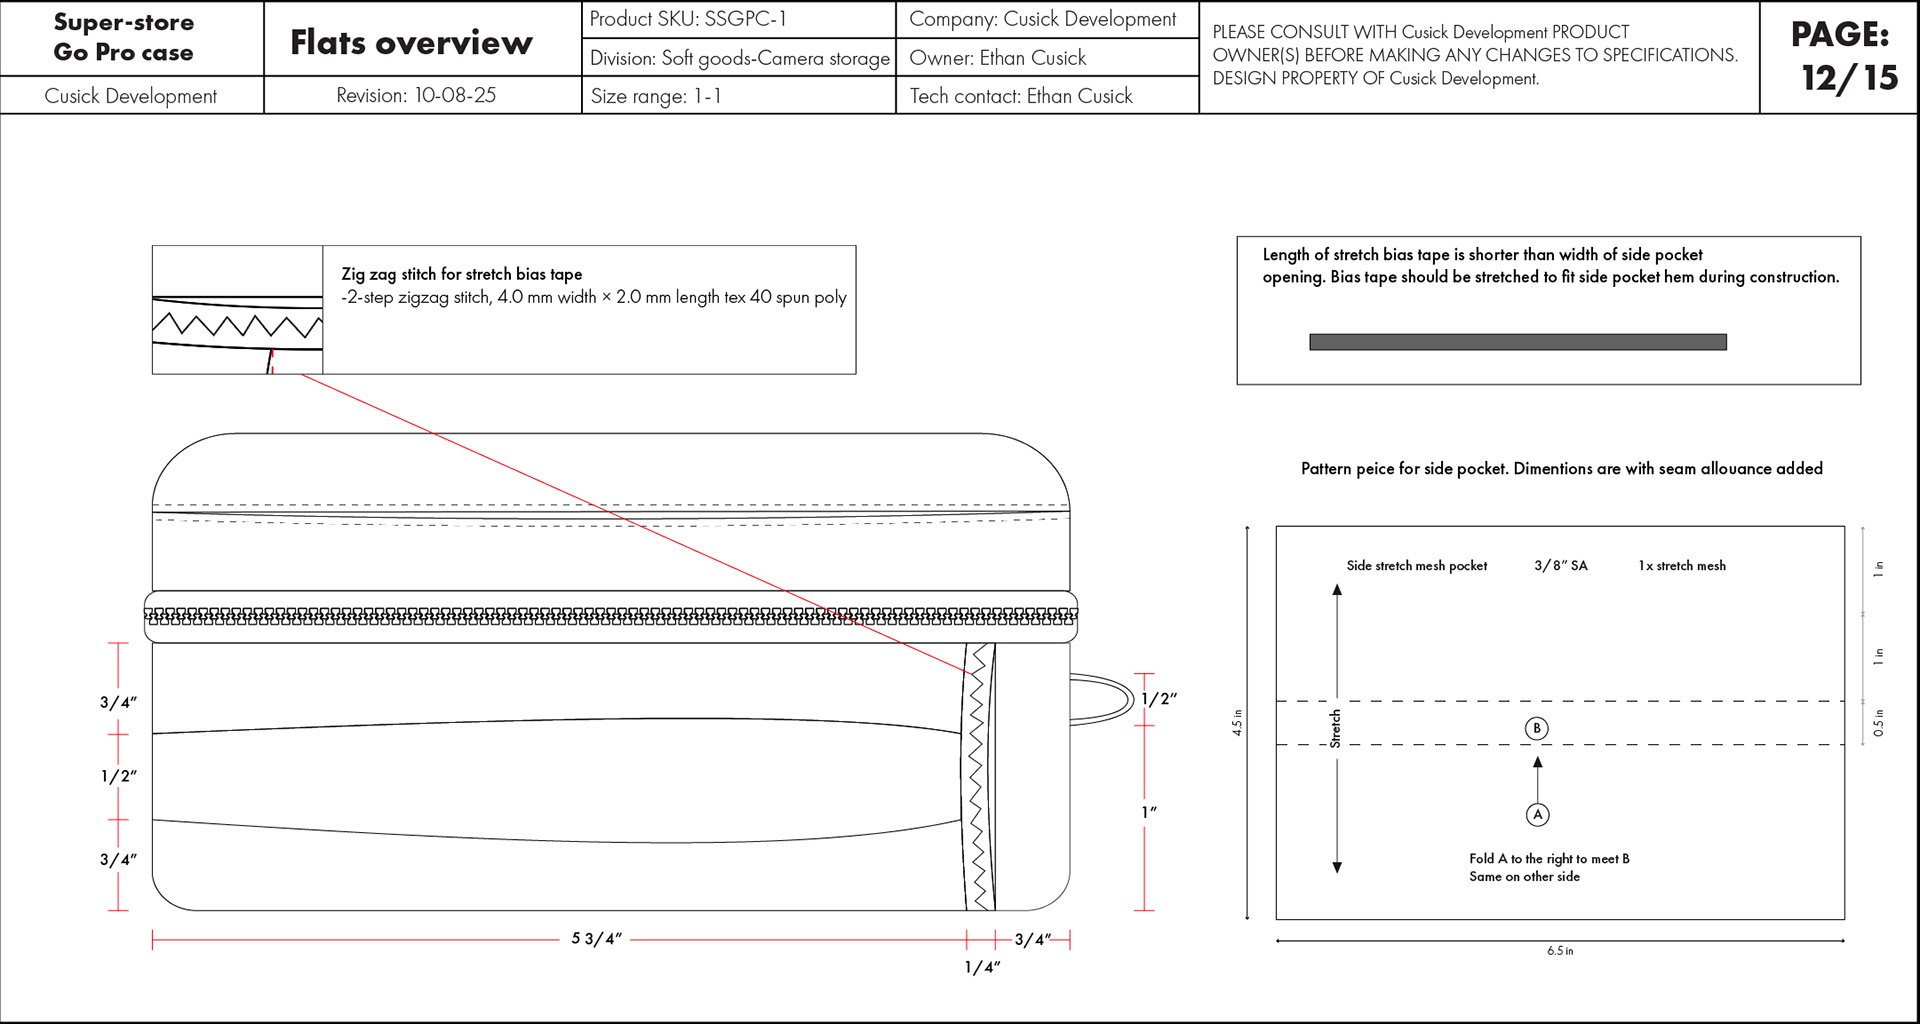
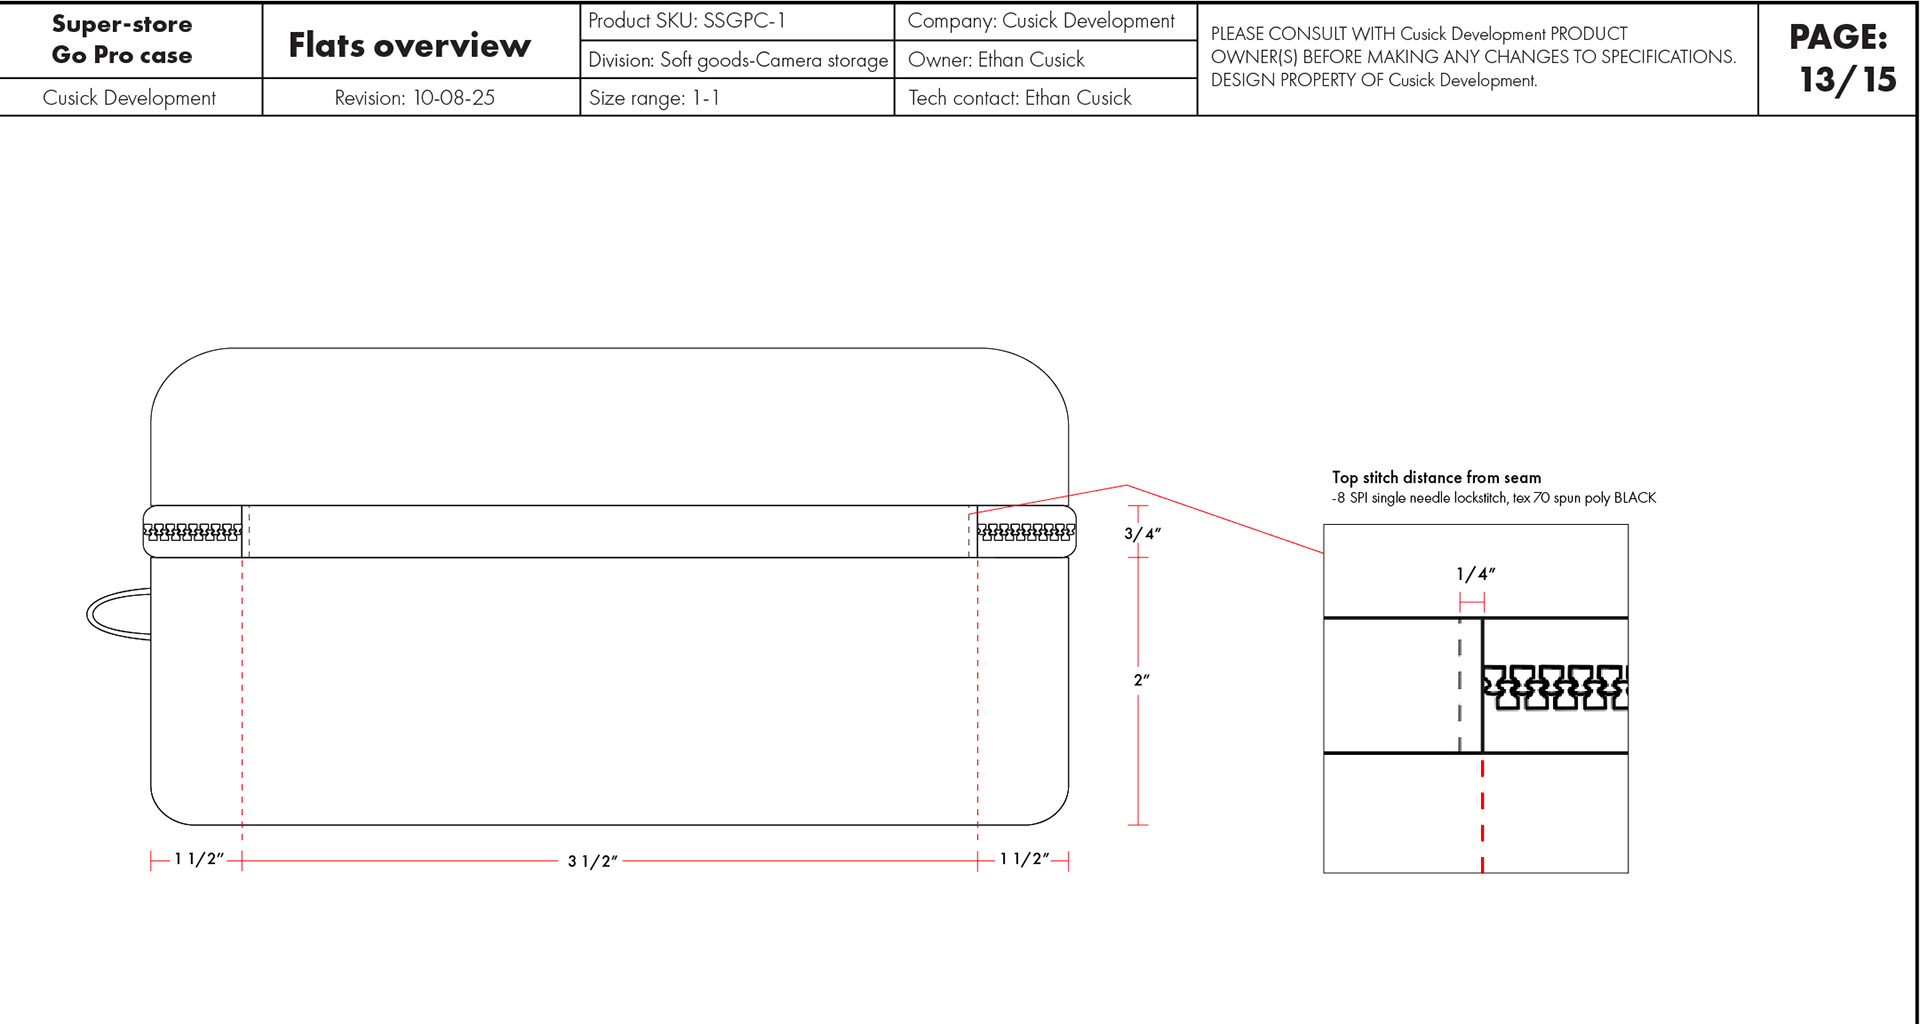
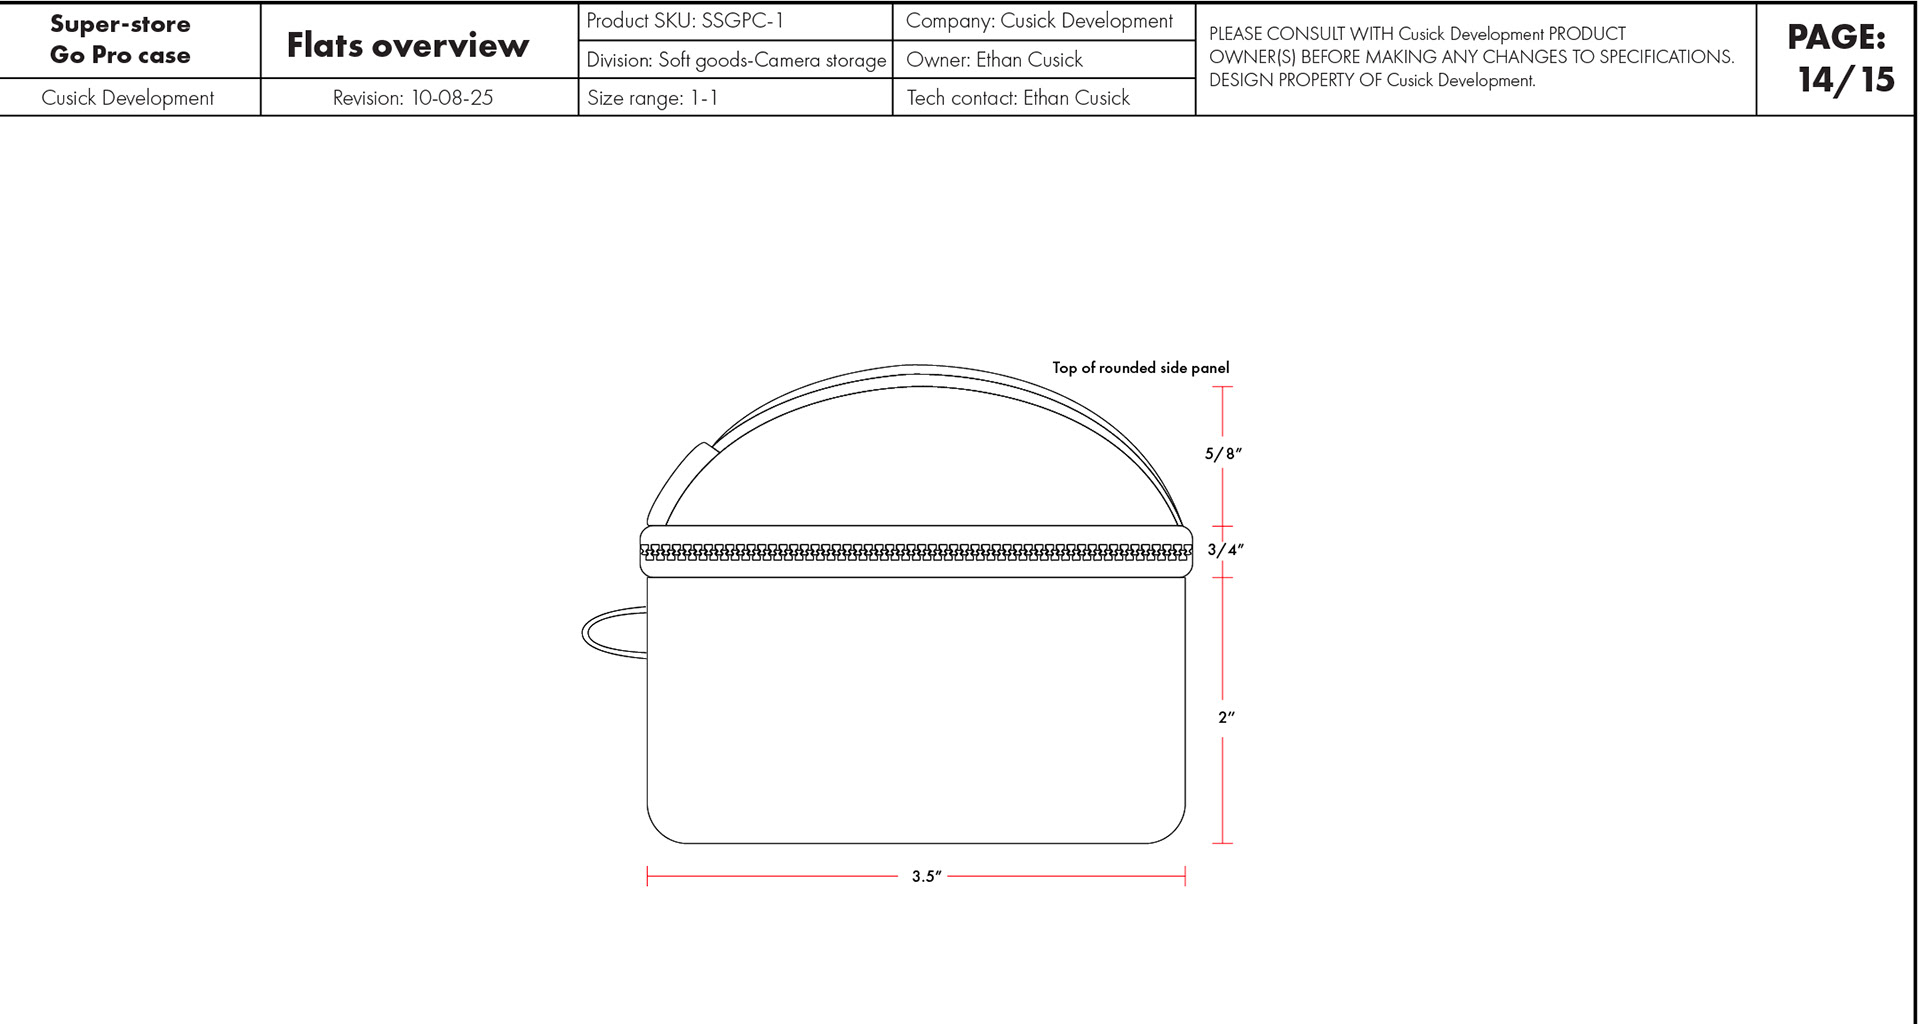
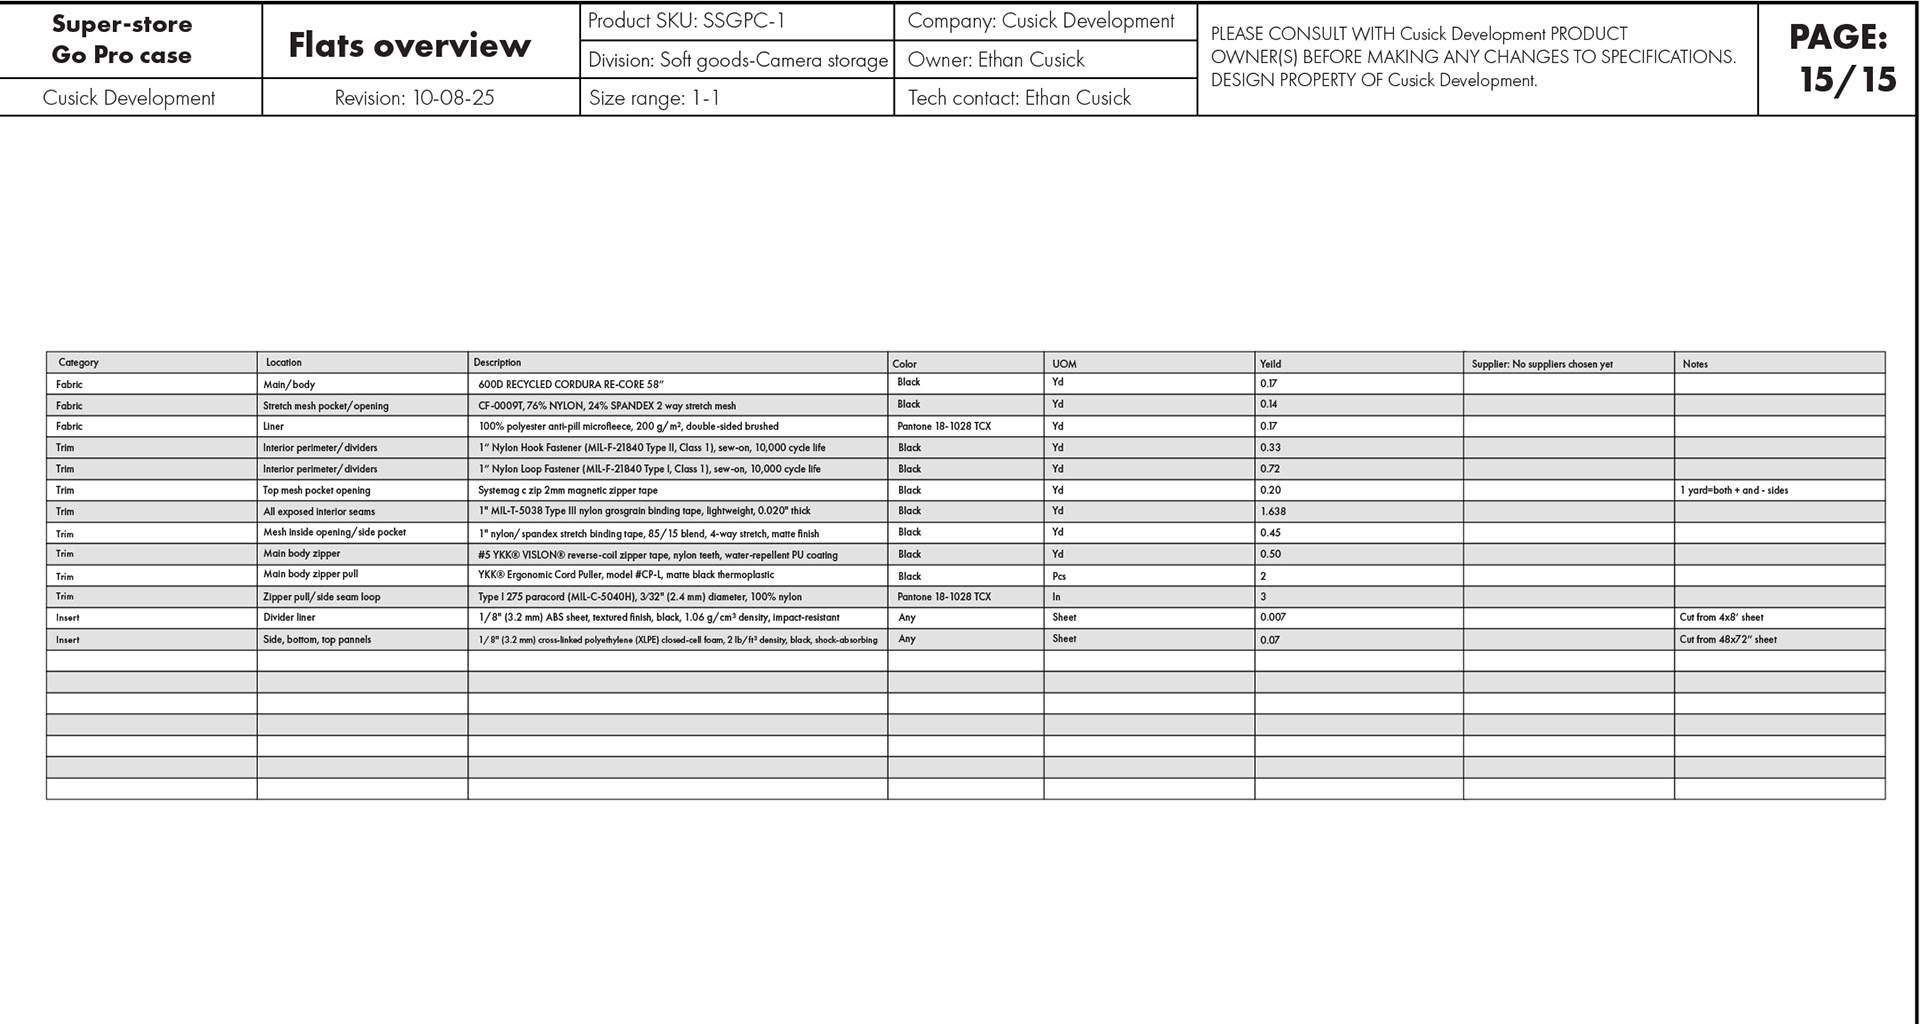
This was the last prototype I created. It included all of the final details that I left out of the first bunch. Details include: Stretch bias tape to finish mesh, pleated top pocket with magnetic zipper tape opening, pleated side pocket for mini tripod storage and modular dividers reinforced with ABS plastic (one of witch has elastic sewn onto the side for SD card storage)


Tech pack
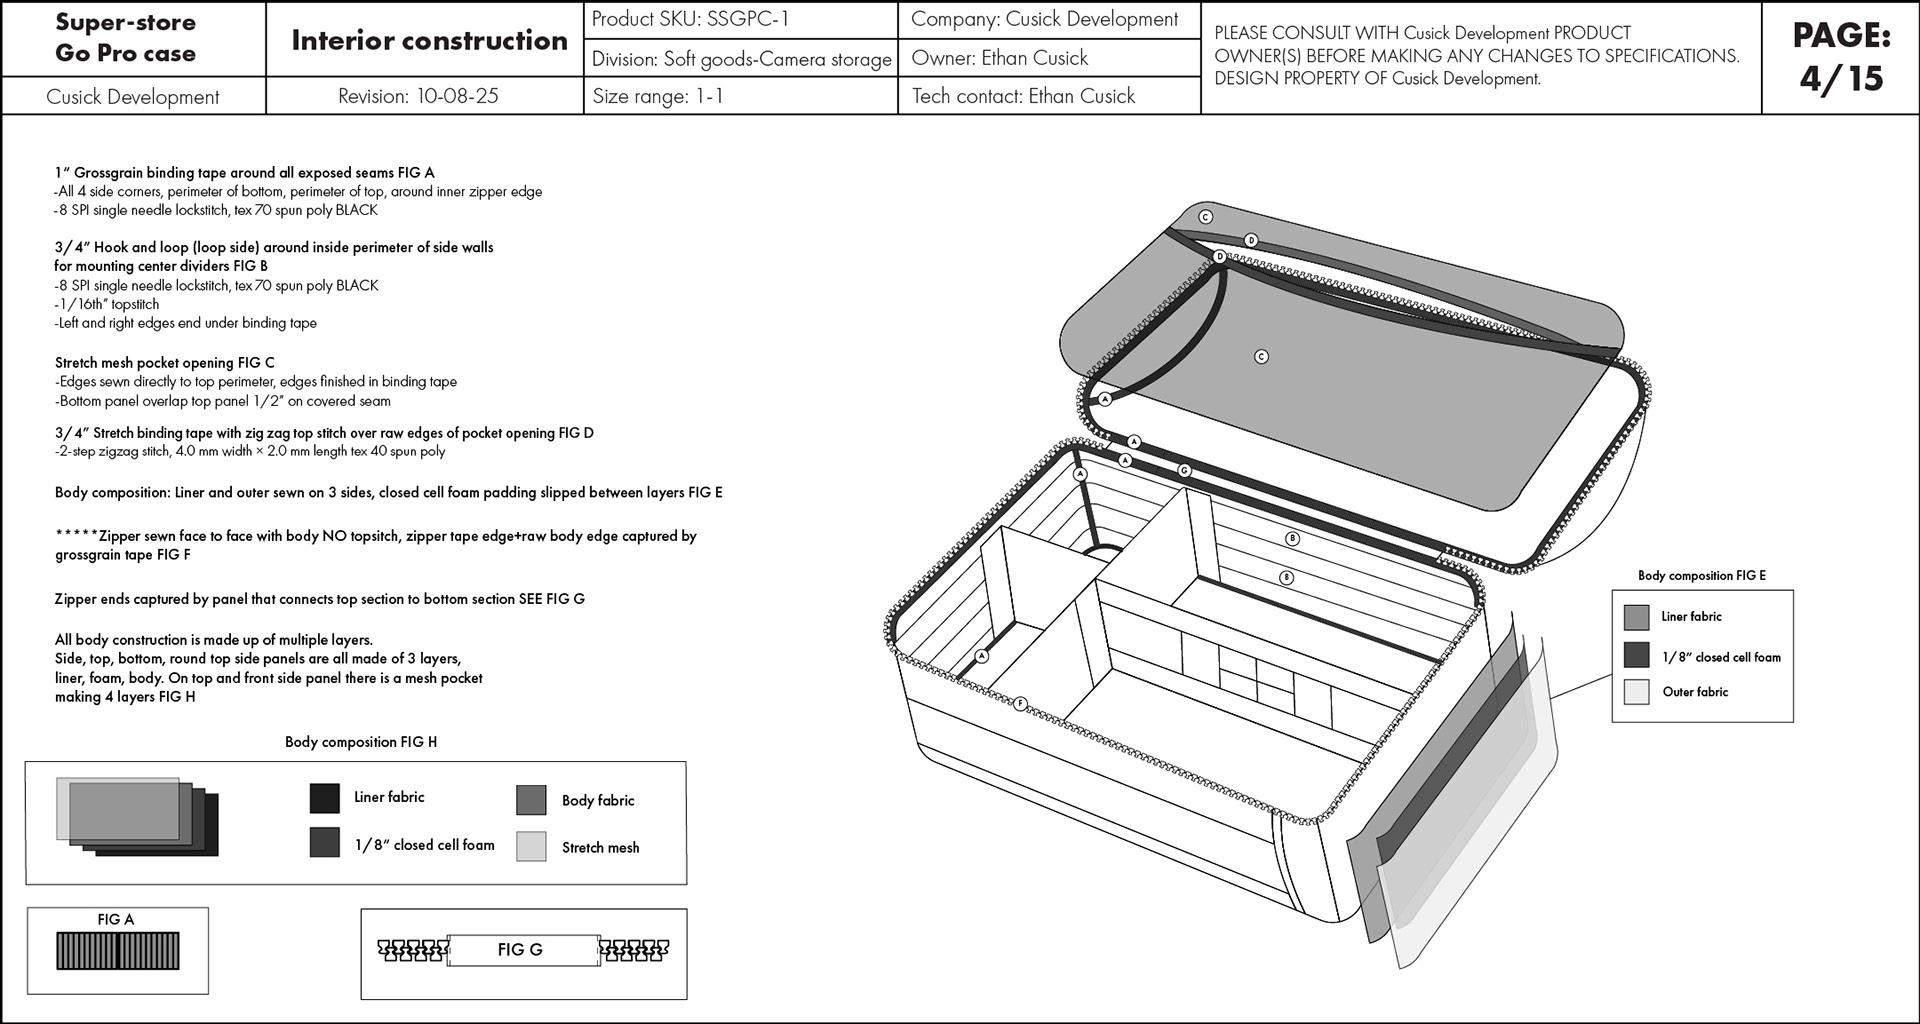
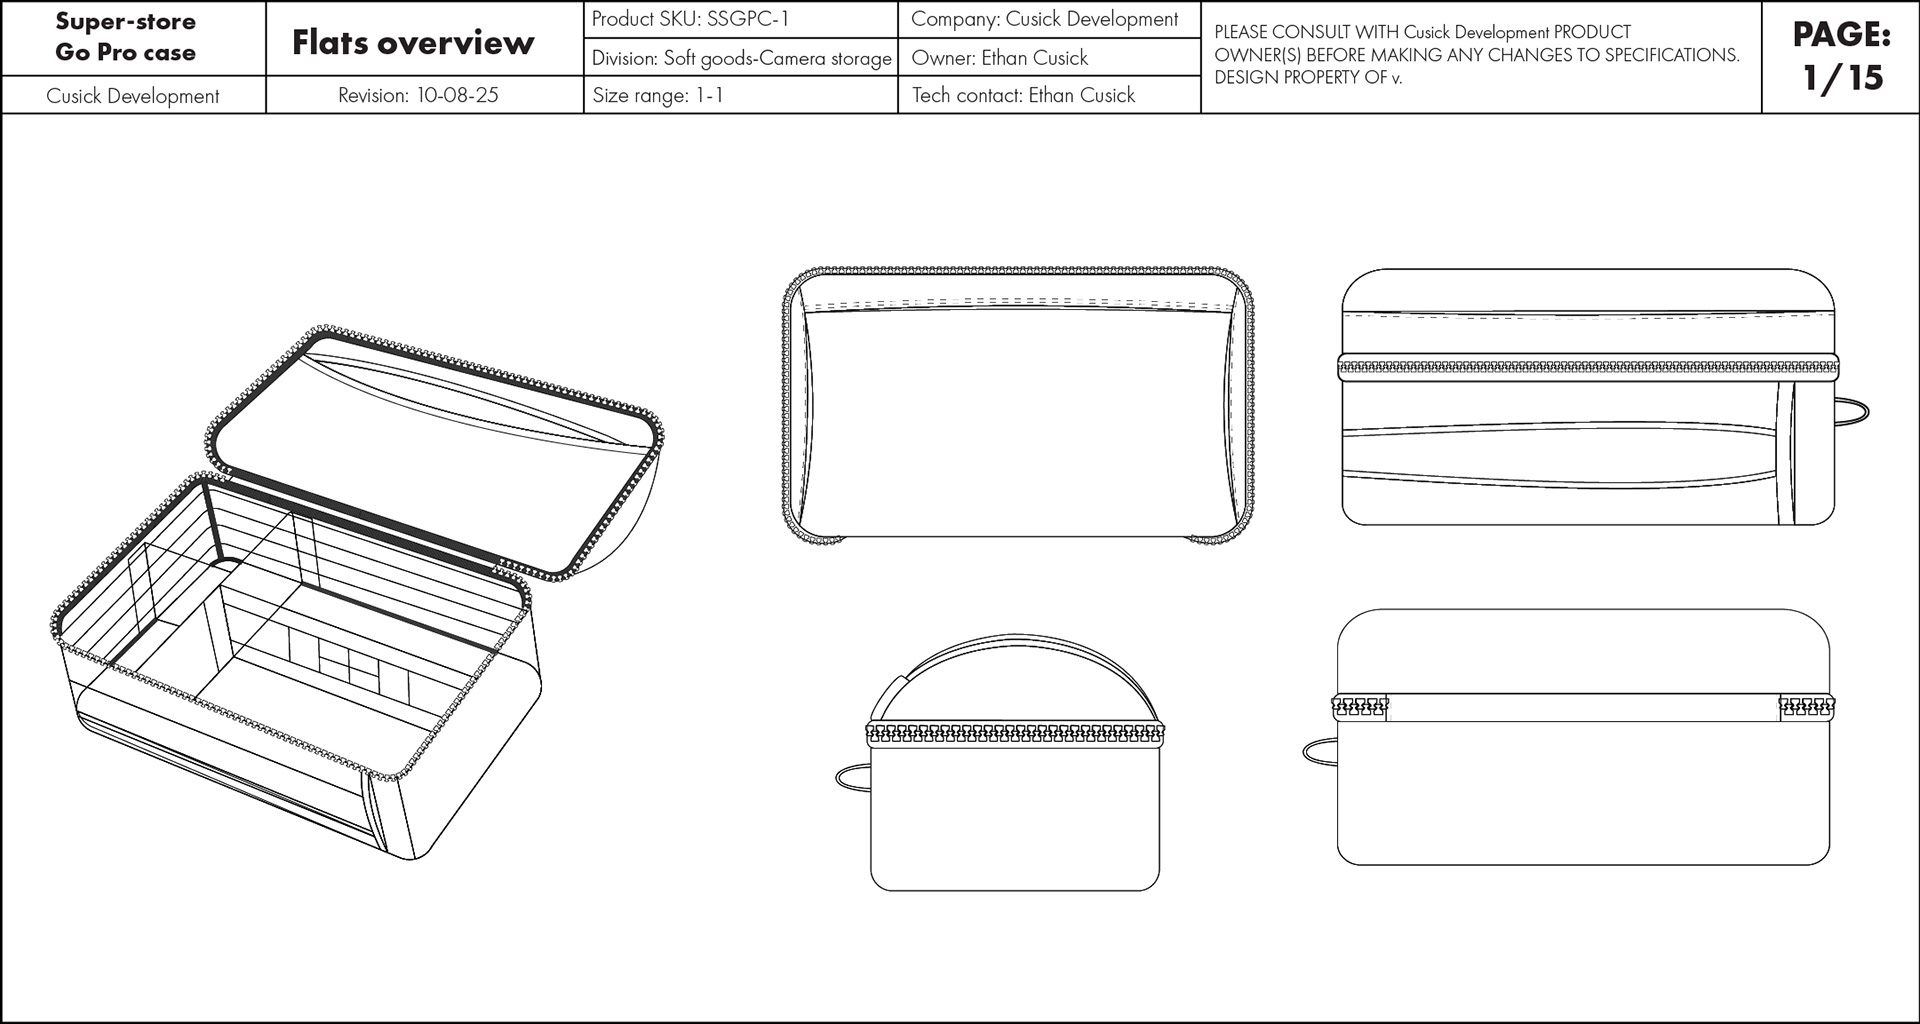
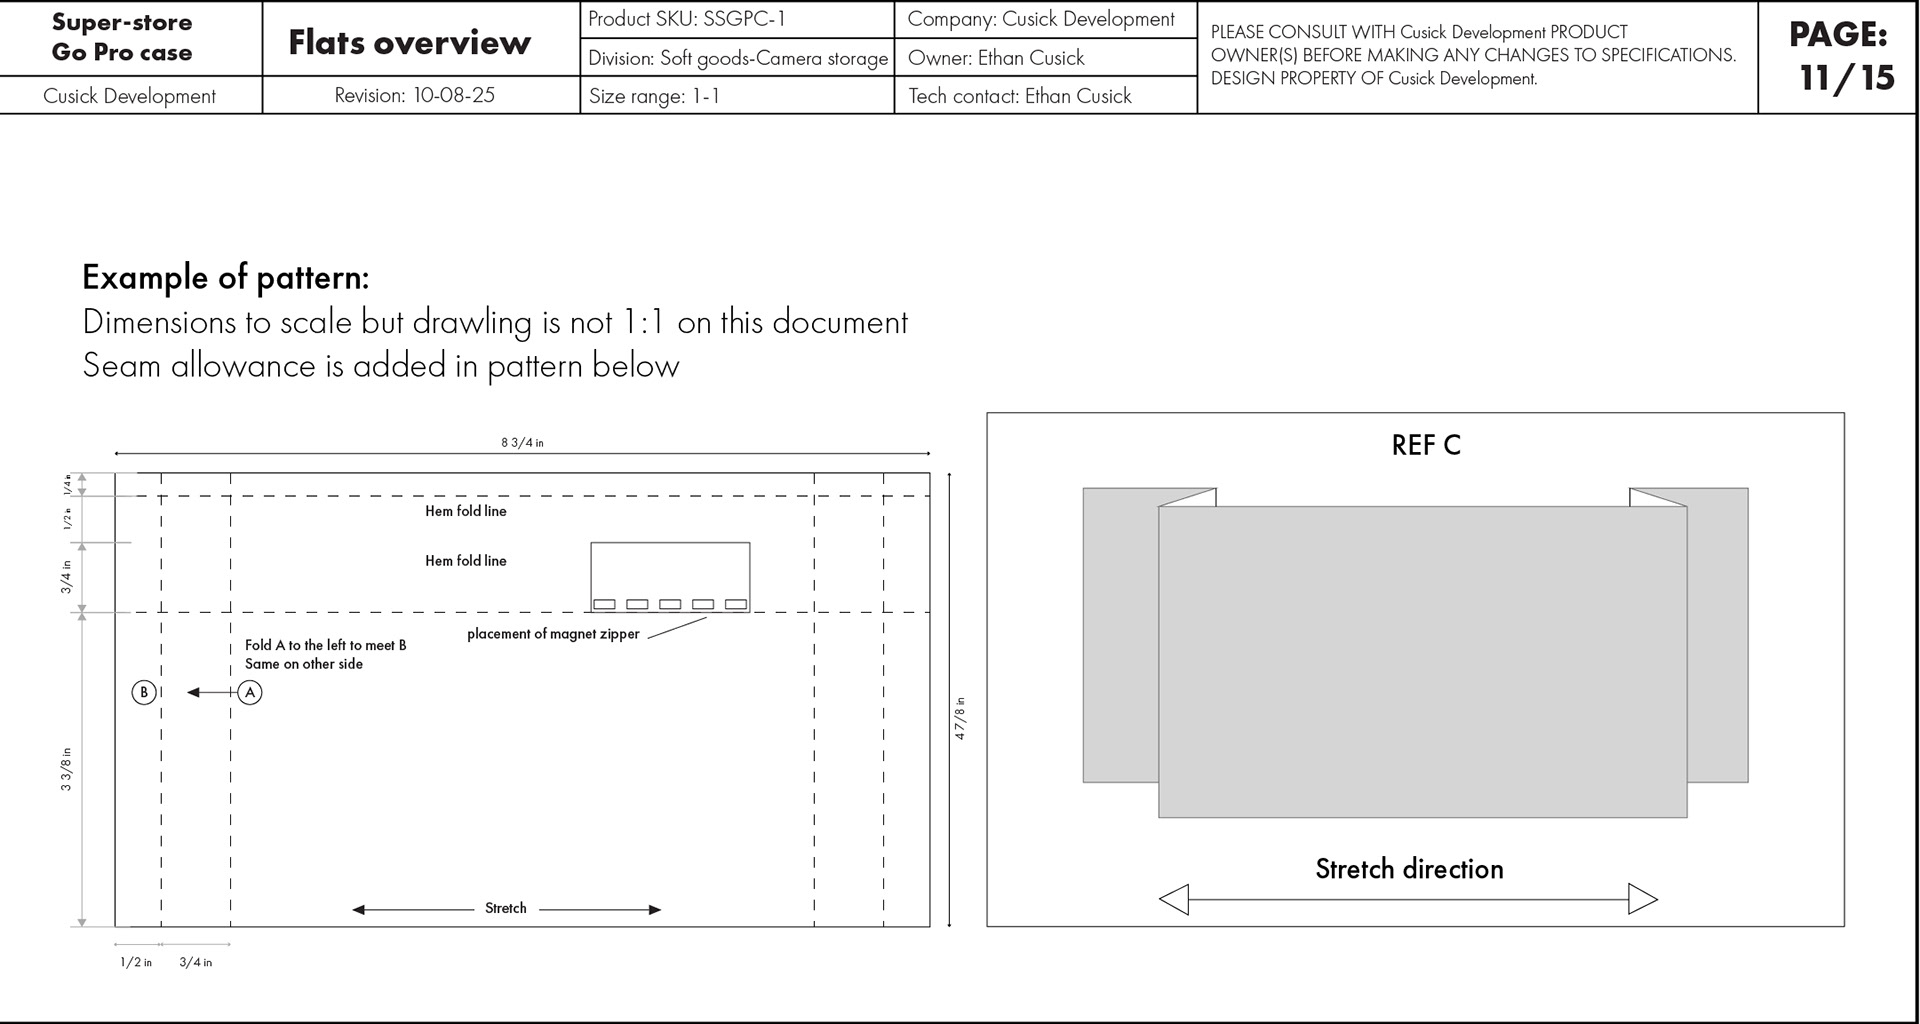
This tech pack includes detailed flats, construction notes, and 1:1 scale patterns. Turning prototypes into production-ready documentation is where I’m most experienced and confident.


Pattern
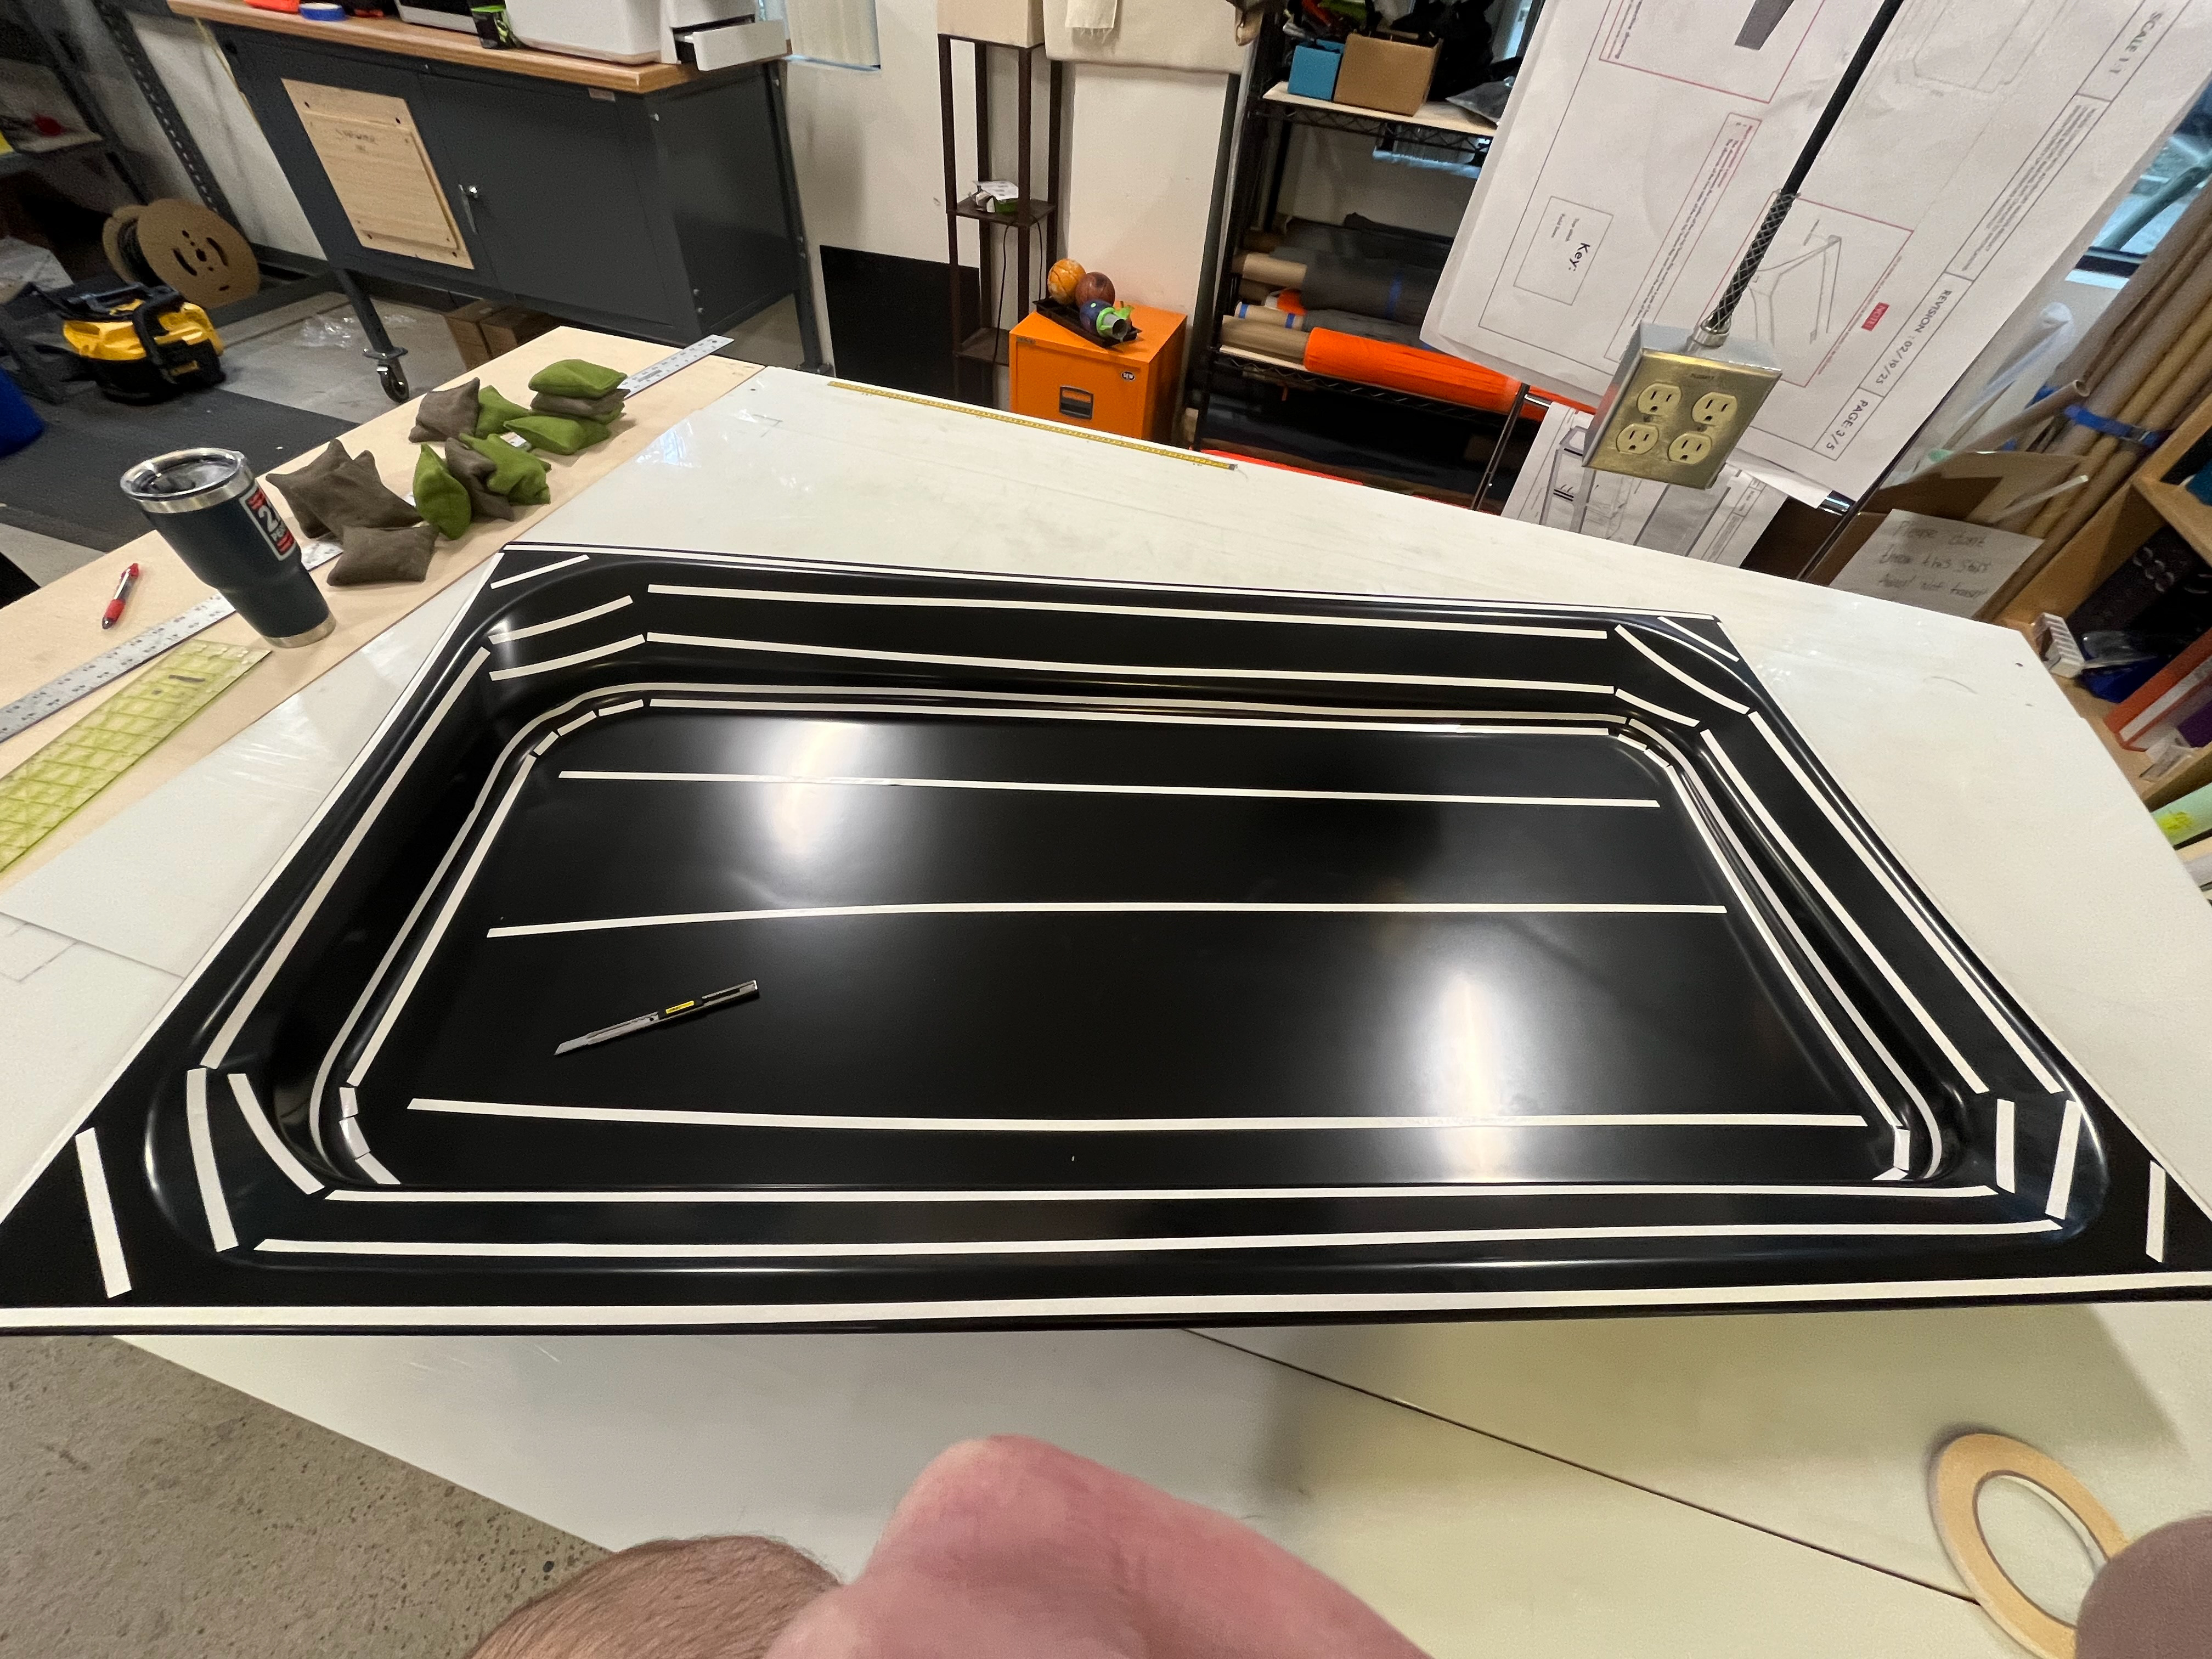
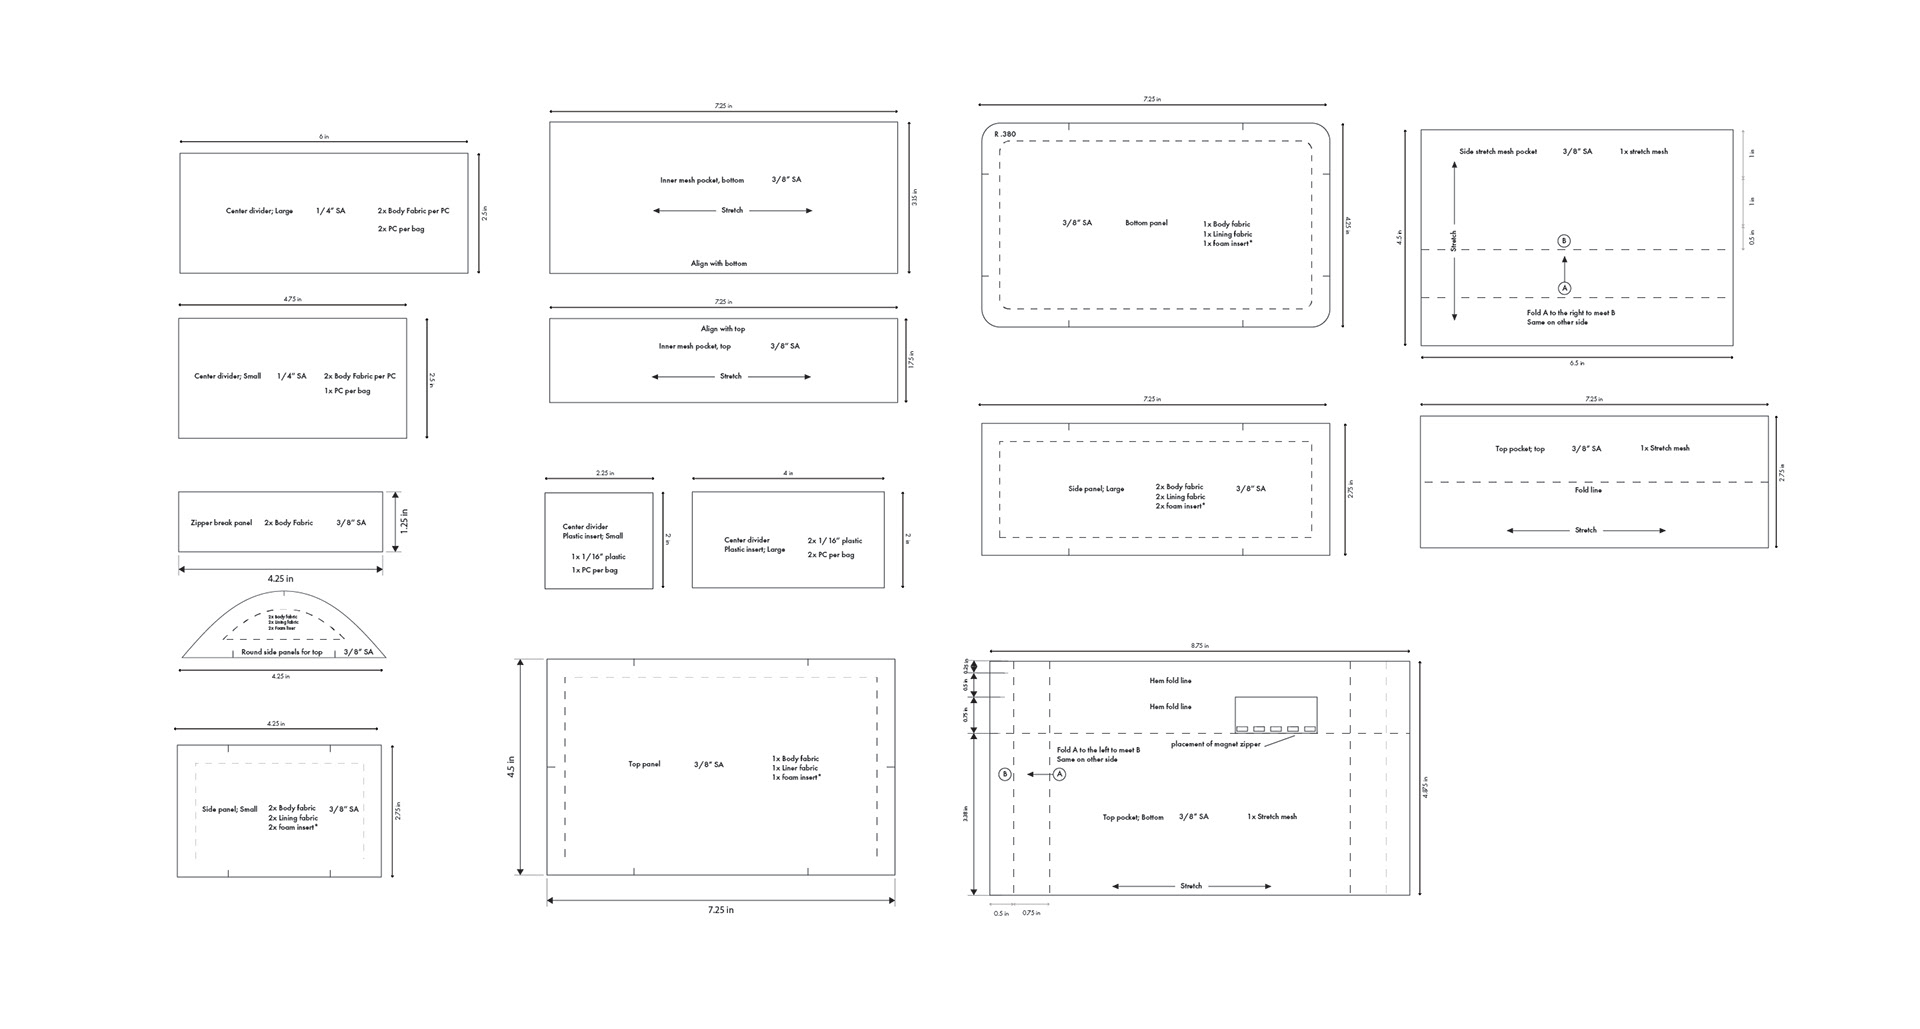
After the final prototype was made I scanned and converted the pattern to digital. The two reasons I did this was to create an 8.5x11 pattern layout if that anyone could print and make their own, and to have the pattern digitized so that it could be nested in a cut file for manufacturing. That 8.5x11 layout will be available at the bottom of the project.
Instructions: For any pattern that uses a dotted line inside the the pattern piece, that dotted line is the pattern for the foam that lives inside the walls of that pattern piece. Either cut all your fabric patterns first, then trim the edges and cut your foam pattern pieces OR print another copy and trim to size. Seam allowance is added into the pattern and SA for each panel is listed on each piece
Reflection
This project reinforced the value in slowing down early and thinking critically before building. While it started as a quick personal challenge, it became an important reminder that strong design comes from both the drive to create/make and intention.
This project reinforced the value in slowing down early and thinking critically before building. While it started as a quick personal challenge, it became an important reminder that strong design comes from both the drive to create/make and intention.
By forcing myself through the entire workflow, from idea to tech pack, I built confidence in my technical process and identified where I want to improve next: deeper concept exploration, more deliberate/thorough sketching, and a stronger connection between design intent and final product.
Check out the youtube video I made about this project and the pattern if you would like to make one for yourself!